Choose your operating system:
Windows
macOS
Linux


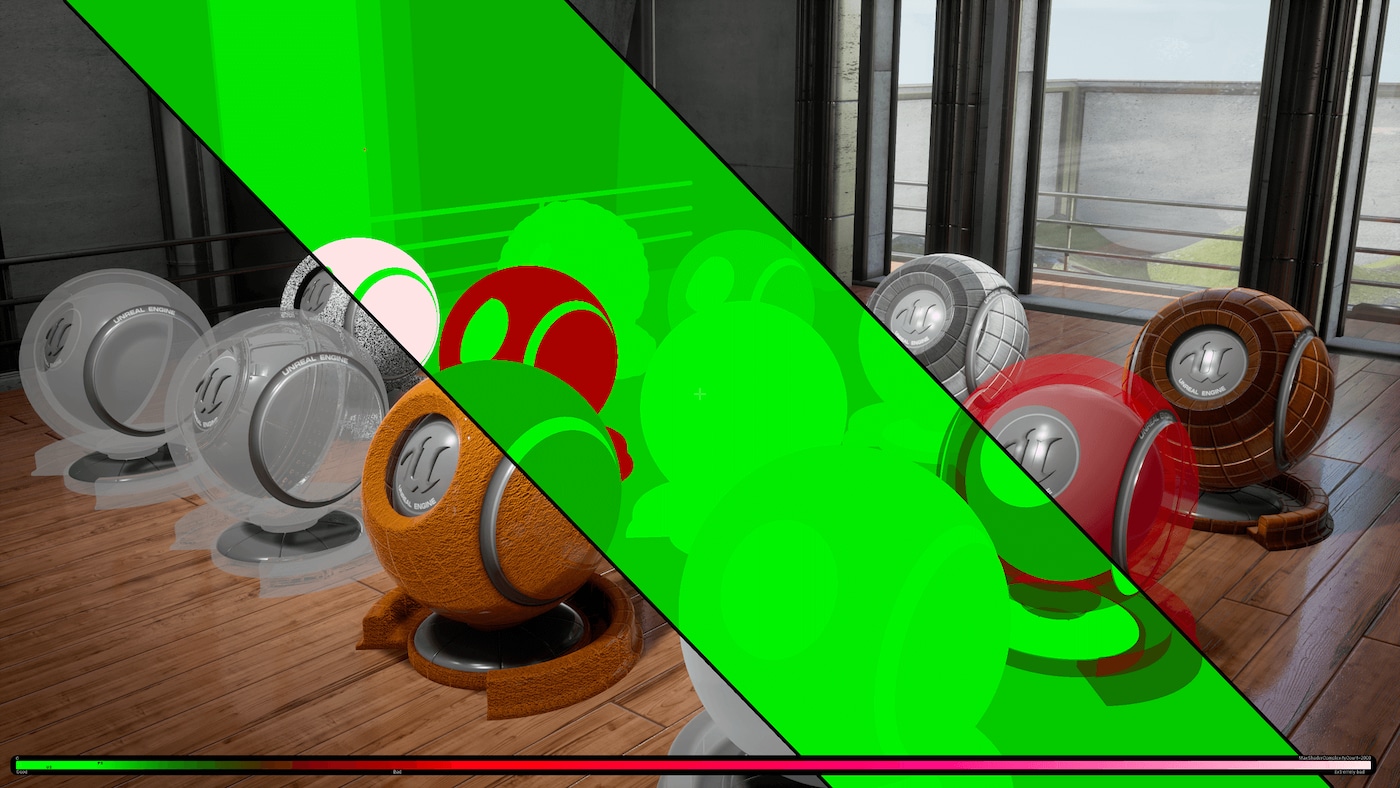


Layered Materials can be thought of as "Materials within Materials." They provide a means to create a single Material that has a series of sub-Materials (or layers ) that can be placed across the surface of your objects using per-pixel operations, such as masks. They are perfect for handling complex blending between unique surface types. In the image of the rockets above, the rocket on the far right is using separate Material Layers, including chrome, aluminum, and copper, and is blending between each material on a per-pixel basis. This effect is easily achieved with Layered Materials.
As a feature, Layered Materials exist as an extension of Material Functions. Functions, as you may recall, are self-contained node networks that perform a specific operation, such as a complex math equation. These functions can then be reused at will in any number of Materials. Because of the Make Material Attributes and Break Material Attributes nodes, functions can also be used to define a Material, entirely within a Function. Then, by bringing those functions into a final Material, you can have a Layered Material.

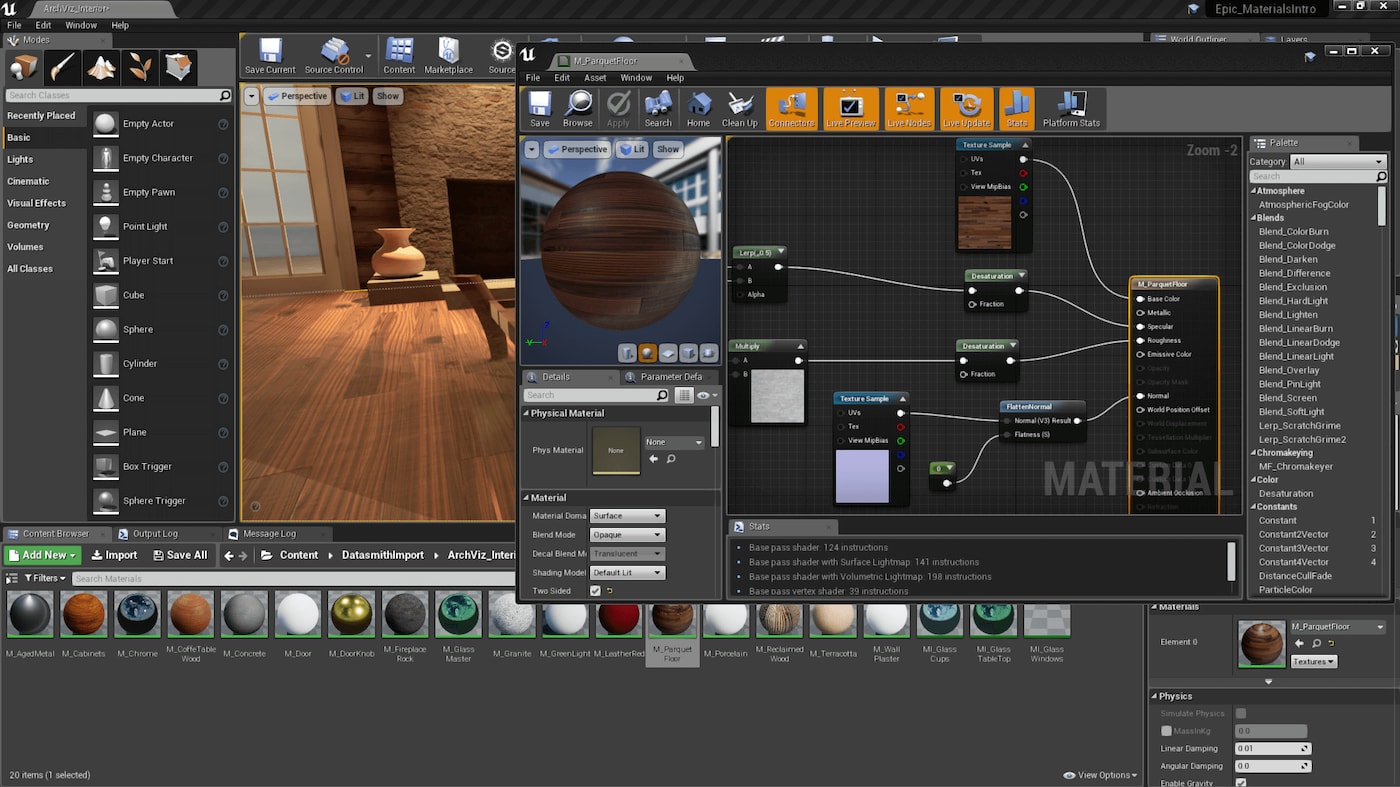
In the image above, we have created a simple chrome material, entirely within a Material Function, via a Make Material Attributes node. This function can now be used as a Material Layer , and can be blended with other Material Layers.
It is important to realize that since Material Functions cannot be applied directly to a surface, you need to bring your Material Layer functions into a new Material, which can then be applied to your objects. The great thing about this is that you can bring in as many Material Layers as you wish, blending them together however you see fit.
So, at a high level, the workflow goes like this:
-
Make your new Material and tweak it to perfection.
-
In the Content Browser, create a new Material Function and copy/paste all your Material Function nodes into it.
-
Connect your network to a new Make Material Attributes node, and connect it to the Function output.
-
Save the function.
-
Drag and drop the function from the Content Browser into the Material Editor. It is now a Material Layer.
-
Blend multiple Material Layers together using the Material Layer Blend functions.
Your final object can now have multiple Material Layers distinctly blended across its surface.
Key Benefits
One of the benefits to using Layered Materials are that they allow you to create what would otherwise be a very complicated Material, and to keep it much more manageable from a future editability standpoint. For instance, it is possible to create the effect of Layered Materials using a conventional Material (without layers), but this would require complex networks to blend between different textures and values for each Material input . Since most Materials make use of multiple inputs, the complexity of such a Material would increase significantly.

Consider the complexity of the network below, which uses no material layers and blends a chrome and a copper effect, such as the one seen above:
Without Material Layers

However, with a Layered Material, each different Material type is contained within its own node, making blending much simpler and far easier for an artist to edit and debug. By using the Make Material Attributes and Break Material Attributes nodes, all of the different Material Layers can be connected directly without having to worry about wiring up individual properties.
The network below works the same way as the one above, but with the chrome and copper effects modularized into their own Material Layers:
With Material Layers

Another benefit of Material Layers is that since they utilize Material Functions, they are reusable. This allows you to set up a library of Material archetypes, or Materials that define a basic real-world surface type. For example, you can create layers that represent generic surfaces such as aluminum, steel, leather, plastic, rubber, and so on. You can then use a Layered Material to blend between them. This can be very useful when wanting to create a detailed object - such as a character - without having to create a massive set of materials to apply separately to the surface.

Blend Types
Within the Material Functions list of the Material Editor is a list of various Material Layer Blend functions. These exist to help you make your blends, with the different types allowing for specialized types of blends, such as with the ability to override specific Material features.

|
Material Layer Blend Functions |
|
|---|---|
|
MatLayerBlend_AO |
Blends an ambient occlusion (AO) map over the surface to remove reflection. |
|
MatLayerBlend_BaseColorOverride |
Allows the Base Color to be replaced. |
|
MatLayerBlend_BreakBaseColor |
Outputs the Base Color from an incoming Material Layer. |
|
MatLayerBlend_BreakNormal |
Outputs the Normal from an incoming Material Layer. |
|
MatLayerBlend_Decal |
Blends a decal sheet over the Material using the 2nd UV channel. |
|
MatLayerBlend_Decal_UV3 |
Blends a decal sheet over the Material Layer using the 3rd UV channel. |
|
MatLayerBlend_Emissive |
Blends an Emissive texture over the Material Layer. |
|
MatLayerBlend_GlobalNormal |
Blends a Normal texture over the Material Layer. |
|
MatLayerBlend_LightmassReplace |
Replaces the Base Color in Lightmass, allowing for changes to indirect lighting results. |
|
MatLayerBlend_ModulateRoughness |
Multiplies the Material Layer's Roughness by an incoming texture. Useful for a "greasy" look. |
|
MatLayerBlend_NormalBlend |
Blends a Normal texture across the surface, but by way of a mask texture, allowing for control of where the normal will appear. |
|
MatLayerBlend_NormalFlatten |
Diminishes the effect of the Normal map. |
|
MatLayerBlend_RoughnessOverride |
Replaces the Roughness texture of a Material Layer. |
|
MatLayerBlend_Simple |
Provides a simple linear interpolation (Lerp) blending solution for 2 Material Layers. Does not blend Normal; instead, retains Normal of the Base Material. |
|
MatLayerBlend_Stain |
Blends the Top Material over the Base Material as a stain, meaning that only the Base Color and Roughness values from the Top Material are used. |
|
MatLayerBlend_Standard |
Blends all attributes of two Material Layers. |
|
MatLayerBlend_Tint |
Allows for tinting of a Material Layer by inputting a tint color and a mask to control the tint's location. Useful for making partial color changes. |
|
MatLayerBlend_TintAllChannels |
Similar to Tint, but also affects Specular. This is a very special case function; generally, you will not need it. |
|
MatLayerBlend_TopNormal |
Blends all attributes of both Materials but only uses the Normal of the Top Material. |
Instancing Layered Materials
Because Layered Materials are essentially Material Functions, parameterizing them for instancing requires a little bit of extra forethought. To make better use of Scalar and Vector Parameters, you can create a Function Input expression as part of a Material Layer. You can then connect a parameter into this input from the top-level Material. See the Material Functions overview for more information.
The flow works something like this:

-
Material Parameter (Scalar Parameter, Vector Parameter, etc.)
-
Material Layer (Function)
-
Function Input expression
-
Some network to define the Material Layer
-
Function Output
-
Final Material
Some helpful tips:
-
When pasting your Material Expressions into a function to create your layer, replace all parameters with appropriately named Function Input nodes.
-
When you bring your new Material Layer into a Material, connect new parameter nodes into the inputs.
-
You can now instance the final Material, and your parameters will drive the appropriate aspects of your layers.
-
Make sure to supply default values for your Function Inputs. This speeds of workflow for those who do not need to make changes.
Caveats
Although Layered Materials are useful for handling multi-Material setups, care must be taken when employing them. They can be heavy in terms of performance, particularly if the Materials used in the layers are complex in themselves.
Keep in mind that all of your layers are rendering simultaneously, and then blended. For instance, if you had 4 layers in a Material, then for each pixel of your object, the system must test to see which of the four is blended, and rejecting any not in use. This added calculation makes the Layered Material more performance intensive.
Your first impulse may be to use Layered Materials any time you wish to have multiple surface types on an object. For instance, if you have a model of a car, you may want to have one Material Layer for paint, another for steel, for rubber, for glass, etc. However, many of those Materials could be separated at the geometry level. This creates more Material Elements on your objects, which increases draw calls, but is generally much more efficient. In short, if you can apply multiple Materials instead of using a Layered Material, then do so. If you must have per-pixel control over where Materials are placed, then use a Layered Material.
Although condensing multiple individual Materials down to one will reduce draw calls, the resulting Layered Material is generally going to be too heavy for this to be considered a mobile feature.