Choose your operating system:
Windows
macOS
Linux


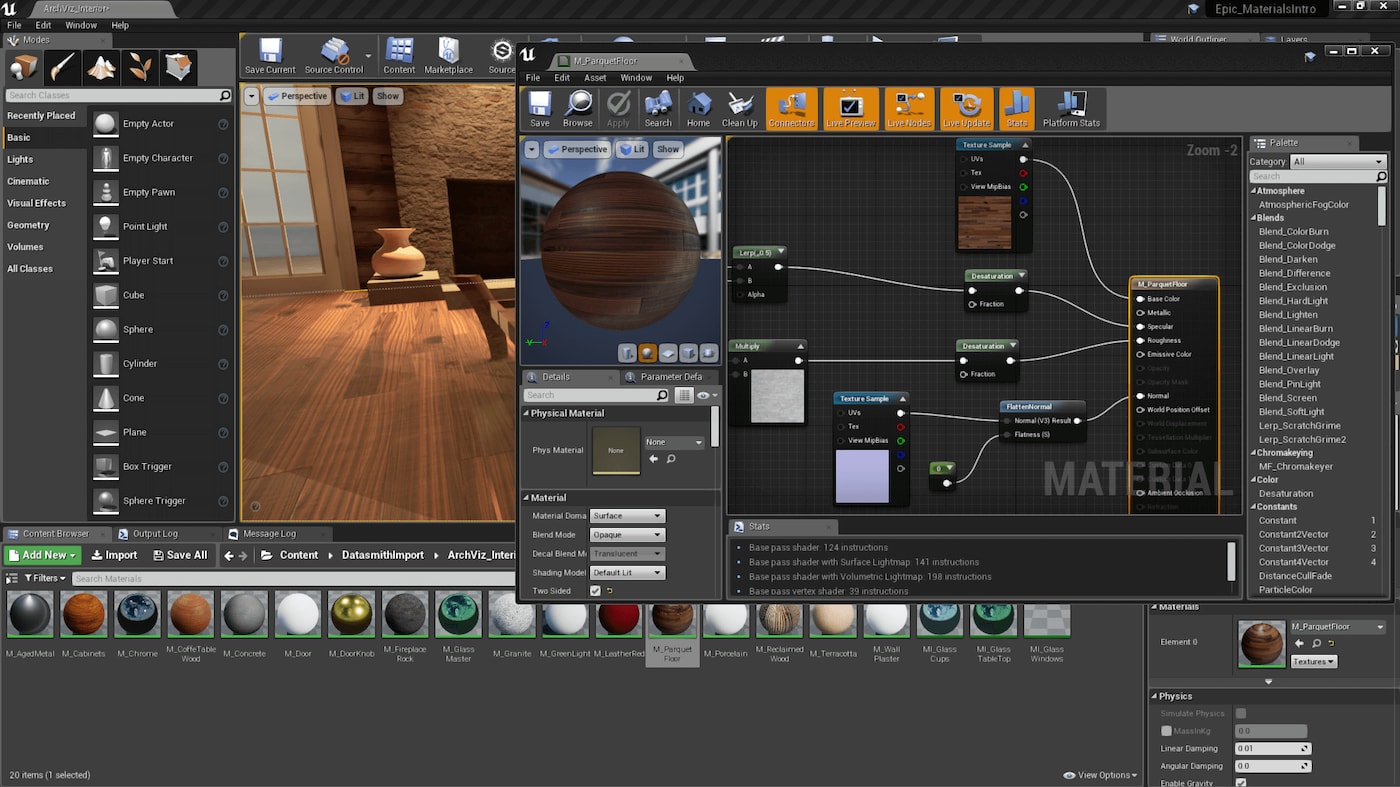


The Material Instance Editor is used for modifying parameters for Material Instances. If you are unfamiliar with Material Instances, please see the Instanced Materials page for more information.
Opening the Material Instance Editor
The Material Instance Editor can be opened by double-clicking any Material Instance asset or through the right-click context menu of a Material Instance asset in the Content Browser . Either of these will open up that particular Material Instance in the Material Instance Editor for editing. Another way to open the Material Instance Editor is by Right-Clicking on an Actor and selecting Edit Material Instance from the Material Name sub-menu of the Materials menu.
Material Instance Editor Interface
The Material Instance Editor is comprised of these regions:

-
Toolbar - Allows you to save your asset, locate it in the Content Browser, and display rendering statistics.
-
Viewport Display Options - Allows you to change the mesh that is used in the viewport.
-
Details Pane - Properties of the Material Instance.
-
Parent List - A list of the chain of parents for the currentMaterial Instance.
-
Viewport - Previews the current Material Instance.
Tool Bar
|
Icon |
Description |
|---|---|
|
|
Saves the current asset. |
|
|
Finds the Material Instance Constant in the Content Browser . |
|
|
Makes all Material parameters in the parent Material visible in the Properties Pane. |
|
|
Toggles the Material stats and compilation errors for mobile. |


Viewport Display Options
|
Icon |
Description |
|---|---|
|
|
Previews the Material Instance on a Cylinder. |
|
|
Previews the Material Instance on a Sphere. |
|
|
Previews the Material Instance on a Plane. |
|
|
Previews the Material Instance on a Cube. |
|
|
Previews the Material Instance on a custom Static Mesh. |
|
|
Enables real time preview, FPS and allows you to set the FOV of the preview window. |
|
|
Changes between Perspective and Orthographic viewing options. |
|
|
Changes between the different standard view modes like Lit, Unlit, Wireframe and others. |
|
|
Enables or disables rendering stats, the grid and the background. |


Details Pane

The Details pane in the Material Instance Editor is where all of the 'work' should take place. Anyone using the Material Instance will override or change parameters through the details Tab. Each parameter that exists in the Parent Material for this Material Instance is listed in the Parameter Groups array under the group assigned to the parameter in the Parent Material. By default, none of the parent's parameter's values are overridden and have to be enabled in order to be used. To enable a parameter, Left-click on the grayed out box that is next to the name of the parameter you want to enable. When you do this, the box will no longer be grayed out and you will be able to adjust the parameter to your liking.
-
Parameter Groups - In this section you can adjust all of the values that have been exposed to the Material Instance from the Parent Material.
-
General - The General section allows you to change the Parent Material, Phys Material, adjust how this Material Instance will influence the Lightmass build and override some of the properties inherited from the parent Material.
Parent List

Since Material Instances can have other Material Instances as their parent, sometimes it is difficult to find the original Material that the Material Instance is based off of. The parent list solves that problem by displaying the chain of parents of the current Material Instance all the way up to the root Material that is the start of the chain. For example, the parent list displayed above shows a Material Instance named Instance_Metallic_Medium that has the Material Instance MasterDemoMaterial_Parent as its parent. We can see in the parent list that MasterDemoMaterial_Parent has MasterDemoMaterial as its parent. The instance currently being edited is shown in bold .
Furthermore, by Double-Clicking on any of the items in the parent list, the editor for that parent will be launched. Parents can also be located in the Content Browser by Right-Clicking on the parent's item and then choosing Find in Content Browser .
Viewport

The Material Viewport displays the Material being edited applied to a mesh. You can interact with the Viewport in the following manner.
-
Rotate the mesh by dragging with the Left Mouse Button .
-
Pan by dragging with the Middle Mouse Button , and zoom by dragging with the Right Mouse Button .
-
Rotate the light direction by holding down the L key and dragging with the Left Mouse Button .
The preview mesh can be changed by using the associated button controls (the shape buttons, Select Preview Mesh combo, and Use Selected StaticMesh button). The preview mesh is saved with the Material so that the next time the Material is opened in a Material Editor, it will be previewed on the same mesh.

The Viewport of the Material Instance Editor also displays statistics about the Material, such as instruction counts for the various shader types as well as the number of Texture samples being used by the Material.

If your Material has some kind of movement in it you and you want to preview it, you can enable Real - Time preview by first clicking on the small white triangle to enable Viewport Options and then click on the stop watch icon. You can also enable / disable real time preview by pressing CTRL + R at the same time on the keyboard.

Creating Instances
Overriding Material Instance Parameters
The checkboxes to the left side of each of the parameter names specify whether or not an overridden value should be used. So below Base Metal, Base Roughness, Chrome Roughness, and OPACITY Chrome are being used while Base Scratch Roughness, Base UV Tile, and Chrome Metal are not. Only checked values are stored for memory conservation reasons, so unchecked values will be lost when the Material Instance Editor window is closed.

Overriding Material Instance Lightmass Settings
You can also override parameters that deal with how the Material Instance interacts with Lightmass by expanding the Lightmass Settings section and then enabling the property you want to override by clicking on it Once a Lightmass property override is enabled, you can then input the new data you want to use in the Parameter Value section. In the following image we have taken the Material Instance for the sky box and overridden it's Emissive Boost to be 2.0 instead of 1.0. When the level lighting is built this will make the Emissive parts of the Material cast more light into the Lightmass build making the levels lighting brighter overall.

Overriding Parent Material Settings
In some cases the Material Instances that are available might not fit your exact needs. For example say you need the Material Instance to be two sided instead of single sided. To fix this you could go to the Parent Material for that Material Instance and set it to be two sided but this would make any other Material Instances that use that Parent Material two sided which is not what we want. Instead you can override certain Parent Material properties within a Material Instance by going to the Material Property Overrides section of the Material Instance and then enabling the property you want to override.

In the image above we have set the Material Instance for the sky box to be Two Sided instead of single sided by enabling the Two Sided option that is under the Material Property Overrides section. This will make the Material Instance always render even if it is put onto geometry that has its faces turned so that you can not see them.