Choose your operating system:
Windows
macOS
Linux
CPU Particle Emitters can be made to render with a light attached to each particle by adding a Particle Light Module in Cascade . This is useful for effects like sparks or fire, where it emits enough light to be noticeable on the surrounding environment.
General Preparation
The performance cost of particle lights is almost completely dependent on how much overdraw on the screen they cause. Overdraw comes from the number of lights times the number of pixels affected.
The general strategy when setting up particle lights is to have a very small number of large particle lights, and a larger number of small particle lights. It is important to tweak and profile with the ProfileGPU console command as the cost of particle lights can easily get out of hand. The cost shows up under Lights .
For reference, here are some still images of the above animations with just the Particle Lights emitters.


In this first image, the particle lights are used to accent an already solid particle system, making the sparks and flare feel more physical. Further, very few particle lights exist at any given moment. In the second image, the lights add volume and position to the system, but uses far more particle lights to achieve the effect (over 200).
Usage
Adding lights to a particle system is very straight forward:
-
Open a particle system in Cascade.
-
Right Click anywhere on the emitter on which you want to have the lights.
-
Mouse down in the module list to Light -> Light .
![PL_addLightModule.png]()
-
Setup your new light module.
![PL_lightModuleAdded.png]()

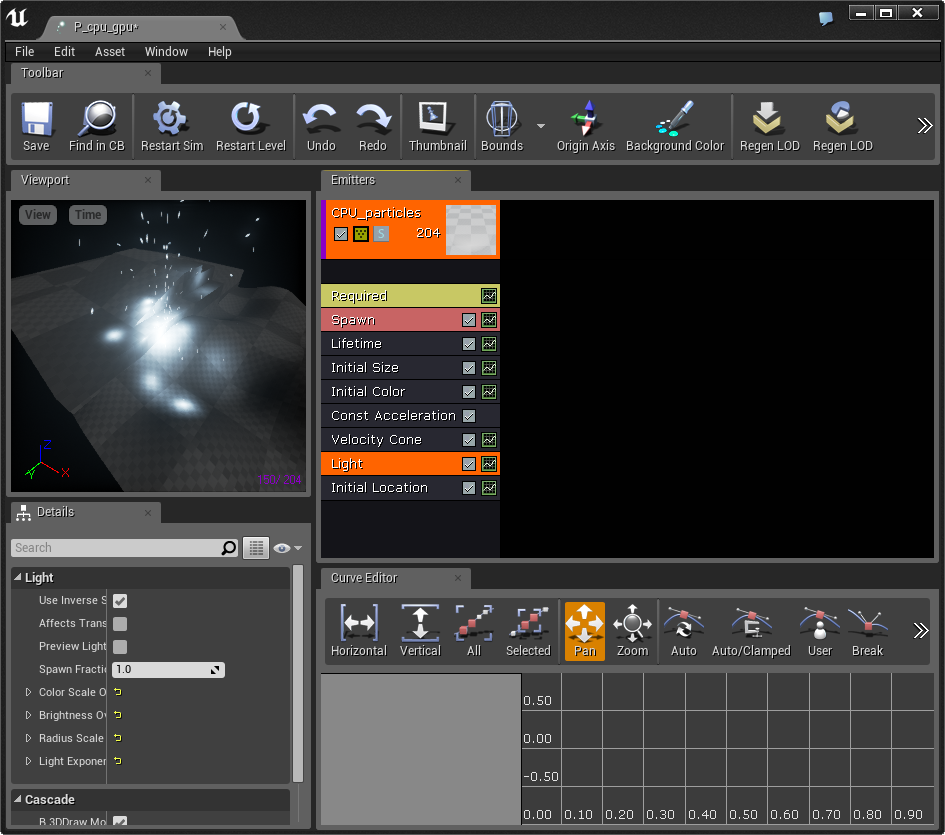
Remember: the Light module can only be used on CPU particles, so none of the GPU particles will work with it. You would not break the system adding the module to a GPU emitter, but it will not do anything and you will have a giant red X over the module in the list.
Properties

|
Property |
Description |
|---|---|
|
Use Inverse Squared Falloff |
If enabled, Light Exponent will be ignored in favor of having a more realistic falloff based on the radius of the light. |
|
Affects Translucency |
When enabled, each particle light will affect lit translucency. This is useful for the emissive trail of a rocket passing through smoke. This property adds significant cost to each particle that is rendered with it, so it is recommended to only have a few particles with this setting enabled. |
|
Preview Light Radius |
In the Preview window this will show the radius of the lights in wireframe spheres. |
|
Spawn Fraction |
Defines what percentage of particles should have lights attached to them. 1.0 is all particles, 0.5 is half of the particles, and 0.1 is 10% of the particles. Use this for reducing cost when optimizing. |
|
Color Scale Over Life |
Like Radius Scale, this multiplies the color of the light by the values entered here to offset the color of the light based on the color of the particle. |
|
Brightness Over Life |
Allows you to change the brightness of the light over its lifetime. |
|
Radius Scale |
This is a multiplier that defines the range of the light based on the size of the particle. A particle that is scaled by 1 on the X axis will have a radius equal to the Radius Scale but a particle with a scale of 10 on its X axis will have a radius of 10 times the Radius Scale . |
|
Light Exponent |
If Use Inverse Squared Falloff is disabled, then this will control the falloff of the light, higher numbers result in a more gradual falloff as light approaches the light radius where as lower numbers will result in a sudden drop off of the light near the light radius. |