Choose your operating system:
Windows
macOS
Linux
Launch Storyboards are launch screens for iOS applications. Unlike traditional launch screens, which are static images, storyboards support animation, and are capable of scaling to fit the resolution and DPI of the user's device. Developers can use this to create highly polished launch screens with relative ease that fit a wide range of devices. This how-to will walk you through implementing storyboards in your own Unreal Engine 4 (UE4) projects.
Storyboards are mandatory for all apps for both the App Store and Apple Arcade. Apple no longer accept submissions featuring static launch screens.
Simple Launch Storyboards
It is recommended that you create a fully featured custom storyboard using the sections below. UE4 provides a method for creating simple, single-image storyboards for placeholder and testing purposes, ensuring that you always have a way of packaging a valid iOS project. This workflow can be used in any operating system, regardless of whether you are creating a C++ project or not.
To configure a simple storyboard, open Project Settings and navigate to the Platforms > iOS > Launch Screen section.

If you leave Custom Launch Storyboard unchecked, the image provided in Launch Screen Image will be converted into a storyboard when you build your project. An image with the Unreal Engine logo is provided by default as a fallback.
Guidelines for Images
Launch screen images must be PNG files with no alpha channel. It is a good idea to make the dimensions square (for example, 2048x2048) so that they can scale and crop to the largest number of devices as easily as possible.
Creating a Custom Launch Storyboard in Xcode
To create a custom storyboard, you will need a Mac with Xcode. You do not need to create a C++ project in Unreal to follow these steps, but you will need Xcode to generate the storyboard.
Setting Up an Xcode Project
If you are creating a C++ project, you can create your launch screen directly in the Xcode project for your UE4 game. Alternatively, you can create your launch screen in any valid Xcode project outside of your UE4 project and move it into UE4 later. This is useful if you want to keep your storyboard project separate for organizational reasons, or if you are creating a Blueprint project.
Follow these steps to create a stand-alone Xcode project:
-
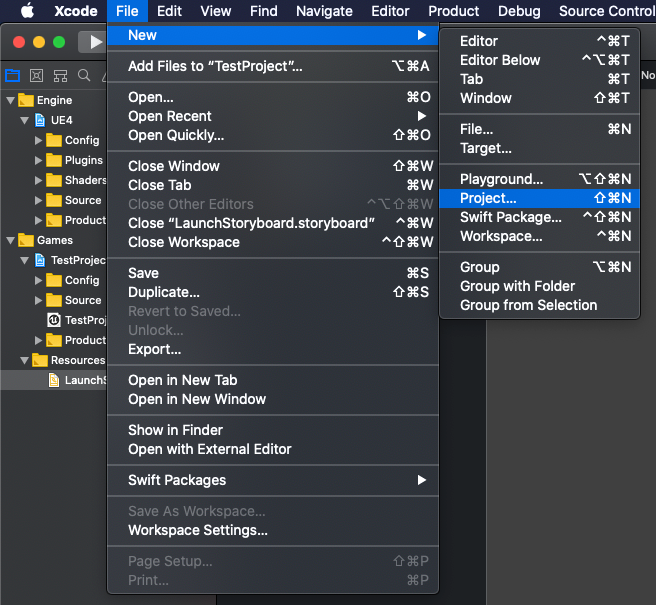
Open Xcode and click File > New > Project .
![New Xcode Project]()
Click to enlarge image.
-
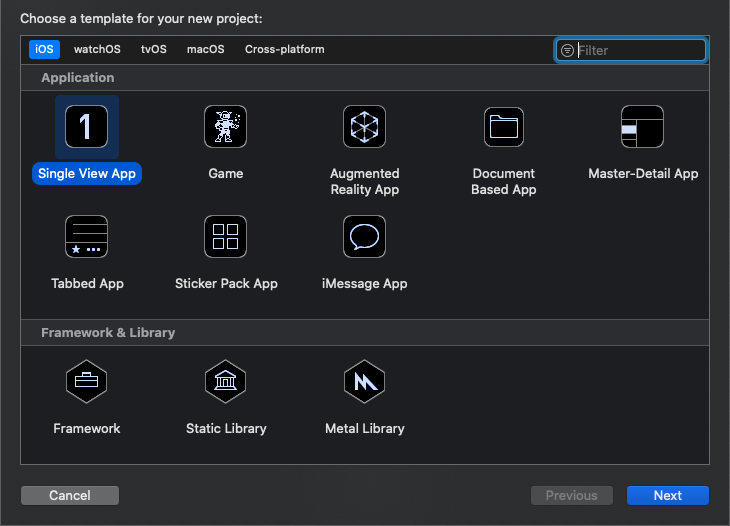
In the templates menu, make sure you are creating an iOS project, then click Single View App , then Next .
![Select Single View App]()
Click to enlarge image.
-
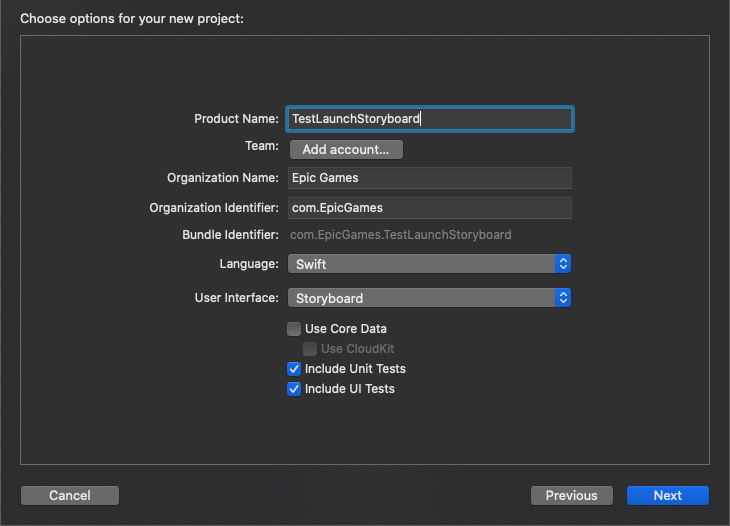
In the options menu, fill in your product name, organization name, and organization identifier. In this example, this results in a Bundle Identifier of com.EpicGames.TestLaunchStoryboard .
-
In the user interface dropdown, click Storyboard . Once you have filled out all necessary information, click Next .
![App Options]()
Click to enlarge image.
-
Place your new project in a folder that is convenient. In this example, it will be in Users/UserName/Xcode Projects .
You will not need to compile this project. You are only making this project for the sake of creating the storyboard, which we will manually move to our UE4 project.
Creating the Launch Storyboard
Now that we have a project set up, follow these steps to create the storyboard that you will use for your launch screen:
-
In the project navigator , right-click your project, click New Group , and create a new group called Storyboard .
![Storyboard Group]()
-
Click File > New File...
![New File]()
Click to enlarge image.
-
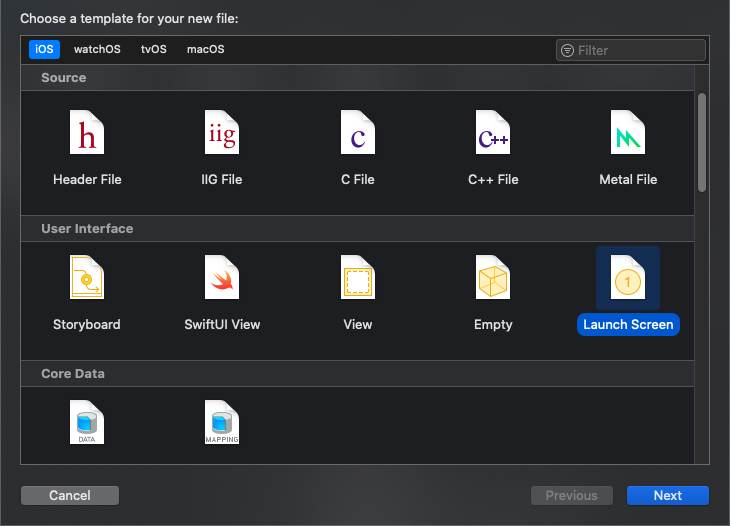
In the file template menu, navigate to the User Interface section, select Launch Screen , then click Next .
![Launch Screen]()
Click to enlarge image.
-
Save the file when prompted. Place it in the Storyboard folder, making sure it is in the group of the same name, and change the name of the file to LaunchScreen , with no spaces.
![SetLaunchScreenName.png]()
Click to enlarge image.
-
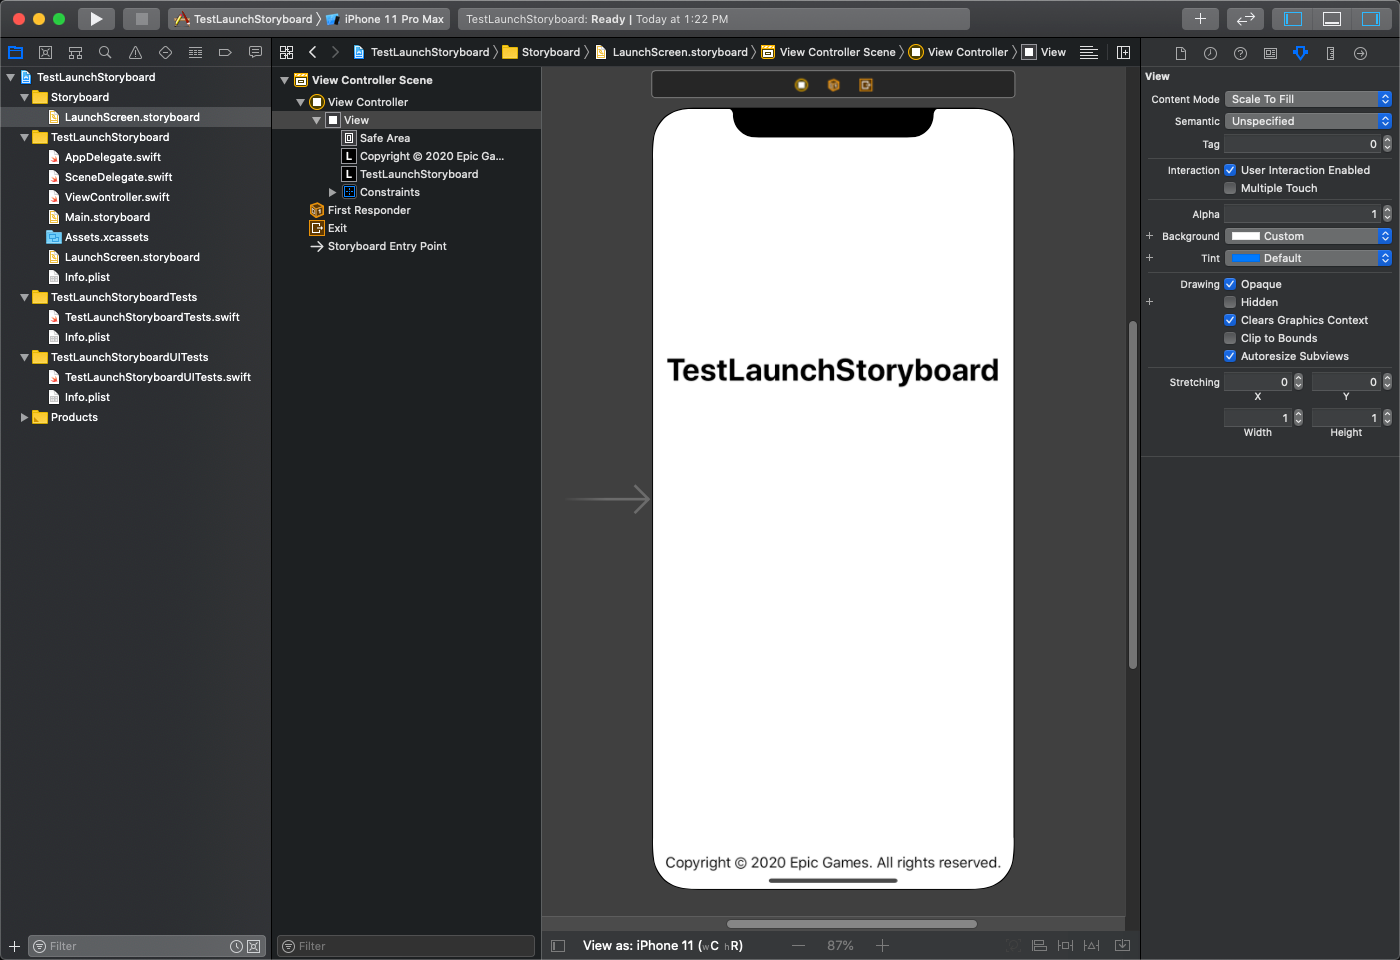
Click the Create button to finish creating the storyboard. A file called LaunchScreen.storyboard will appear in your Storyboard group, with a simple text label and a copyright notice.
![Section1_Result.png]()
Click to enlarge image.
-
Select the View Controller . In the Identity Inspector, set the Storyboard ID to "LaunchScreen." Under the Restoration ID section, check the Use Storyboard ID checkbox.
![SetStoryboardID.png]()
Click to enlarge image.


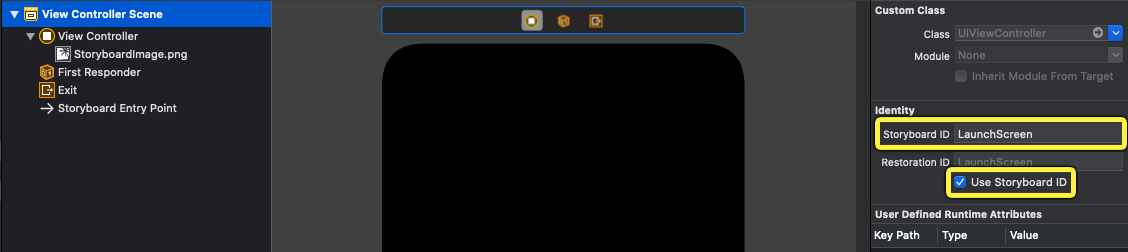
Setting the Storyboard and Restoration IDs for the View Controller is necessary for the storyboard to be recognized on startup. If you skip this step, the application will hang on a black screen before displaying the storyboard.
Adding an Image to the Launch Storyboard
The storyboard created in the previous section is functional enough that it could be used in your project as is. In this section, we will add an image to the storyboard so that you know how to integrate outside assets into your Xcode project.
-
Create an image to serve as the background for the storyboard. This image should be a PNG with no transparency.
-
In the project navigator , right-click the Storyboard group, click New Group , and call your new group Assets .
-
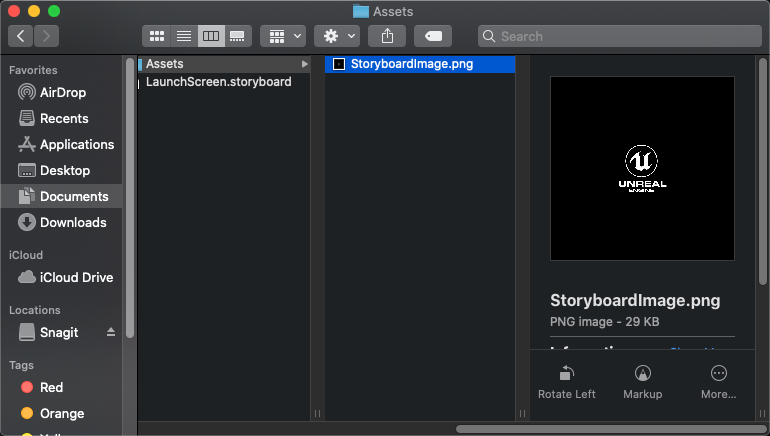
In Finder , make sure there is an Assets folder inside the Storyboard folder, and place your PNG in the Assets folder.
![AssetsFolder_StoryboardImage.png]()
Click to enlarge image.
-
Click and drag your PNG into the Assets group in the project navigator to add it to the Xcode project.
![AssetFolder_WithImage.png]()
-
Click the + (plus) button at the top of the Xcode window to open the library .
![ClickPlusButton.png]()
Click to enlarge image.
-
In the library, locate the Image View object, then click and drag it into your storyboard. It will replace the default View and all of the text populating it.
![CreateNewImageView.png]()
Click to enlarge image.
-
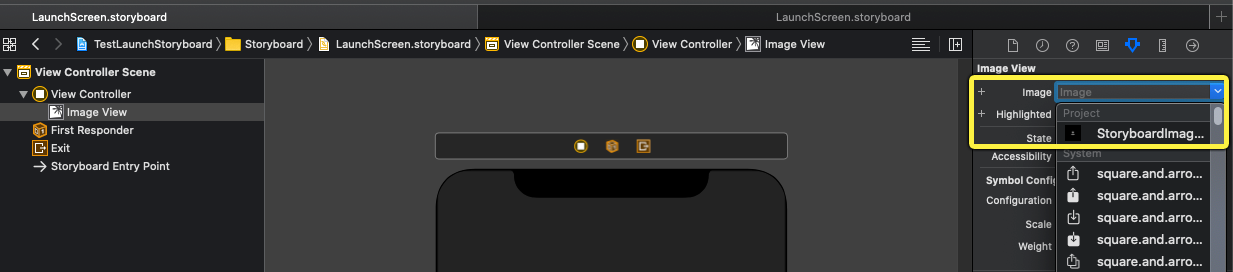
Select Image View , then in the Attributes panel, click the source image dropdown and select your PNG. If the Attributes panel is not shown, click the icon that looks like a chevron with a line through it, next to the ruler icon.
![SelectImageForImageview.png]()
Click to enlarge image.
-
In the Attributes panel, set the Content Mode to Aspect Fill .
![AspectFill.png]()
-
Select the Size inspector by clicking the ruler icon. Click all four constraints in the Autoresizing section. This will ensure that the Image View resizes based on all four directions.
![SetAutoResizing.png]()
Click to enlarge image.


As long as the image is located somewhere in your Xcode project, your Image View will be able to utilize it. However, we recommend keeping the image in an Assets folder for the purpose of adding it to your Unreal Engine project per the next section.
Image Guidelines
We recommend using square images for launch storyboards for the sake of maximizing compatibility with a wide range of aspect ratios. However, if you are targeting a specific device or a specific aspect ratio, you can tailor your images to fit that aspect ratio safely.
Adding the Custom Storyboard
To add your storyboard to an Unreal project:
-
Create a folder in your engine install directory called
Project/Build/IOS/Resources/Interface. -
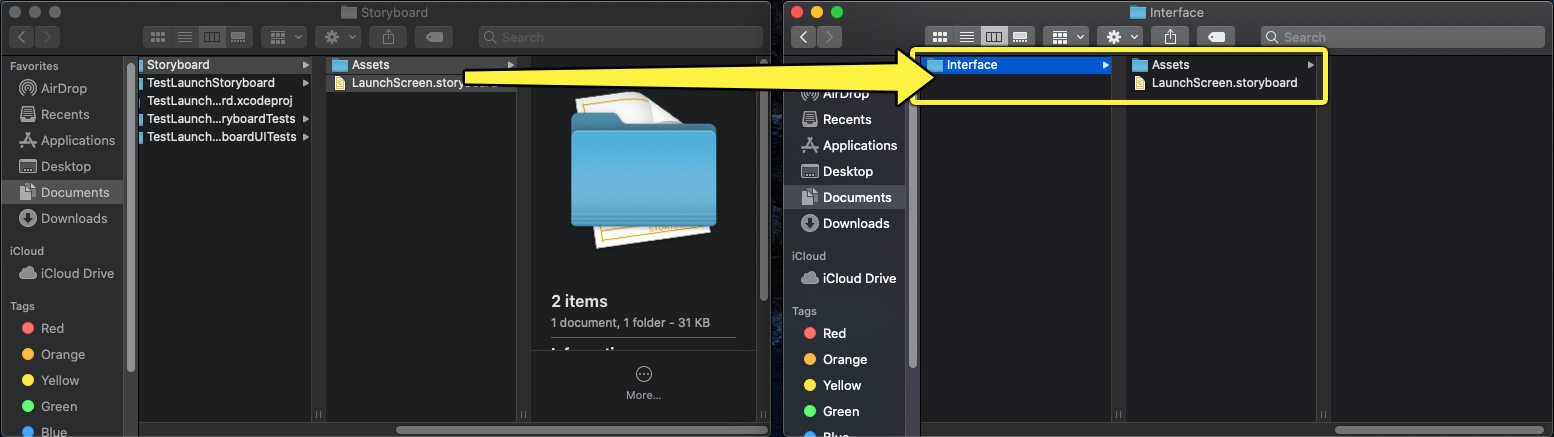
Locate the Storyboard folder for your Xcode project in Finder.
-
Copy both LaunchScreen.storyboard and the accompanying Assets folder into
Project/Build/IOS/Resources/Interface.![MoveStoryboardToProject.png]()
Click to enlarge image.
If you do not have the required files in the Project folder, the system will fall back to the Engine directory to look for them instead.
-
In the Unreal Editor , open Project Settings and navigate to Platforms > iOS > Launch Screen .
-
Enable the Custom Launch Storyboard checkbox.
![EnableCustomStoryboard.png]()
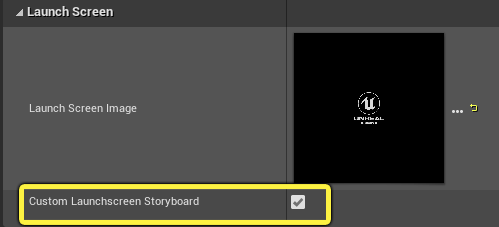
Now when you package your iOS project, instead of using the default launch storyboard, the project will use the custom storyboard you placed in the IOS/Resources/Graphics folder. While the Xcode project does not depend on a specific folder structure for referencing the image file, the UE4 project requires it to be located in an Assets folder alongside the LaunchScreen.storyboard file.
Further Reading
After following this guide, you should have everything you need to implement a basic launch storyboard in your UE4 project. For additional information about configuring and editing storyboards for iOS, refer to Apple's documentation for launch screens and storyboards .