Choose your operating system:
Windows
macOS
Linux
The Handheld AR Template is available for Unreal Engine projects using UE 4.27 or later. This template provides a simple base for augmented reality projects targeting Android and iOS devices, which you can modify to suit your project's needs.
This guide will walk you through the features the AR Template comes with, how to launch and navigate it on a mobile device, and where you can locate its features in the Unreal Editor so you can begin creating your own handheld AR applications.
1. Overview of User Journey and Features
The AR Template is a simple handheld AR application with a user journey that follows these steps:
-
The user opens the application.
-
The application displays a prompt to begin scanning the environment. The user must provide camera permissions to continue.
-
When the user confirms the prompt, the application scans the environment with the user's camera, then defines a virtual scene by adding planes to the environment.
-
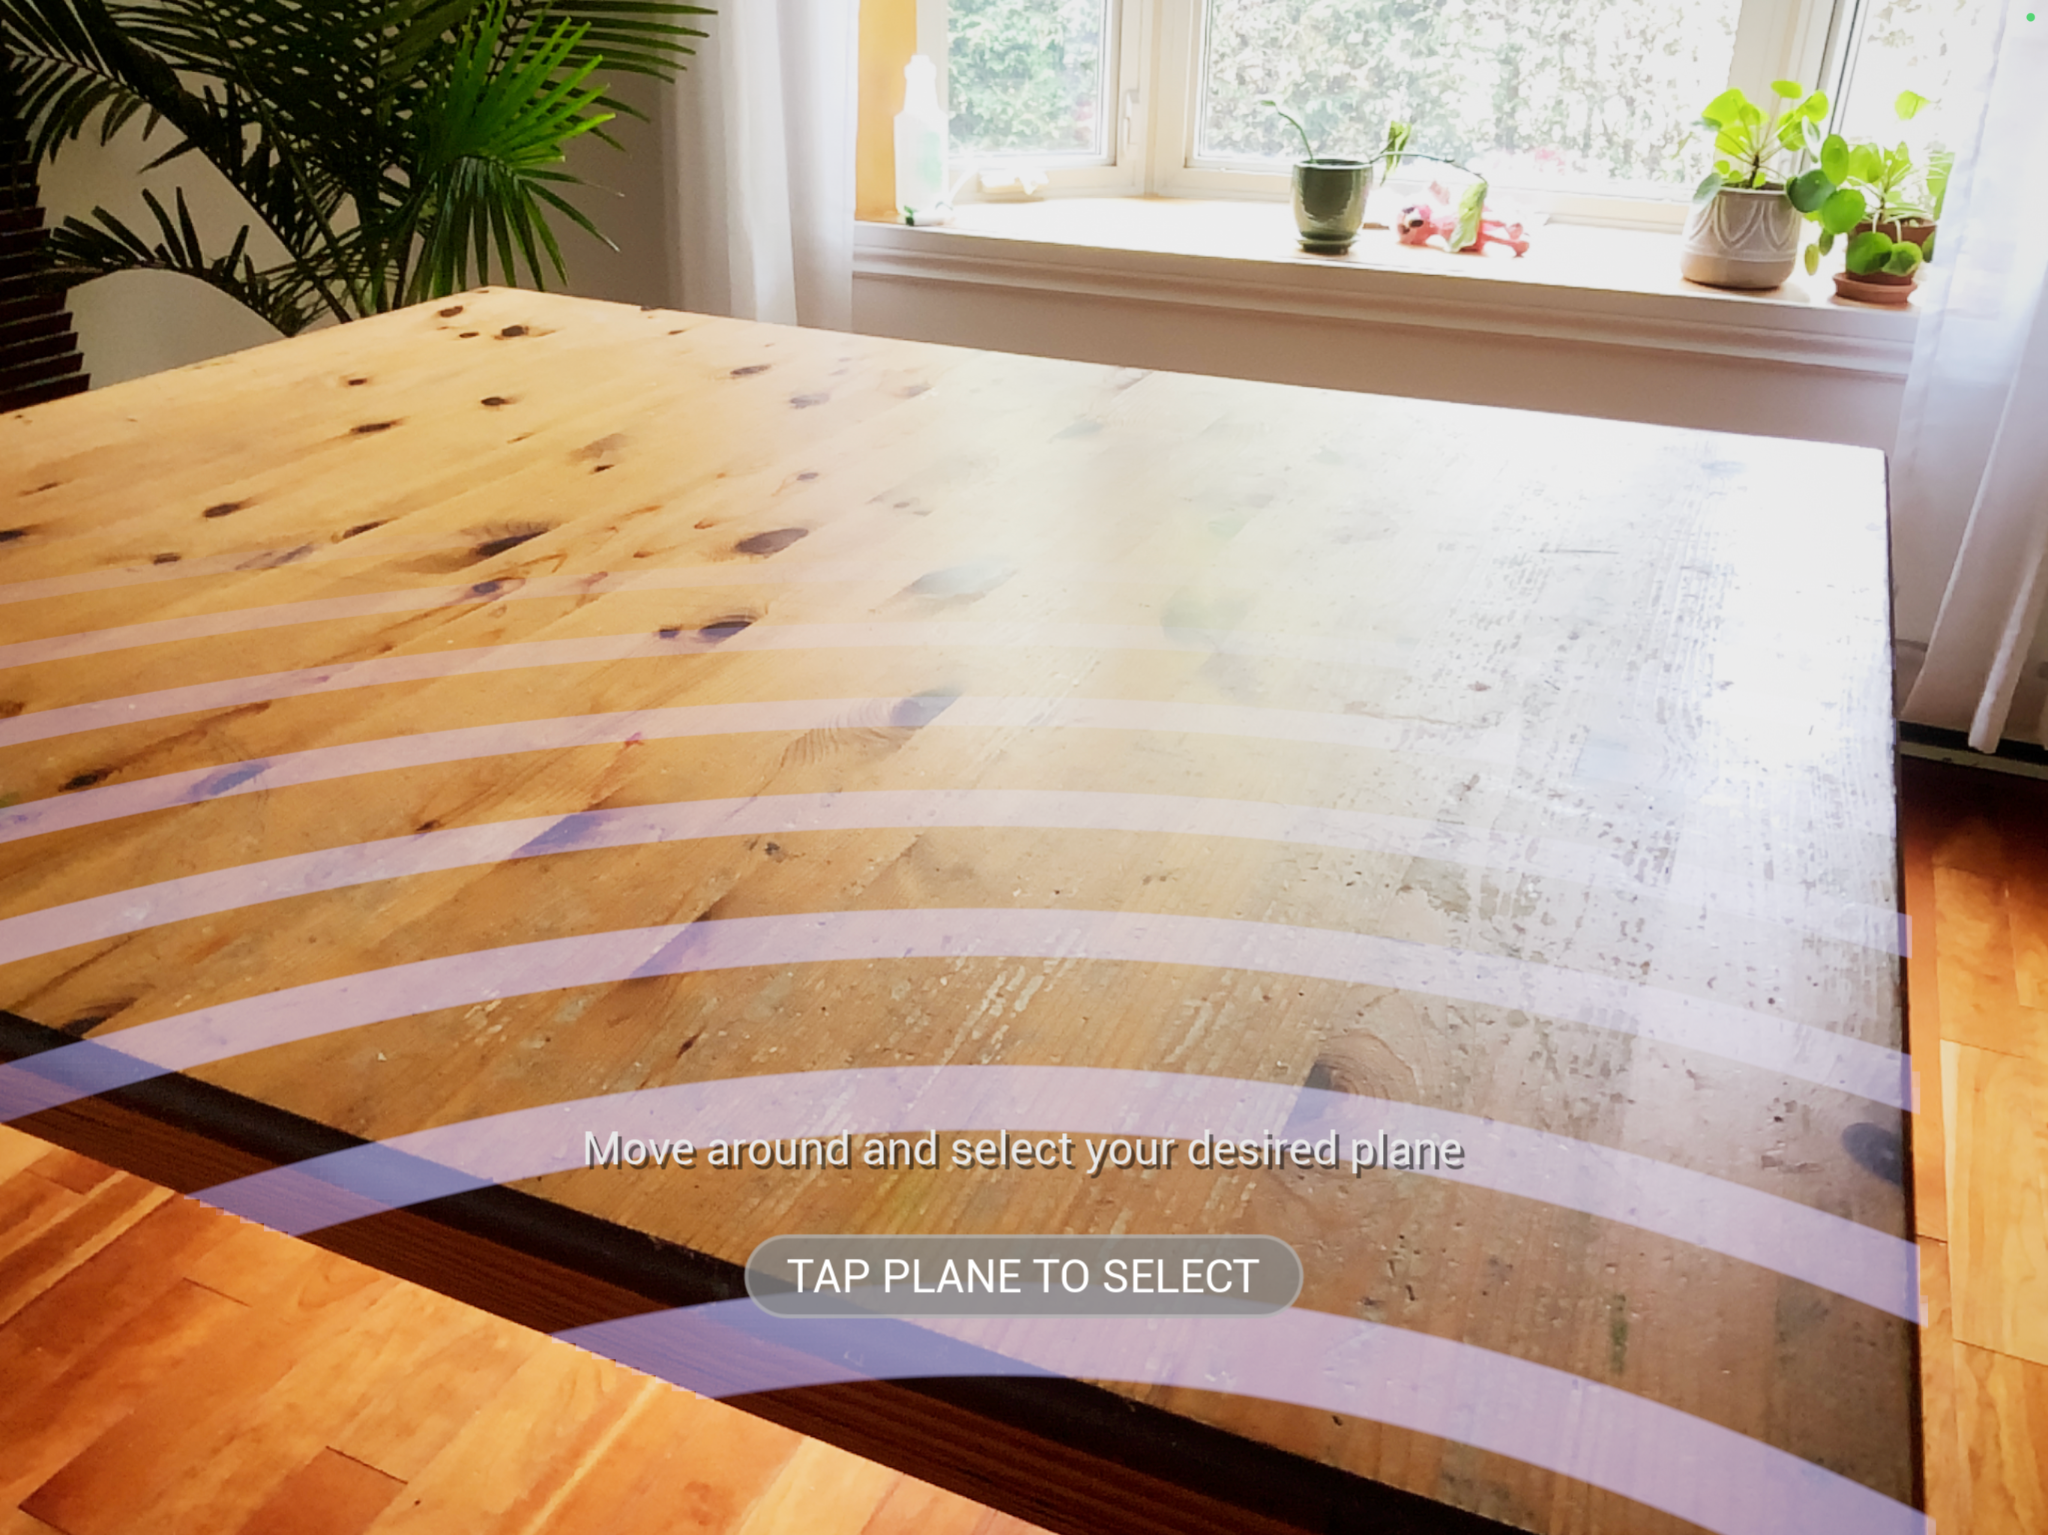
The application prompts the user to select a plane to interact with.
-
When the user selects a plane, they can place a virtual object on it.
-
Once a virtual object is placed, the user can manipulate it with a variety of transformation tools. A HUD provides configuration options, the ability to take snapshots of the AR scene, and the option to reset back to selecting a plane.
This template showcases the following features:
-
An application flow controlled by a simple state machine.
-
Scanning an environment to gather data for:
-
Defining interactive planes in a virtual scene.
-
Lighting and scene depth information.
-
-
Using a UMG widget to display the environment captured from the camera.
-
Touchscreen-based interactions in the virtual scene.
-
Manipulating virtual objects.
-
Selecting planes defined by the user's environment.
-
-
Use of gesture-based touch input for different types of interactions.
-
A basic UI with options for different styles targeting different types of applications.
-
Capturing images from the fully composited AR scene and saving them to your camera roll.
2. Compatibility
The Handheld AR Template will work on any device that fulfills the following requirements:
-
The device must be supported by Unreal Engine.
-
The device must support ARKit (iOS) or ARCore (Android).
Refer to the iOS Device Compatibility and Android Device Compatibility pages for a list of devices that are supported by the current version of Unreal Engine.
For a list of iOS devices that support ARKit, refer to the following link: https://developer.apple.com/library/archive/documentation/DeviceInformation/Reference/iOSDeviceCompatibility/DeviceCompatibilityMatrix/DeviceCompatibilityMatrix.html
For a list of Android devices that support ARCore, refer to the following link: https://developers.google.com/ar/devices .
3. Setting Up the Template
To use the AR Template, you will need to create a project using the template as a base, then set up your project for packaging on your desired Mobile device. This section will walk you through the steps needed.
-
Open Unreal Editor . In the Select or Create New Project menu, scroll down to New Project Categories and select Games , then click Next .

The AR template is also available using Architecture, Engineering, and Construction as well as Automotive, Product Design, and Manufacturing.
-
In the Select Template menu, choose the Handheld AR template. Choose a Name and Location for your project. In this example, the project is called ARTemplateGame . Once you have finalized your settings, click Create Project .

After finishing these steps, the project will open in Unreal Editor, with HandheldARBlankMap as the default map.

4. Packaging and Deploying on Your Device
To complete your project setup, you need to prepare your project to package on your mobile device. Both Android and iOS require different setup steps in your project settings.
Android Setup
To prepare your handheld AR project for Android, complete the following steps:
-
Install the required version of Android Studio on your computer.
-
Run the AndroidSetup script in your engine folder to make sure the required SDK and NDK components are installed on your computer. Depending on your operating system, you may need to reboot your computer to make sure changes take effect.
-
In your Project Settings , locate the Android settings and click the Configure Now button under APK Packaging to configure your project for the Android platform. If you have not already accepted the Android SDK license, click the Accept SDK License button as well.
-
Make sure your device is set to Developer Mode and is set up to accept USB connections with your computer.
You can find more detailed information about these steps in the Android Setup section .
iOS Setup
To prepare your handheld AR project for iOS, follow these steps:
-
Install the latest version of Xcode on your Mac.
-
Obtain a provisioning profile and signing certificate from the Apple Developer Portal for your project.
-
The provisioning profile should have permissions to use your device's camera.
-
-
Open your Project Settings and import the provisioning profile and signing certificate.
You can find more detailed information about these steps in the iOS Setup section .
Packaging and Launching
Once you have performed the necessary setup to support your mobile device, you can package your project by clicking File > Package Project and selecting a packaging option for the appropriate device. This will create a packaged build that you can deploy on a device later.
You can also launch directly on your device by clicking the Launch dropdown in the main toolbar, then selecting your device from the list of devices shown. You can check the status of your device in the Device Manager menu to verify that it is connected. The Handheld AR Template will package and automatically push to your device, then launch itself.
5. Navigating the Application
This section will provide a walkthrough of the user journey for the out-of-the-box configuration of the Handheld AR Template.
Scanning and Object Placement
When the Handheld AR Template launches, it will use your device's camera to display your surroundings. A prompt will ask you to scan your environment.

Click the Begin Scan button to start. This will gather the data needed to build the 3D scene for virtual objects.
The application will ask you to allow permissions to take pictures and record video. These permissions are required for the camera to scan and display the environment.
Once your mobile device has finished scanning, the application will display several planes and prompt you to select one by tapping it on your screen. Planes are displayed with colored waves across the surface. The application only displays one plane at a time to reduce visual noise, and will set the closest plane to being visible.

After you select a plane, the bottom toolbar UI will appear, and you can place a virtual object.

The template can place one virtual object at a time, but you can use the workflow for placing this object to place others in your own applications.
Manipulating Objects.
In the Handheld AR Template, you can Translate , Scale , or Rotate a virtual object using the touchscreen.
To translate an object, tap it and drag it along the ground where you want to place it. Any one-finger touch will display the translation HUD. Objects are confined to the bounds of the plane they are placed on. Those bounds will be displayed on the HUD when you start translating the object.
To scale an object, use your thumb and forefinger to pinch or expand the object. The template recognizes pinches that are mostly vertical relative to the orientation of the screen. The UI will display the new size of the object in centimeters as you scale it.
To rotate an object, place two fingers on the screen and swipe them left or right. The system recognizes swipes and drags that are mostly horizontal relative to the screen as being rotations. This will display the rotation HUD, which includes a circle around the base of the object and its current world rotation in degrees.
Navigating the UI and Menus
By default, the Handheld AR Template's UI is displayed at the bottom of the screen. This includes a toolbar as well as a floating Info button in the lower-left corner.
Snapshot
The Snapshot button will take a picture with your virtual objects displayed on the screen and save it to your camera roll. A prompt displaying the words Snapshot Saved will confirm the snapshot was successfully taken.
As of 4.27, the Handheld AR Template will save screenshots to the camera roll on Android, but not on iOS.
Reset
The Reset button will remove the virtual object and return the user to the prompt for selecting a plane.
Options Menu
The Options button will open a menu that provides configuration options.

Toggling Snapping will make virtual objects snap to discrete 1 cm increments when translating or scaling. Rotations will snap to 5 degree angles.
Toggling Interact HUD will turn the HUD off until you interact with the screen. This provides a way to make clean screenshots.
The UI Style selector cycles through three UI styles. The Light and Dark styles show the default UI with the toolbar at the bottom of the screen. The Game style shows a more stylized HUD with all the tools arranged in a circular element instead of a horizontal one. The Game style supports all of the same functions and flows as the Light and Dark styles, but demonstrates a different layout for using them.

Info Menu
The Info Menu displays a simple visual guide to the gestures for manipulating virtual objects.

6. Template Quick Reference
All assets for the Handheld AR Template are located in the Handheld AR folder in the Content Browser. The Handheld AR template primarily depends on the following assets:
|
Asset Name |
Path |
Summary |
|---|---|---|
|
BP_ARGameMode |
HandheldAR/Blueprints/GameFramework/BP_ARGameMode |
The game mode used in the Handheld AR Template. Initializes the AR Pawn. |
|
BP_ARPawn |
HandheldAR/Blueprints/GameFramework/BP_ARPawn |
The Pawn class for the Handheld AR Template. Initializes the HUD and handles setup of the virtual scene, as well as input from the user. |
|
BP_MainMenu |
HandheldAR/Blueprints/UI/BP_MainMenu |
The main UI for the Handheld AR Template. Controls other menus and initializes the AR scene from the camera. |
|
BP_Plane |
HandheldAR/Blueprints/Placeable/BP_Plane |
A plane that placeable objects can be placed on. These are set up by the AR Pawn after scanning the environment. |
|
BP_Placeable |
HandheldAR/Blueprints/Placeable/BP_Placeable |
A base Blueprint class for placeable objects that the user can interact with. |
For more information about these actors and where to look for key functionality, refer to the Handheld AR Template Reference page.
7. On Your Own
Now that you have set up the Handheld AR Template and can explore it on your mobile device, you can start using it as a jumping-off point for developing handheld AR applications of your own. Check the Handheld AR Template Reference page for more detailed information about the classes that make up this template and how you can modify them.