Choose your operating system:
Windows
macOS
Linux

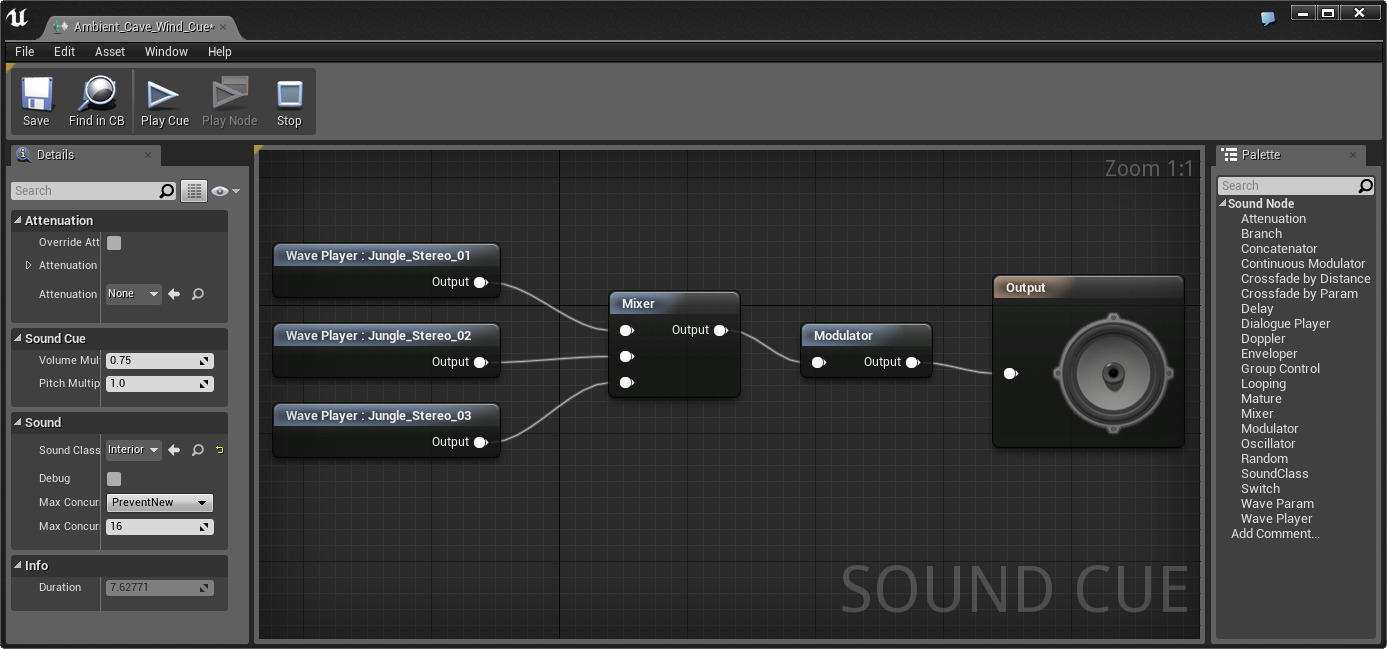
The behavior of audio playback in the Unreal Engine is defined within Sound Cues. The Sound Cue Editor is a node-based editor that is used to work with audio.
For more information about the Sound Cue Editor UI, see Sound Cue Editor UI .
Sound Cue
The audio output of the combination of nodes created in the Sound Cue Editor is saved as a Sound Cue.
By default, every Sound Cue's Audio Graph Node contains an Output node, which has a speaker icon on it. The Output node's default value for Volume Multiplier is 0.75, and for Pitch Multiplier is 1.00. You can modify these values in the Details panel.
The volume and pitch settings are used to manage relative Sound Cue volumes. This affects the output of all audio contained within the Sound Cue. If you are using multiple Sound Waves with Mixer or Random Nodes, you can control their volume and pitch independently by adding Modulator nodes.
Sound Wave
A Sound Wave is the representation of an imported audio file in the Sound Cue Editor . You can select a Sound Wave asset in the Content Browser and then add it to the Sound Cue you are editing by Right-clicking anywhere in the Sound Cue Editor, and then choosing the Sound Wave in the From Selected category on the context menu.
Because other Sound Cues may use the same Sound Wave, you cannot modify the volume and pitch values of a Sound Wave in the Sound Cue Editor. However, you can modify a Sound Wave's properties when you import it, or by opening it in the Content Browser by double-clicking it.
Importing Sounds
To import sounds in the Unreal Editor, do the following:
-
In the Content Browser , click the
![New Asset button]()
-
Under Import Assets , click Import to *"folder name" .
-
In the Import dialog box, browse to the .wav file that you want to import, select it, and click Open . This will import the .wave file as a Sound Cue asset.
At this time, you can only import WAV files as sound files.
Creating Sound Cues
To create a Sound Cue, do the following:
-
In the Content Browser , click the
![New Asset button]()
-
Under Other Assets , click Sounds , and then click Sound Cue .
-
Type a name for your new Sound Cue.
Opening the Sound Cue Editor
You can open the Sound Cue Editor by right-clicking a Sound Cue asset in the Content Browser and then clicking Edit on the context menu that appears, or by double-clicking a Sound Cue asset.
Audio Node Graph
The Audio Node Graph is located in the Viewport panel. It displays the audio signal path from left to right, with interconnected nodes representing audio control modules and audio files. The Output node, which has an image of a speaker on it, represents the final output of audio as heard in-game and is always positioned furthest to the right in the signal path. The source audio files (Sound Waves) are always positioned furthest to the left in the signal path. Wires are used to connect the nodes.

To preview playback, use the play buttons located in the toolbar at the top of Sound Cue Editor window. For more information about the toolbar, see Toolbar .
The Play Cue button plays the entire Sound Cue, and the Play Node button plays the sound from the selected node. (If multiple nodes are selected, the Play Node button is grayed out and unavailable.) While a Sound Cue is playing, to aid in debugging, the wires of currently active nodes turn red. This makes it easy to follow the Sound Cue's construction in real time.

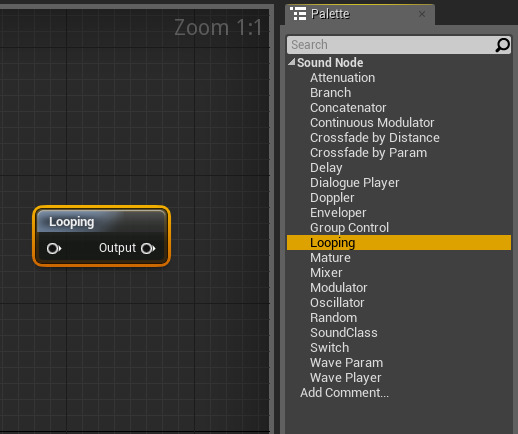
You can add an audio node by dragging it into the graph from the Palette .

You can also add a node by right-clicking in the graph and choosing a node from the context menu that appears.

As with other node-based editors in the Unreal Editor, you can type text in the search box to dynamically filter the list of nodes that appears in the context menu.

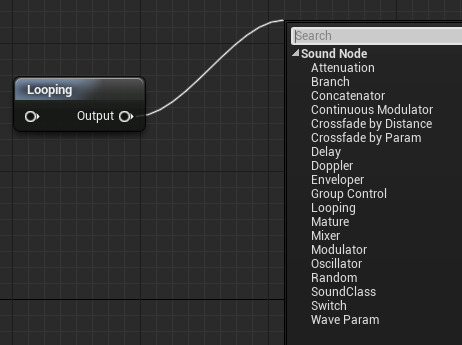
If you have a node in the graph, you can add a new node by dragging a wire off the existing node's pin and choosing a new node from the context menu that appears.

For explanations of the nodes available for use within the Sound Cue Editor, see the Sound Cue Reference .
