Choose your operating system:
Windows
macOS
Linux
There are many tools within UE4 that can help you create assets for your levels. However, there may come a time where you have to create an asset in an exterior application and import it into UE4. In this How-to, we will go over the basics on how to import a Static Mesh that was made in another 3D application into UE4 so that it may be used in your levels.
Set Up
If you are creating a level in UE4, chances are that you have made some 3D models in another application and now you are ready to put that model into UE4. In order to make sure that the transition from your 3D modeling software, whether it be Maya, 3ds Max, or some other modeling program, there are a few things to check. First, it is very useful to remember while modeling and before exporting that the measurement used in UE4 is Unreal Units and that 1 Unreal Unit equals 1 centimeter. Also, only certain file types that can be imported into UE4, FBX being the file format recommended for 3D objects. Likewise, make sure that any textures and materials applied to your static mesh are supported file types.
Exporting
In this example, we have this crate model that we want to export from Maya into our level in UE4.

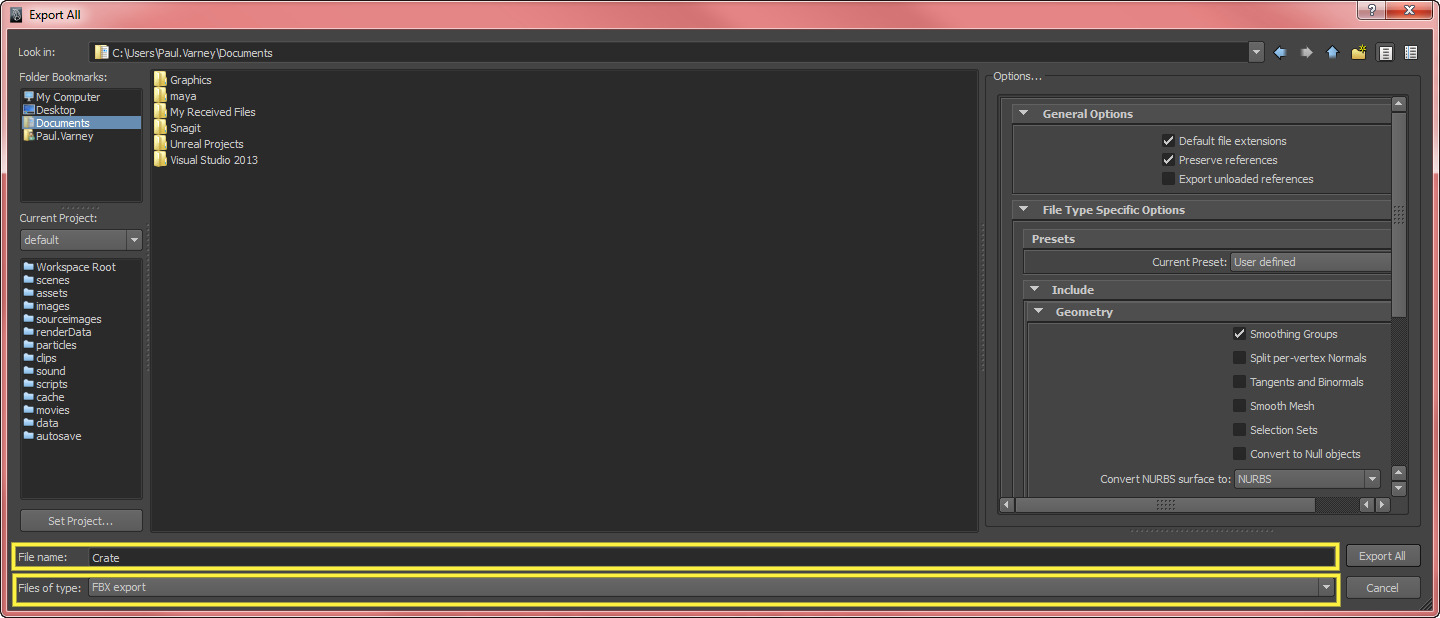
After your model is completed, the first step towards importing it into UE4 is exporting it from the 3D application the mesh was created in. In this example, we used Maya, but you can feel free to use any application that has the ability to export FBX files. Go to the file menu in your respective application and select Export .

Once selected, go ahead and choose the path you want to save your mesh to. Make sure to give it a name and also select the file type that you want to export the mesh as. (Again, FBX is recommended.)
Import
Now that the mesh has been exported from the 3D application, we need a project to import the mesh into. If you have a project already that you are working with, you can skip this step. However, if you need a project to work with, you can open the launcher and select a new project. The project category and template you choose and whether or not you have included Starter Content will not matter for the purposes of this How-to. Make sure you choose a path to save it to and give your project a name and click Create Project .
Once your project has been loaded, locate your Content Browser . Browser through the folders in your Content Browser to find where you want the mesh you are importing to be saved at. In this example, we will be importing our crate mesh into a folder labeled Meshes . Once you are in the folder you want to save your mesh to, you can import your mesh in one of two easy ways. The first way is to right-click in an empty space within folder in the Content Browser and select Import to... from the context menu. You can also click the Import button at the top of the Content Browser , highlighted in green in the image below.
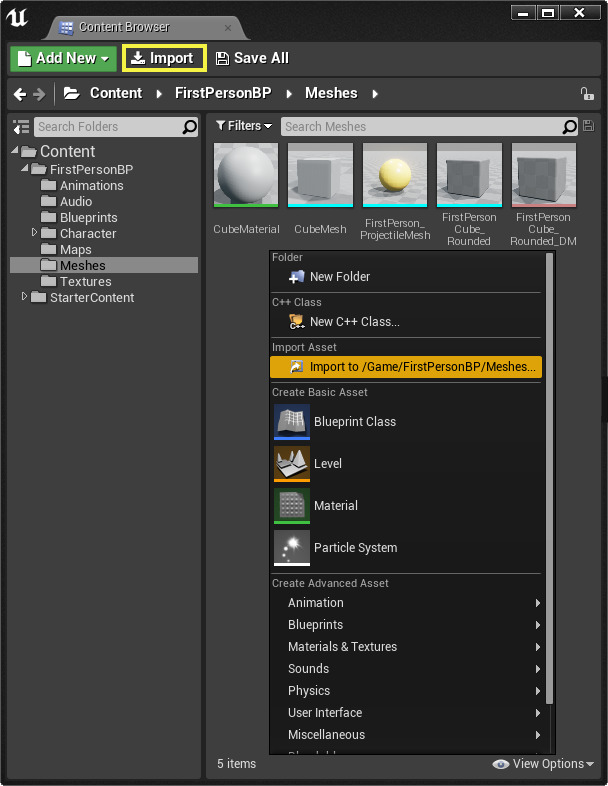
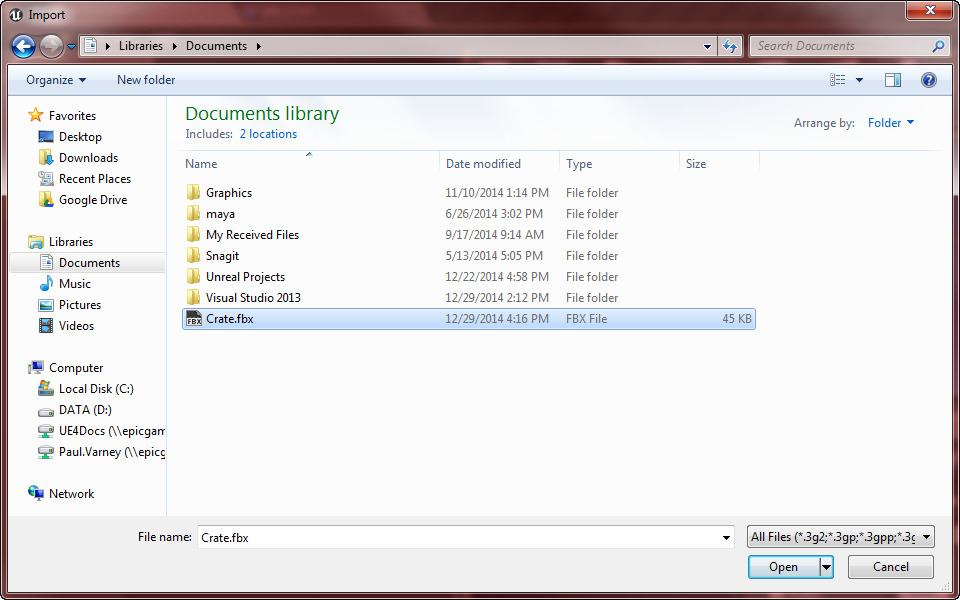
Once you have either selected the Import to... option or clicked the Import button, browse to wherever you saved the mesh when you exported it from the 3D application. Once you have found the mesh, you can import it by either double-clicking or by clicking Open .
After you have selected the mesh to import and either double-clicked the file or clicked Open , the FBX Import Options menu should appear. By default, it will look very similar to the image on the left. However, there are many other options that you can play with when importing your mesh, as shown by the image on the right. For our purposes in this How-to, all of the defaults are fine and we can import the mesh just the way it is.
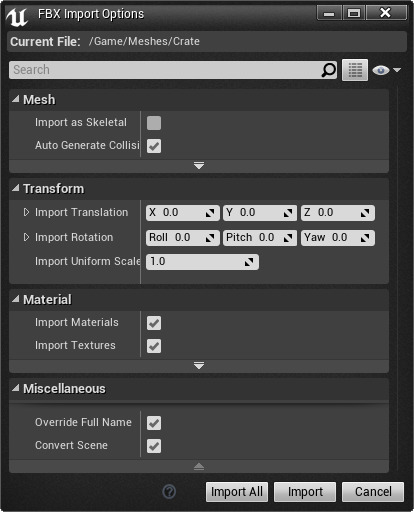
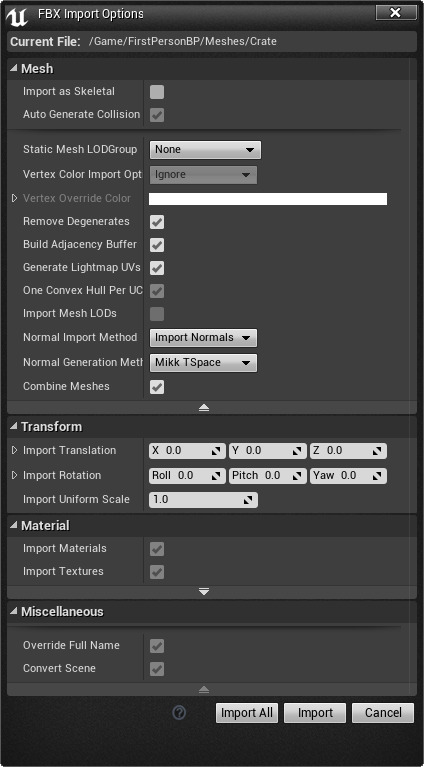
There are a few things to note. If you had a mesh that you wanted to import as a Skeletal Mesh, the process is very similar, just make sure that the first checkbox in the Mesh section that reads Import as Skeletal is checked. As we are going to import this mesh as a Static Mesh, we can leave that unchecked. Also, rather than repeating this process for many different meshes, when selecting a mesh to import as we did in the last step, you may select more than one mesh to import. If you do, clicking Import will allow you to choose the Import Options for each individual mesh, while clicking Import All will import all the meshes with the same options.
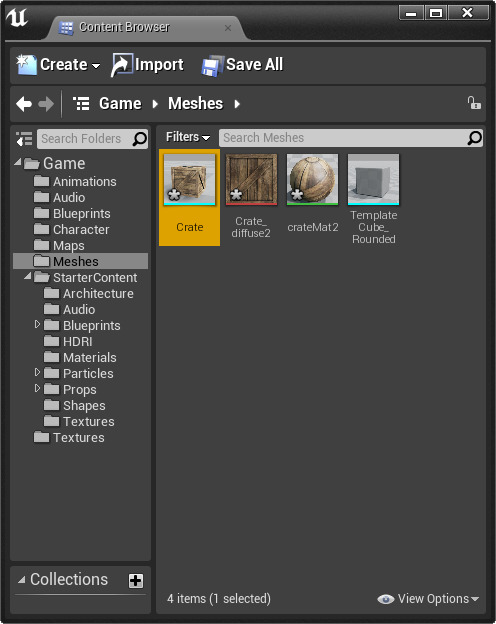
Once you click Import , your mesh will appear in the Content Browser in the folder you were in when you selected Import. Note that if you imported more than one mesh, after you click Import , another FBX Import Options menu will appear. As we only imported one mesh in this example, clicking Import or Import All yields the same result and brings us back to our Content Browser . Also note that when you import your mesh, by default in the FBX Import Options , Import Materials and Import Textures are both checked to true , so any materials or textures that you may have applied to your mesh in your 3D application will also have been imported. The different colored bars on the bottom of the thumbnail tell you what type of asset it is. The asset with the light blue bar at the bottom is your Static Mesh.
Now that you have your mesh imported into UE4 and saved, you can now use it in your level, which is as easy as dragging it from the Content Browser into the Viewport like you would with any other asset.