Choose your operating system:
Windows
macOS
Linux
概要
このドキュメントでは、ナビゲーション メッシュのさまざまな変更方法について説明する準備作業として、レベルと AI エージェントを作成する手順を説明します。
なお、 完全なサンプル プロジェクト をダウンロードすることもできます。サンプル プロジェクトには、このガイドで取り上げるすべてのマテリアルが含まれています。
目的
-
シンプルなレベルを作成し、レベル内にナビメッシュ バウンズ ボリューム アクタを配置してナビゲーションを追加する。
-
ナビゲーション システムを使用してレベル内を歩き回るように ThirdPersonCharacter ブループリントを変更する。
1 - 必要な設定
-
メニューの [New Project Categories (新規プロジェクトカテゴリ)] セクションにある [Games (ゲーム)] を選択して [Next (次へ)] をクリックします。
![Select the Games category and click Next]()
-
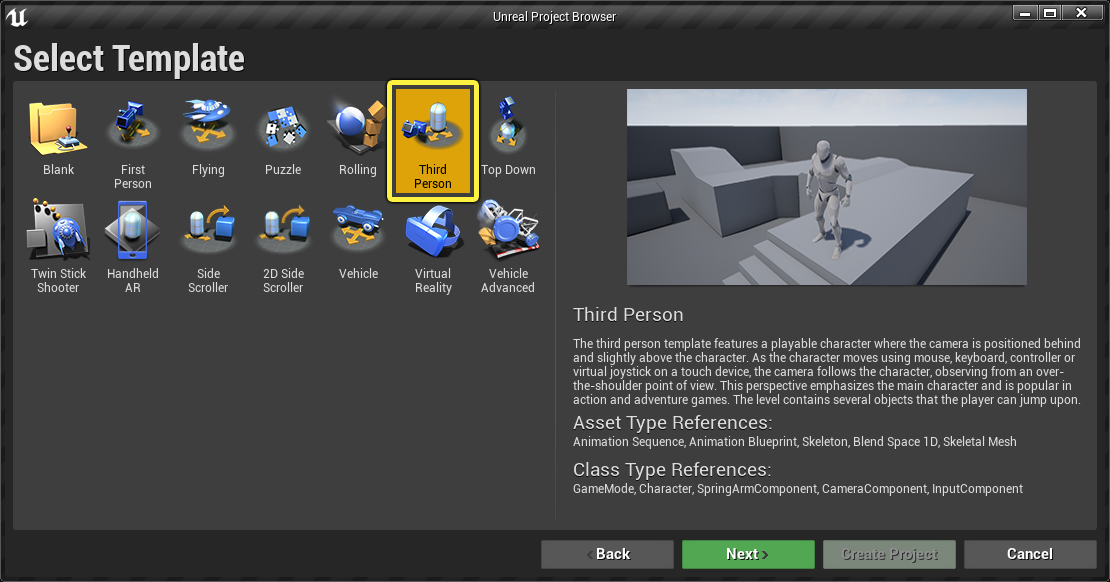
[Third Person (サードパーソン)] テンプレートを選択し、 [Next (次へ)] をクリックします。
![Select the Third Person template and click Next]()
-
[Blueprint (ブループリント)] 、 [No Starter Content (スターターコンテンツ無し)] オプションの順に選択して、 [Create Project (プロジェクト作成)] をクリックします。
![Select Blueprint and No Starter Content and click Create Project]()


このセクションの結果
新規のサードパーソン プロジェクトを作成し、ナビゲーション メッシュが配置された基本的なレベルを構築する準備が出来ました。
2 - テスト レベルを作成する
-
メニューバーで [File (ファイル)] > [New Level (新規レベル)] の順にクリックします。
![Create a new Level]()
-
[Default (デフォルト)] レベルを選択します。
![Select the Default Level]()
-
[World Outliner (アウトライナ)] で [Floor] スタティック メッシュ アクタを選択し、 [Details (詳細)] パネルで [Scale (拡大・縮小)] を X = 10、Y = 10、Z = 1 に設定します。
![Select the Floor Static Mesh Actor in the World Outliner]()
![Set the Scale to X = 10, Y = 10, Z = 1]()
-
コンテンツ ブラウザ で 「Geometry」>「Meshes」 の順に移動し、 [TemplateFloor] スタティック メッシュをレベルにドラッグします。
![Drag the Template Floor Static Mesh into the Level]()
-
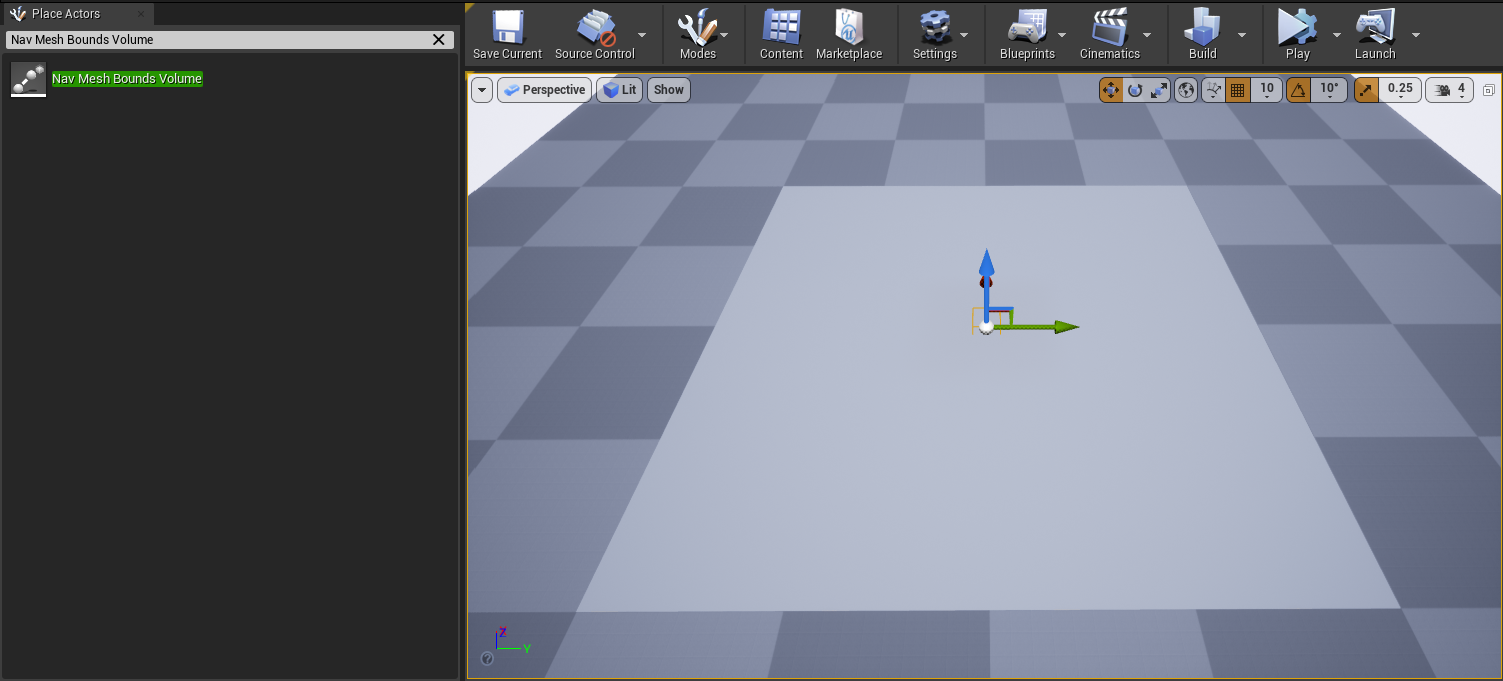
[Place Actors (アクタを配置)] パネルに移動し、「 Nav Mesh Bounds Volume 」を検索します。これをレベルにドラッグして、Floor メッシュ上に配置します。
![Drag the Nav Mesh Bounds Volume to the Level]()
-
[Nav Mesh Bounds Volume] を選択した状態で [Details] パネルに移動し [Scale] を X = 20、Y = 20、Z = 5 に設定して、床領域全体を覆うようにします。デフォルトで、Unreal Engine によってナビゲーション バウンズ内にナビゲーションが自動生成されます。ナビメッシュ アクタ RecastNavMesh-Default もレベルに追加されます。 P キー を押して、レベル内のナビゲーション メッシュを視覚化します。
ナビゲーションが生成されない場合は、[Project Settings] > [Navigation System (ナビゲーション システム)] の順に移動して [Auto Create Navigation Data (ナビゲーション データの自動作成)] チェックボックスをオンにします。
![Set the Scale to X = 20, Y = 20, Z = 5]()
![The Navigation Mesh now covers the entire floor]()
-
[Place Actors] パネルに移動し、 [Basic (基本)] カテゴリで [Cube (キューブ)] スタティック メッシュ アクタをレベルにドラッグします。
![Drag the Cube Static Mesh Actor into your Level]()
-
その キューブ を選択した状態で [Details] パネルに移動して、 [Scale] を X = 1、Y = 1、Z = 5 に設定します。
![Set the Scale to X = 1, Y = 1, Z = 5]()
![The Cube is now rescaled]()
-
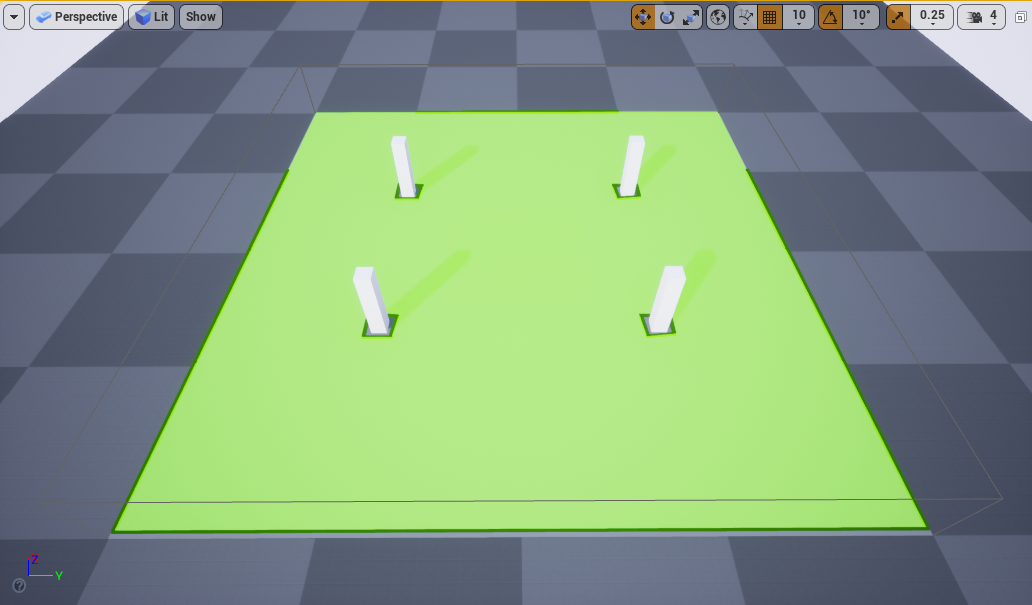
レベルにさらに 3 つ キューブ を追加して、先ほどのキューブと同じサイズに変更します。それらのキューブを、以下のように床に配置して、4 つの柱を作成します。
![Drag three more Cubes into the level and scale them as the one above]()
-
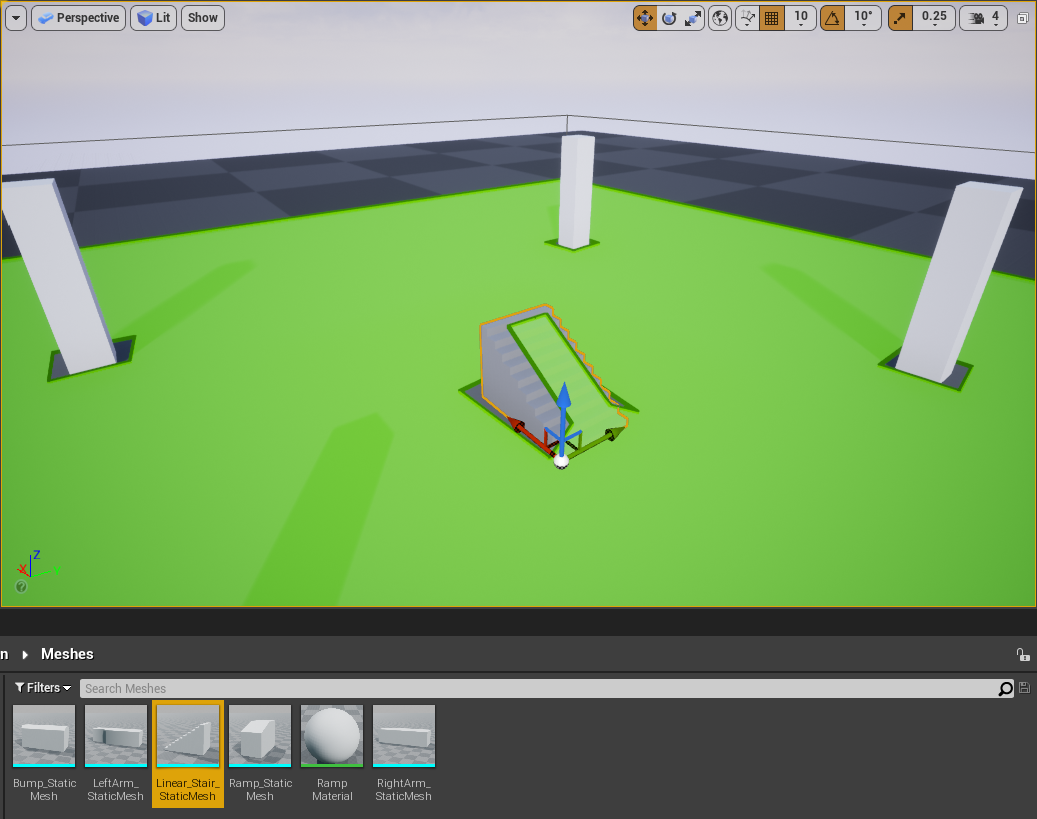
次に、中央に階段とプラットフォームを追加します。 コンテンツ ブラウザ で 「ThirdPerson」 > 「Meshes」 の順に移動し、 [Linear_Stair_StaticMesh] をレベルにドラッグします。
![Add a stair and a platform in the middle]()
-
階段を選択した状態で [Details] パネルに移動して、 [Scale] を X = 1.5、Y = 1、Z = 1.3 に設定します。
![Set the Scale to X = 1.5, Y = 1, Z = 1.3]()
-
階段を選択した状態で、 Alt キーを押しながらメッシュをドラッグして複製します。
![Duplicate the stairs mesh]()
-
[Place Actors] パネルに移動し、 [Basic (基本)] カテゴリで [Cube (キューブ)] スタティック メッシュ アクタをレベルにドラッグします。 [Details] パネルに移動して [Scale] を X = 14、Y = 4、Z = 0.1 に設定します。以下のように、階段の端にアクタを配置してプラットフォームを作成します。
![Drag a Cube Static Mesh Actor into your Level and set the scale to X = 14, Y = 4, Z = 0.1]()
-
[Place Actors] パネルに移動し、 [Basic] カテゴリで [Sphere (スフィア)] スタティック メッシュ アクタをレベルにドラッグします。
![Drag a Sphere Static Mesh Actor into your Level]()
-
この スフィア を選択した状態で [Details] パネルに移動し、 [Collision (コリジョン)] セクションで [Collision Presets (コリジョン プリセット)] を [No Collision (コリジョンなし)] に設定します。
![Set the Collision Presets to No Collision]()
-
最後に、スフィアを複製して、以下のようにレベル中に配置します。
![Duplicate the spheres and place them around your Level]()


このセクションの結果
このセクションでは、単純なレベルを作成してナビメッシュ バウンズ ボリュームを追加しました。また、エージェントのターゲット アクタの役割を果たす 5 つのスフィアを追加しました。
3 - エージェントを作成する
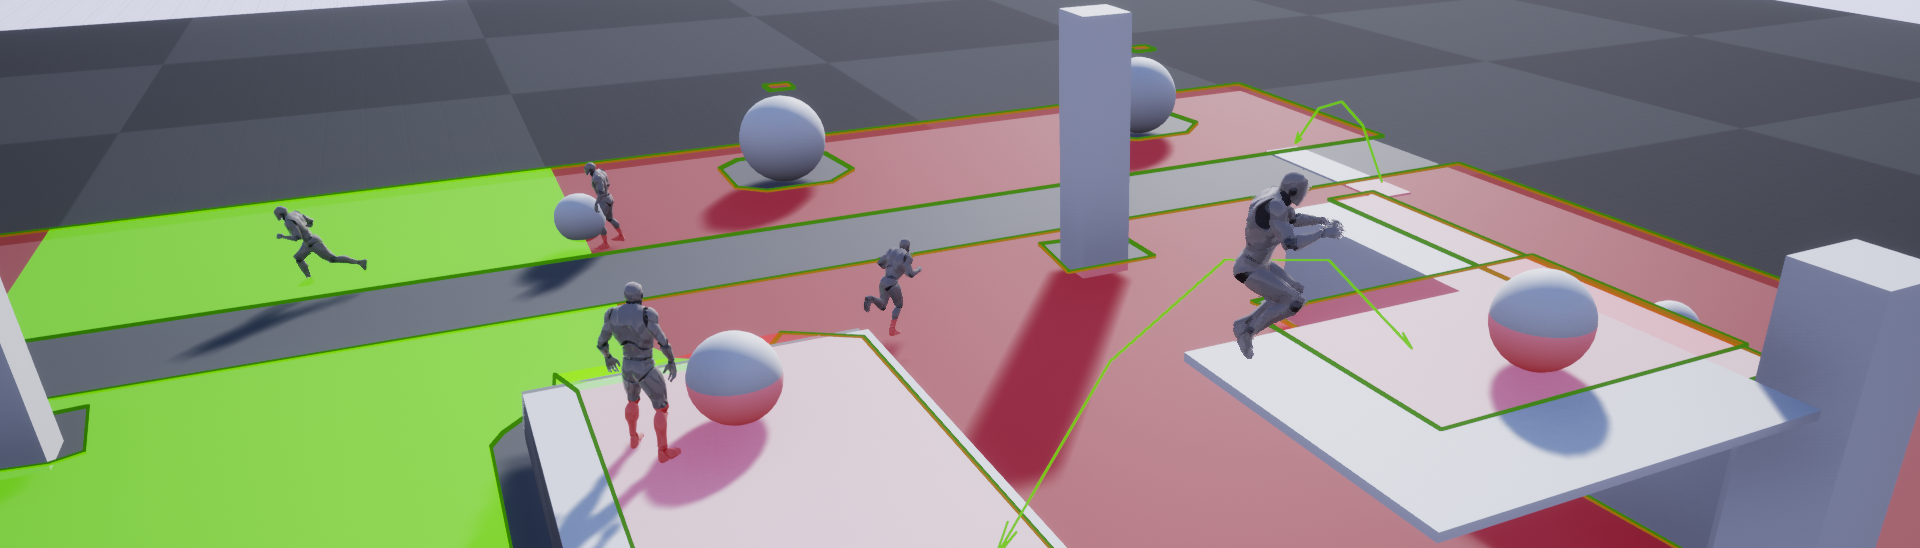
このセクションでは、一連のターゲット アクタの間を移動する AI エージェントを作成します。
-
コンテンツ ブラウザ で右クリックし、 [New Folder (新規フォルダ)] を選択して新しいフォルダを作成します。このフォルダに「 NavigationSystem 」という名前を付けます
-
コンテンツ ブラウザ で、 「ThirdPersonBP」>「Blueprints」 の順に移動し、 [ThirdPersonCharacter] ブループリントを選択します。これを「 NavigationSystem 」フォルダにドラッグし、 [Copy Here (ここにコピー)] オプションを選択します。
![Copy the Third Person Character Blueprint to the Navigation System folder]()
-
「 NavigationSystem 」フォルダに移動して、ブループリントの名前を「 BP_NPC_ModNavMesh 」に変更します。ブループリントをダブルクリックしてブループリント エディタで開き、 イベント グラフ に移動します。すべての入力ノードを選択し、削除します。
-
イベント グラフ を右クリックし、「 Add Custom Event 」を検索、選択します。イベントに「 MoveNPC 」という名前を付けます。
![Right click the Event Graph, then search for and select Add Custom Event. Name it Move NPC]()
-
[My Blueprint (マイ ブループリント)] パネルに移動し [Variables (変数)] の隣の 追加 (+) ボタン をクリックして新しい変数を作成します。変数の名前を「 TargetList 」にします。
![Create a new variable and name it Target List]()
-
[Details] パネルに移動し、 [Variable Type (変数の型)] の隣のドロップダウンをクリックします。「 Actor 」を検索して、[Object Reference (オブジェクト参照)] を選択します。
![Set the variable type to Actor Object Reference]()
-
以下のように、選択した Actor の隣にある 青色の球体 アイコンをクリックして、 [Array (配列)] オプションをクリックします。 [Instance Editable (インスタンス編集可能)] チェックボックスをクリックして有効にします。
![Click the blue sphere icon next to Actor selection and click the Array option]()
![Click the Instance Editable checkbox to enable it]()
-
TargetList 変数を イベント グラフ にドラッグして [Get TargetList (TargetList を取得)] オプションを選択します。
-
TargetList ノードからドラッグして、「 Last Index 」を検索、選択します。
![Drag from the TargetList node, then search for and select Last Index]()
-
TargetList ノードからドラッグし、「 Get (a copy) 」を検索して選択します。
![Drag from the TargetList node and search for and select Get a copy]()
-
Get ノードの 緑色 のピンからドラッグし、「 Random Integer in Range 」を検索、選択します。以下のように、 Last Index ノードの 緑色 のピンを Random Integer in Range ノードの Max ピンに接続します。
![Drag from the green pin of the Get node, then search for and select Random Integer in Range]()
![Connect the green pin of the Last Index node to the Max pin of the Random Integer in Range node]()
-
Get ノードからドラッグして、 [Promote to variable (変数に昇格)] を検索、選択します。変数に「 CurrentTarget 」という名前を付け、 MoveNPC ノードに接続します。
![Drag from the Get node, then search for and select Promote to variable]()
![Name the variable Current Target and connect it to the Move NPC node]()
-
CurrentTarget ノードからドラッグして、「 Is Valid 」を検索、選択します。 IsValid マクロ ノードを Set CurrentTarget ノードに接続します。
![Drag from the CurrentTarget node, then search for and select Is Valid]()
![Connect the IsValid macro node to the Set CurrentTarget node]()
-
CurrentTarget 変数を イベント グラフ までドラッグし、 Get Current Target を選択します。 CurrentTarget ノードからドラッグして、「 Get Actor Location 」を検索、選択します。
![Drag from the CurrentTarget node, then search for and select Get Actor Location]()
-
GetActorLocation ノードの Return Value からドラッグし、「 Get Random Reachable Point In Radius 」を検索、選択します。 Radius 値を 100 に設定します。
![Drag from the Return Value of the GetActorLocation node, then search for and select Get Random Reachable Point In Radius]()
![Set the Radius value to 100]()
-
GetRandomReachablePointInRadius ノードの Random Location ピンからドラッグして [Promote to variable (変数へ昇格)] を選択します。変数の名前を「 RandomLocation 」にします。以下のように、 RandomLocation ノードを IsValid ノードに接続します。
![Drag from the Random Location pin of the GetRandomReachablePointInRadius node and select Promote to variable. Name the variable Random Location]()
![Connect the RandomLocation node to the IsValid node]()
-
RandomLocation ノードからドラッグして、「 AI MoveTo 」を検索、選択します。
![Drag from the Random Location node, then search for and select AI MoveTo]()
-
AI MoveTo ノードの Pawn ピンをドラッグして、「 Get a reference to self 」を検索、選択します。 Random Location ノードの 黄色 のピンを AI MoveTo ノードの Destination ピンに接続します。最後に、以下のように AI MoveTo ノードの Acceptance Radius を 50 に設定します。
![Drag from the Pawn pin of the AI MoveTo node, then search for and select Get a reference to self]()
![Connect the yellow pin of the Random Location node to the Destination pin of the AI MoveTo node]()
-
AI Move To ノードの On Success ピンをドラッグして、「 Delay 」を検索、選択します。以下のように、このノードの [Duration (期間)] を 4 に設定します。 Delay ノードの Completed ピンをドラッグして、「 MoveNPC 」を検索、選択します。
![Drag from the On Success pin of the AI Move To node, then search for and select Delay. Set the Duration to 4. Drag from the Delay node and add a Move NPC node]()
-
上記の手順を繰り返して、ノードを AI Move To ノードの On Fail ピンに追加します。 Delay ノードの [Duration] を 0.1 に設定します。
![Repeat the steps above to add the nodes to the On Fail pin of the AI Move To node. Set the Duration of the Delay node to 0.1]()
-
イベント グラフ を右クリックし、「 Event Begin Play 」を検索して選択します。 Event Begin Play ノードからドラッグして、「 MoveNPC 」を検索、選択します。
![Right-click the Event Graph, then search for and select Event Begin Play]()
![Drag from the Event Begin Play node, then search for and select Move NPC]()
-
ブループリントを コンパイル して、 保存 します。
-
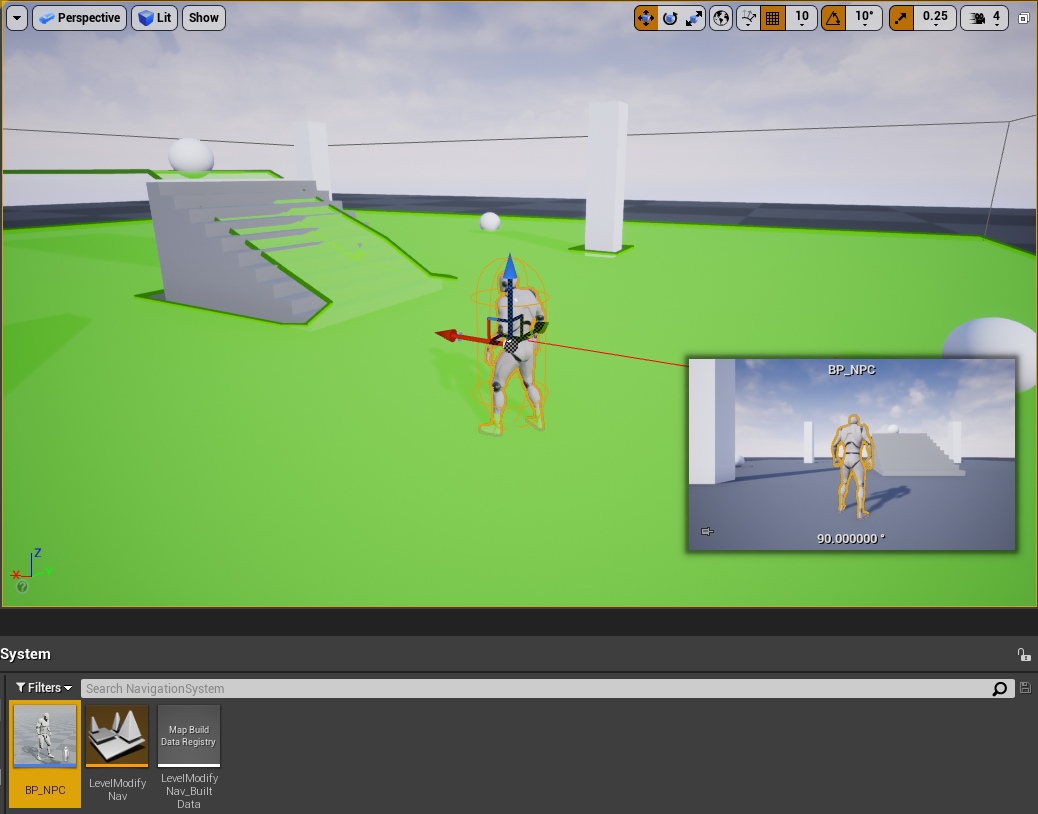
BP_NPC_ModNavMesh ブループリントをレベルにドラッグして、 [Details] パネルで [Target List] を見付けて 追加 (+) ボタンをクリックし、新しいターゲット アクタを追加します。
![Drag your BP_NPC_ModNavMesh Blueprint into your Level]()
![In the Details panel find the Target List and click the Add button to add a new target Actor]()
-
ドロップダウンをクリックして、以前作成した スフィア アクタを検索、選択します。
![Click the dropdown, then search for and select the Sphere Actor]()
-
上記の手順を繰り返して、残りの 4 つの スフィア アクタを追加します。
![Repeat the step above to add the remaining four Sphere Actors]()
-
[Simulate (シミュレート)] をクリックして、エージェントがレベル内のゴール間を歩き回るのを確認します。
![Click Simulate to see your Agent roam between goals in your Level]()


このセクションの結果
このセクションでは、一連のターゲット アクタの間を歩き回るエージェントを作成しました。これで、 ナビゲーション システムの変更 についての学習に進むことができます。