Choose your operating system:
Windows
macOS
Linux
Overview
Unreal Engine's Navigation System allows Agents to traverse the Level using a Navigation Mesh for pathfinding.
The Agent determines the most optimal route to its destination by comparing the cost of each navigation polygon within the Navigation Mesh. If all polygons along the route are of equal cost, then the Agent will choose the shortest path to its target (usually a straight line).
You can influence the cost of the navigation triangles using Navigation Modifier Volumes and Navigation Query Filters .
Navigation Modifier Volumes use Area Classes to determine the Default Cost multiplier of navigation within the volume. Area Classes also define the Fixed Area Entering Cost , which is the initial cost applied when the Agent enters the area. You can create as many Area Classes as needed to influence how your Agents navigate your Level.
Navigation Query Filters contain information about one or more Area Classes and can override the cost values, if needed. You can create as many Query Filters as needed to further customize how your Agents navigate your Level.
Goals
In this Quick Start Guide you will learn to create and use your own Navigation Areas and Query Filters to influence how different Agents traverse the same Navigation Mesh toward their targets.
Objectives
-
Create three custom Area Classes to use with Navigation Modifier Volumes.
-
Create two Navigation Query Filters to be used by Agents.
1 - Creating Custom Area Classes
-
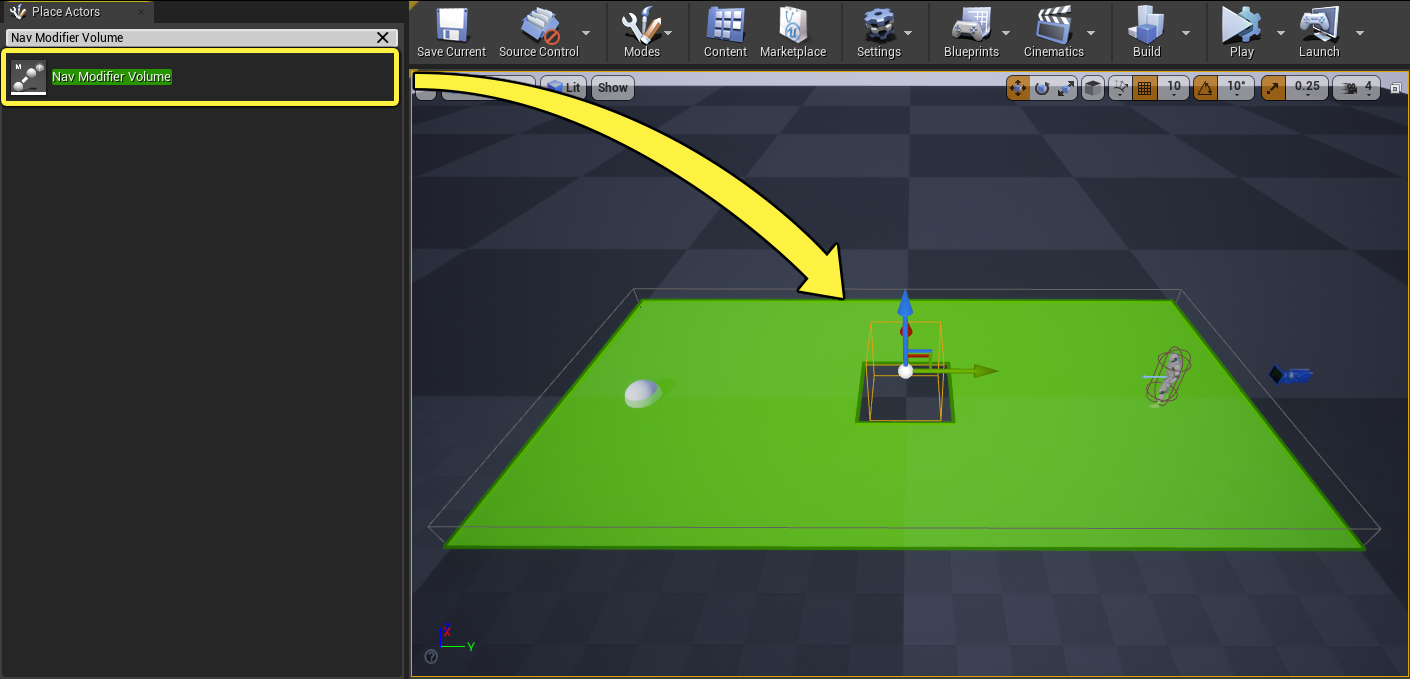
Go to the Place Actors panel and search for Nav Modifier Volume . Drag the Nav Modifier Volume Actor into your Level and place it on the Floor mesh. Go to the Details panel and set the Scale to X = 2, Y = 6, Z = 1.
![Custom-NavMod-Drag1.png]()
![Custom-NavMod-Drag2.png]()
-
Inside the Content Browser , right-click and select Blueprint Class under the Create Basic Asset section.
![Blueprint-Class.png]()
-
Inside the Pick Parent Class window, go to the All Classes section and expand the arrow. Search for and select Nav Area. Click Select and name the Blueprint BP_Area_Neutral .
![Custom-NavArea-Create1.png]()
![Custom-NavArea-Create2.png]()
-
Repeat the previous two steps twice and name these Blueprints BP_Area_Lane1 and BP_Area_Lane2.
-
Double-click the BP_Area_Lane1 Blueprint to open it. You can modify the Default Cost multiplier when navigating inside the volume and the Fixed Area Entering Cost . For this example, leave the settings at their default values.
-
Click the Draw Color bar and select a blue color. Compile and save .
![Custom-NavArea-Blue.png]()
-
Repeat the step above for the BP_Area_Lane2 Blueprint and change its Draw Color to red .
-
Select the Nav Modifier Volume in your Level and on the Details panel, click the Area Class dropdown and select BP_Area_Neutral .
![Custom-NavMod-Neutral.png]()
![Custom-NavMod-Neutral2.png]()
-
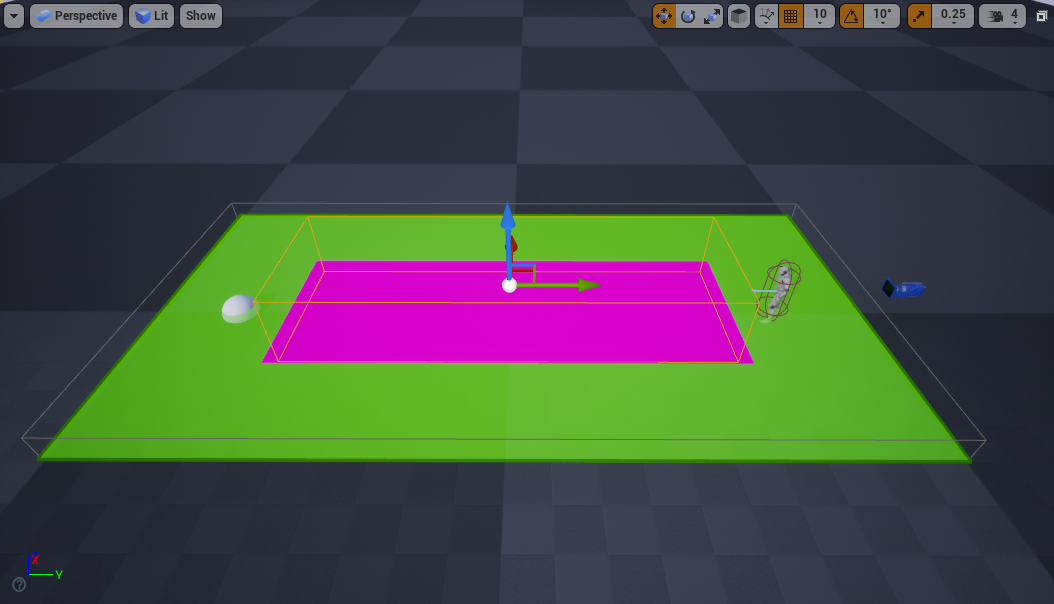
Duplicate the Nav Modifier Volume and follow the steps above to change the Area Class to BP_Area_Lane1 . Move the volume to the side to create a lane as seen below.
![Custom-NavMod-Lane1.png]()
-
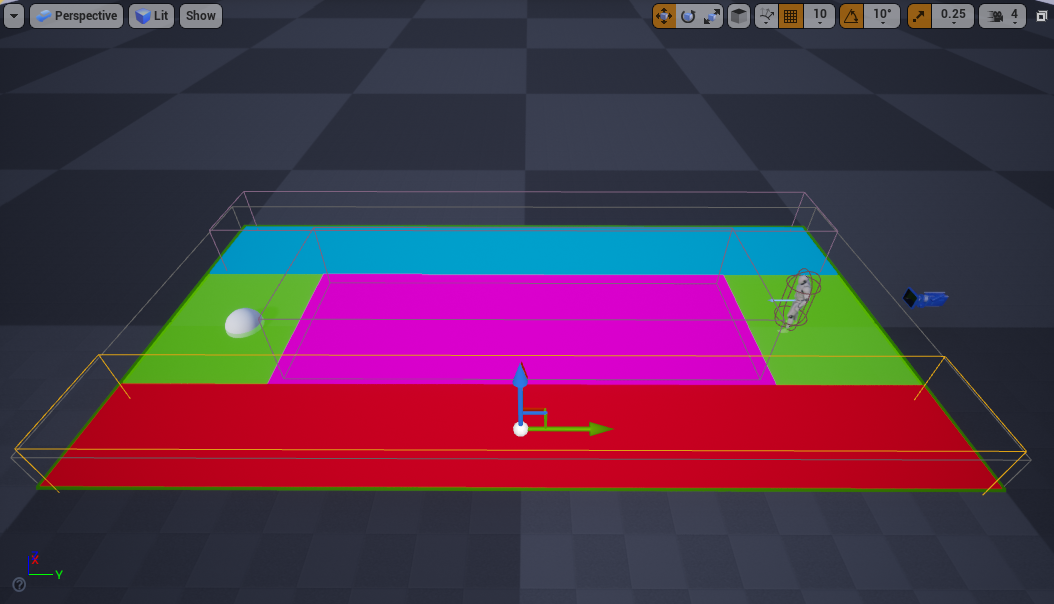
Repeat the previous step to duplicate the Nav Modifier Volume and set the Area Class to BP_Area_Lane2 . Move the volume to the side to create a lane as seen below.
![Custom-NavMod-Lane2.png]()
-
You can now experiment by changing the values of each Area Class to influence the Agent's path to its target. In the example below, the Default Cost of BP_Area_Neutral and BP_Area_Lane1 are both set to 4.
![Custom-NPC-Walk2.gif]()
-
In this example, the Default Cost of BP_Area_Neutral and BP_Area_Lane2 are both set to 4.
![Custom-NPC-Walk3.gif]()


Section Results
In this section you created three custom Area Classes and placed them in your Level. You also changed the Default Cost values of these Area Classes to influence the Agent's navigation towards its target.
2 - Creating Navigation Query Filters
-
Inside the Content Browser , right-click and select Blueprint Class under the Create Basic Asset section.
![Blueprint-Class.png]()
-
Inside the Pick Parent Class window, go to the All Classes section and expand the arrow. Search for and select Navigation Query Filter. Click Select and name the Blueprint BP_QueryFilter1 .
![Custom-Filter-Create1.png]()
![Custom-Filter-Create2.png]()
-
Double-click the BP_QueryFilter1 Blueprint to open it. Click on the Add (+) button next to the Areas section to expand it.
![Custom-Filter-Filter1a.png]()
-
Click the dropdown next to Area Class and search for and select BP_Area_Neutral . Enable the Travel Cost Override checkbox and enter 100.
![Custom-Filter-Filter1b.png]()
![Custom-Filter-Filter1c.png]()
-
Repeat the previous step to add BP_Area_Lane1 and BP_Area_Lane2 to the list. For BP_Area_Lane2 , enable the Travel Cost Override checkbox and enter 100.
![Custom-Filter-Filter1d.png]()
-
In the Content Browser , right-click the BP_QueryFilter1 Blueprint and select Duplicate .
-
Double-click the BP_QueryFilter2 Blueprint to open it. For the Area Class BP_Area_Lane1 , enable the Travel Cost Override checkbox and set its value to 100. For the Area Class BP_Area_Lane2 , disable the Travel Cost Override checkbox.
![Custom-Filter-Filter2.png]()
-
Compile and save the Blueprint.
-
Select the BP_NPC Blueprint in your Level and on the Details panel, click the Filter Class dropdown, then search for and select BP_QueryFilter1 .
![Custom-NPC-AddFilter1.png]()
-
Click Simulate and observe how the Agent is now using the Navigation Query Filter to determine the best route to its destination. Since BP_QueryFilter1 has the BP_Area_Lane1 as the cheapest route, the Agent uses it to reach the Sphere.
![Custom-NPC-Walk3.gif]()
-
Select the BP_NPC Blueprint and change the Filter Class to BP_QueryFilter2 . Click Simulate and observe how the Agent now uses BP_Area_Lane2 area to reach its destination.
![Custom-NPC-Walk2.gif]()


Section Results
In this section you created two Navigation Query Filters and added the three previous Area Classes . You also changed the cost values associated with the Area Classes to modify the Agent's navigation when using different Navigation Query Filters .