Choose your operating system:
Windows
macOS
Linux
By default players of Action RPG (ARPG) can only use items that they purchase from the store. However, this does not mean that this is the only way that players can receive items. In the following how-to, we will go over creating a pickup that can be placed in the world and picked up by the player.
Steps
-
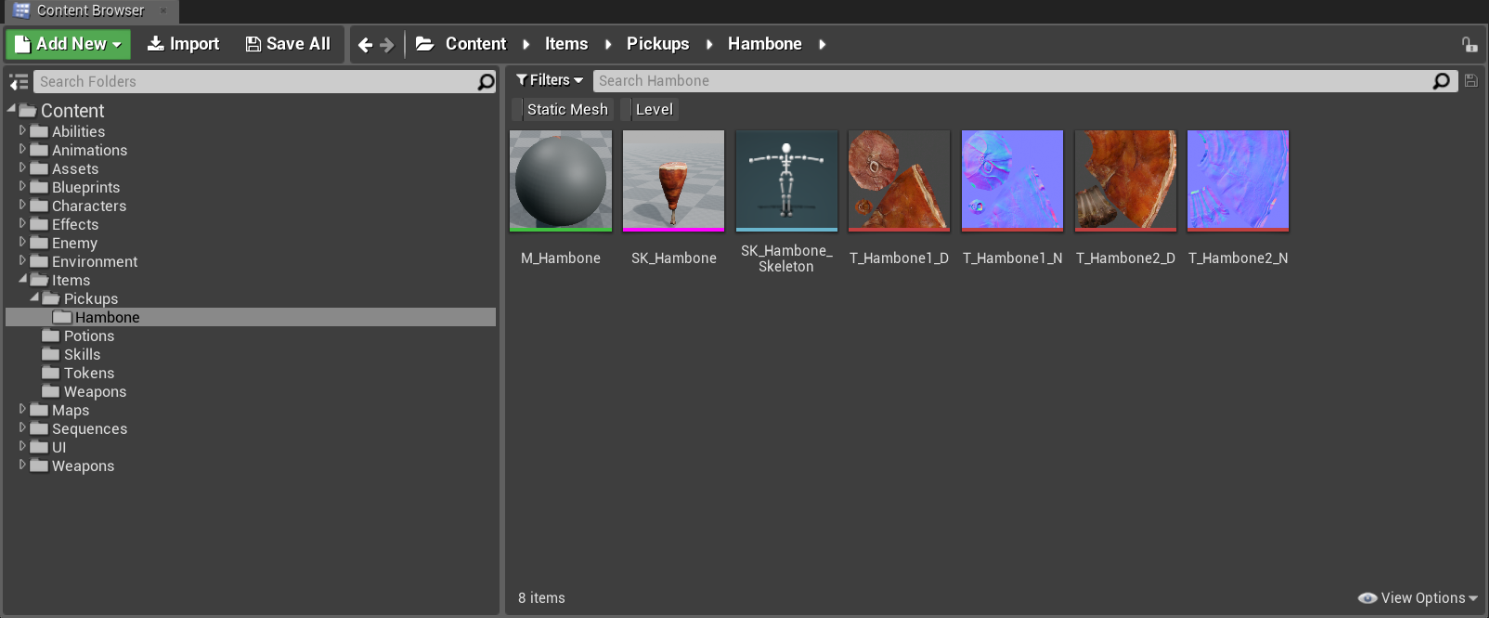
First, locate and then migrate the SK_Blunt_Hambone Skeletal Mesh and all of its assets from the Infinity Blade Weapons pack to the Action RPG project.
-
Next, create a new folder under Items called Pickups .
-
Then drag the Blunt_Hambone folder on to the Pickups folder.

-
Delete the following folders from the Blunt_Hambone folder as they do not conform the naming convention that the project uses.
-
InfinityBladesWeapons
-
Weapons
-
Blunt
-
-
Next, remove the word Blunt from the folder name and all of the various assets.
![Step5.png]()
Click for full image.
-
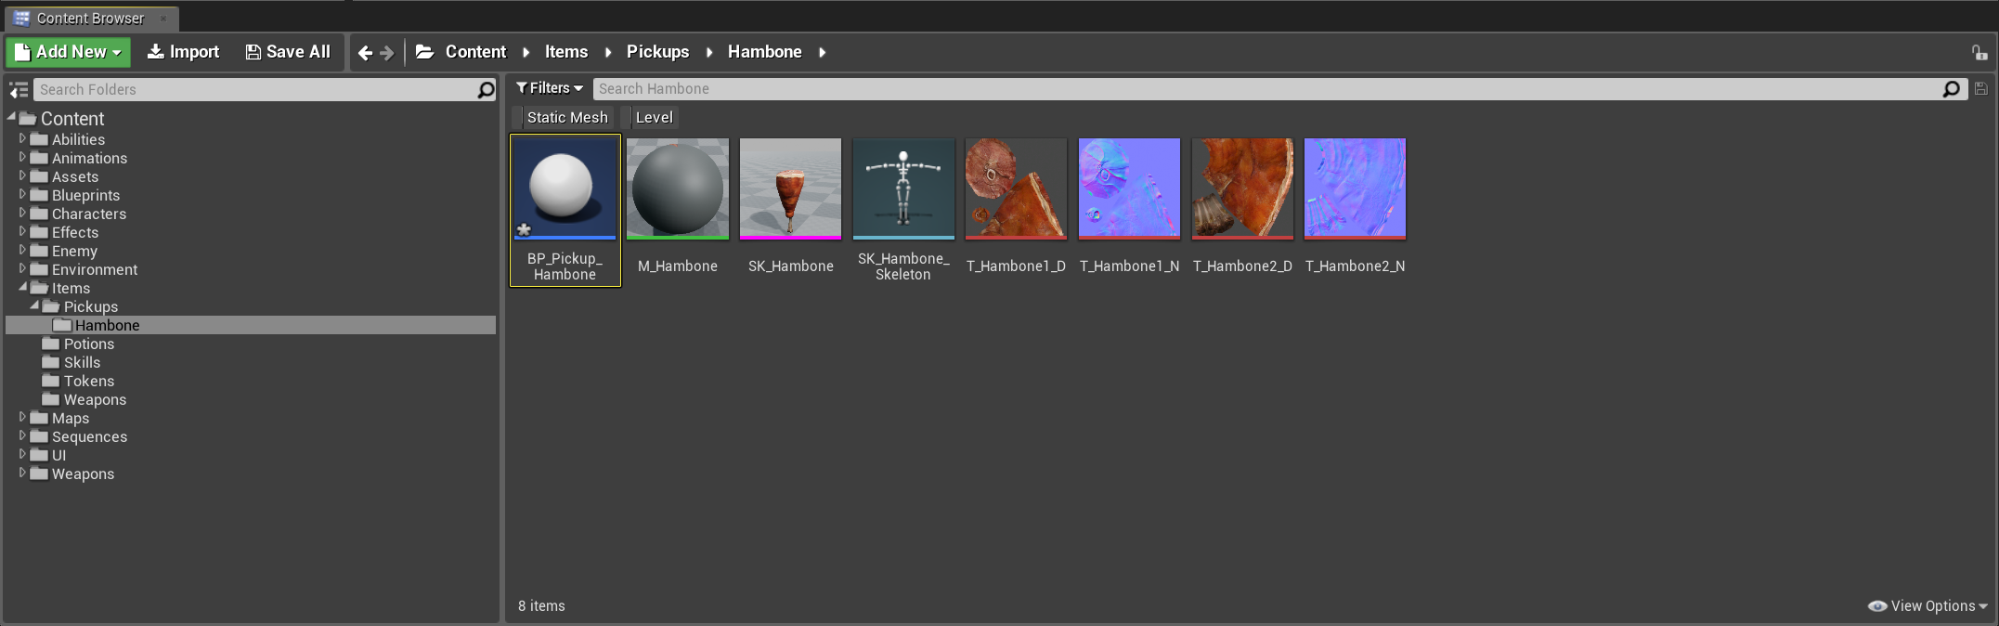
With all of the needed content now added and re-named, make sure the Hambone folder is selected and then right-click in the Content Browser and from the displayed list, select the Blueprint Class option.

-
Name the new Blueprint BP_Pickup_Hambone and then double-click on it to open it up.
![image15-1.png]()
Click for full image.
-
In the Components section add the following components with the following settings.

Components Name
Components Value
Sphere Collision
Radius = 64
Skeletal Mesh
SK_Hambone
-
Next, in the Variables section, create a new variable called PotionType with a Variable Type of RPGItem and a default Potion Type of Potion_Health .

-
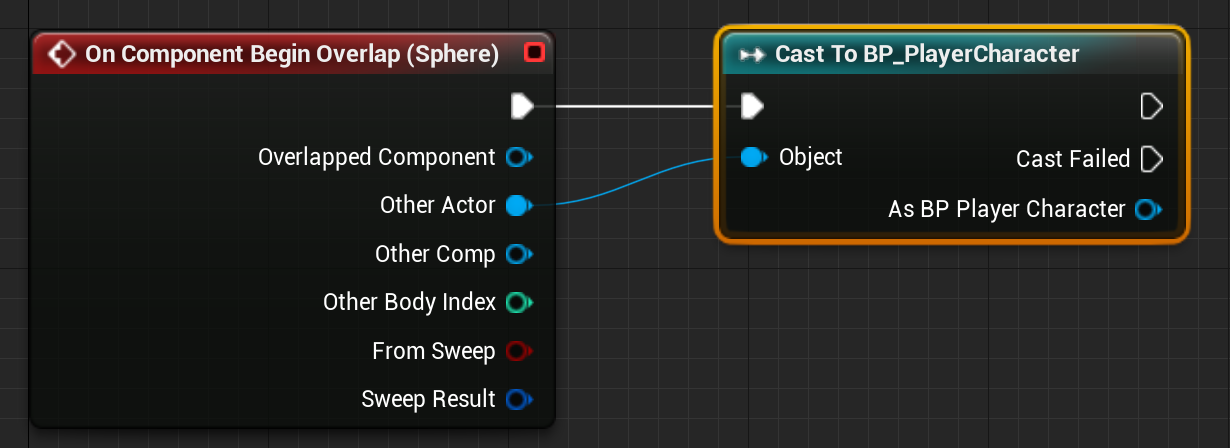
Select the Sphere collision in the Components tab and then in the Details panel, under Events , click the while plus sign icon on the On Component Begin Overlap option to add it to the Event graph.

-
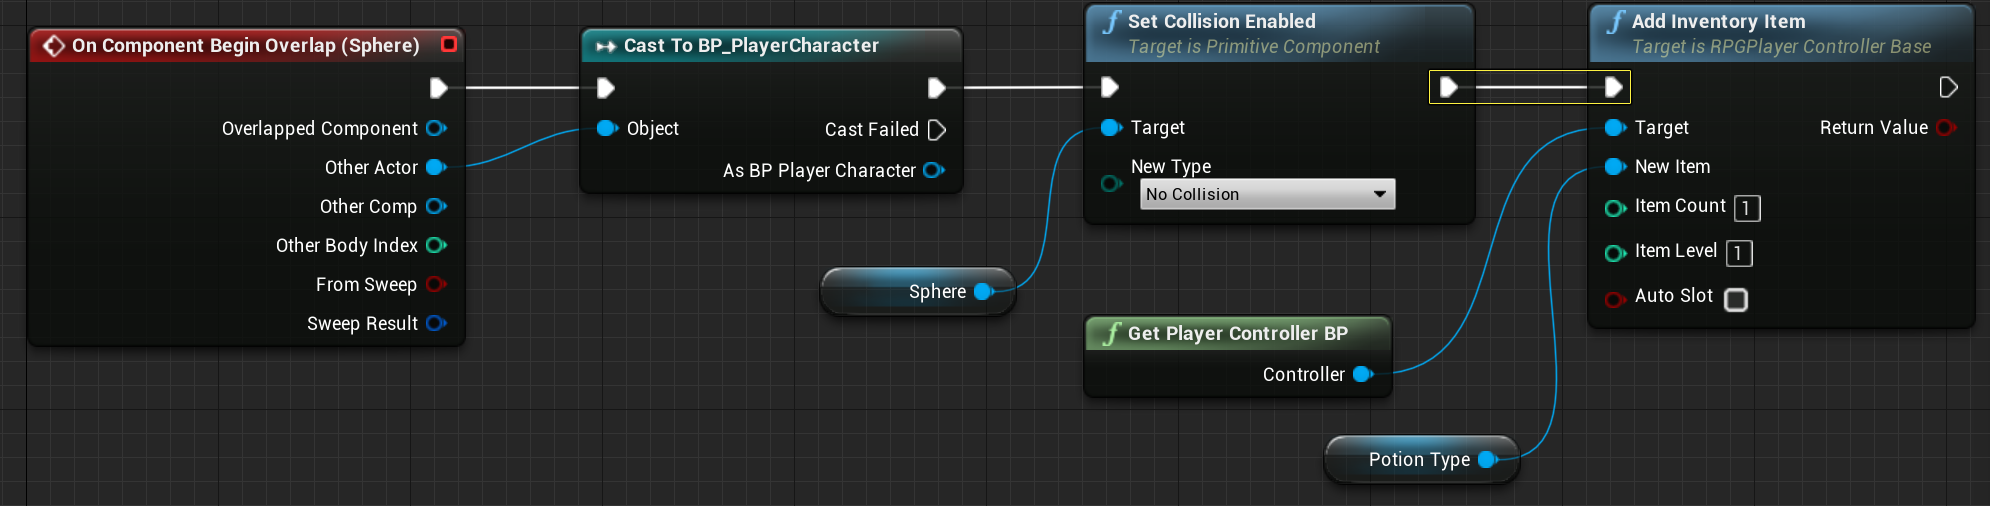
The first node that needs to be added to the Event graph is a Cast To BP_PlayerCharacter node. This will make sure that only the player will be able to use the pickup and not the enemies. Once the node has been added, connect it to the On Component Begin Overlap node so that it matches the image below.
![image15-1.png]()
Click for full image.
-
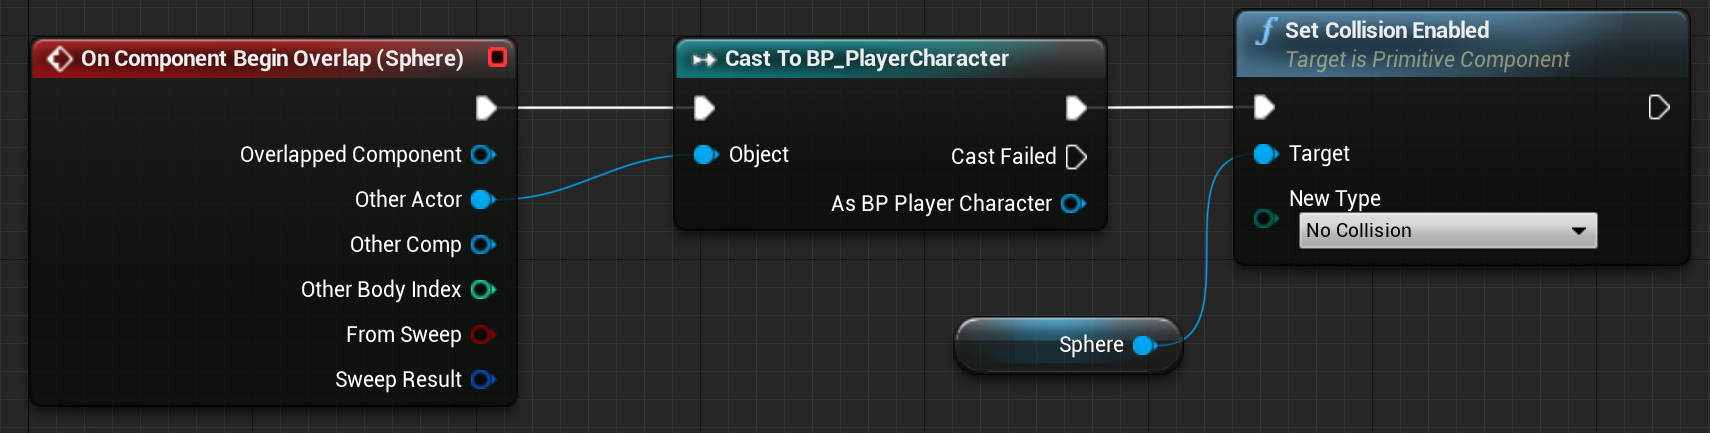
Next, we need to make sure that the pickup does not stop the player from moving as they run over it. To accomplish this add a Set Collision Enabled node to the Event graph and make sure the New Type input is set to No Collision . When completed your Event graph should look like the image below.
![image12.png]()
Click for full image.
-
Now we need to add the following nodes to the Event graph so that we can add the picked up item to the player's inventory.
-
Add Inventory Item
-
Get Player Controller BP
-
Potion Type Reference
![image10.png]()
-
-
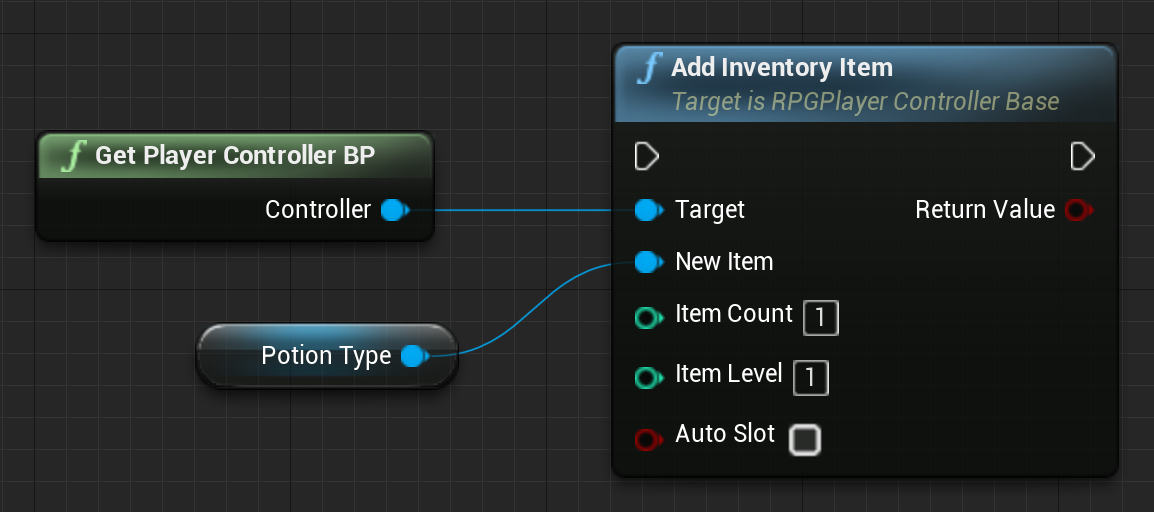
To add the potion to the current inventory, first connect the Potion Type variable to the New Item input on the Add Inventory Item node and then connect the Get Player Controller BP to the Target input on the Add Inventory Item. When completed connect your Blueprint should look like the following image:
![image8.png]()
Click for full image.
-
Next, connect the output of the Set Collision Enabled node to the input on the Add Inventory Item node. This will make sure that we are adding the right item to the right inventory slot. When completed your Blueprint should look like the following image:
![image16.png]()
Click for full image.
-
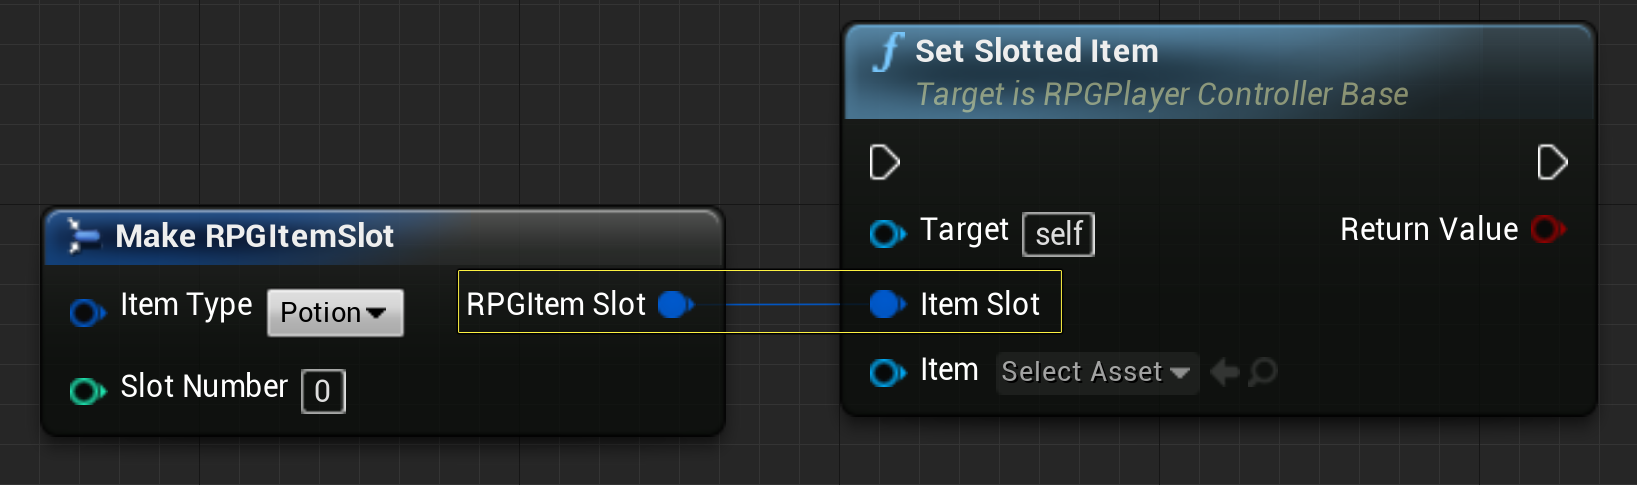
Now add a Set Slotted Item and Make RPGItemSlot nodes to the Event graph.
![image4.png]()
-
Next, we need to set up the logic that will make sure that the item that was picked up will be slotted into the correct inventory location. To do this, connect the output of the Make RPGItemSlot into the Item Slot input on the Set Slotted Item node like in the image below.
![image2.png]()
Click for full image.
-
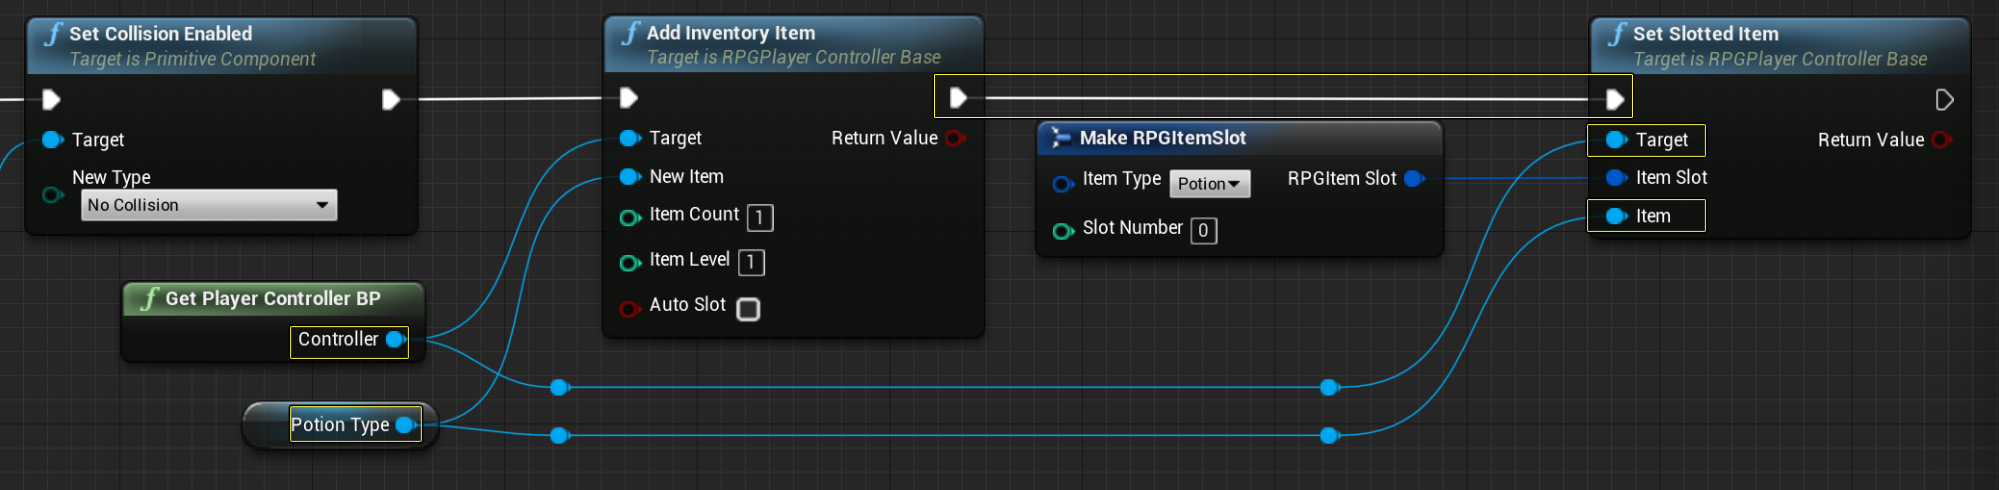
Next, connect the output of the Add Inventory Item to the input on the Set Slotted Item node. Then connect the Target input on the Set Slotted Item to the Player Controller and the Item input to the Potion Type variable. Doing this will allow the item that was picked up to be added to the correct slot in the inventory. When all of this has been completed this portion of your Blueprint should look like the following image:
![image11.png]()
Click for full image.
-
Then add a Destroy Actor node and connect the output of the Set Slotted Item node to the input on the Destroy Actor node. This will make sure that when the player walks over this item to pick it up, the item will be removed from the world. When this has been completed, your Blueprint should look like the following image:
![image14.png]()
Click for full image.
-
Finally, make sure to press the Compile and Save buttons to save your work.


End Results
With the BP_Pickup_Hambone now complete, drag the BP_Pickup_Hambone Blueprint from the Content Browser into the ARPG level and then press the Play button. When the game loads, locate the pickup in the level and run over it with the player. As soon as the player comes in contact with the BP_Pickup_Hambone pickup, the pickup will disappear and the UI and inventory will update showing that a new potion was added. You can see an example of this in action in the following video.