Choose your operating system:
Windows
macOS
Linux
For the
Pipeline State Object (PSO)
caching system to function correctly, it has to map the requested Shaders to the Materials that requested them. This is accomplished by using the
ShaderPipelineCacheTools
commandlet to build a file that contains this mapping information. After that, the data is copied to a .csv file containing the lookup tables, which the cooker can use in generating the PSO cache included in your build. This guide will walk you through the process of generating and using PSO files in your projects step-by-step.
Configuring Your Project to Generate PSO Information
This section walks you through the changes you will need to make to your project settings to support PSO caches.
-
In the Unreal Editor , open Project Settings and navigate to the Project > Packaging section. Enable both Share Material Shader Code and Share Material Native Libraries , then restart the editor to ensure these settings take effect.
![image alt text]()
-
Open your
AndroidEngine.iniin a text editor and add the following console variable under[DevOptions.Shaders]:[DevOptions.Shaders] NeedsShaderStableKeys=true
-
Open DefaultDeviceProfiles.ini in a text editor and add the following console variables under your desired device profile:
[ConsoleVariables] +CVars=r.ProgramBinaryCache.RestartAndroidAfterPrecompile=0 +CVars=r.ShaderPipelineCache.Enabled=1 +CVars=r.ShaderPipelineCache.ReportPSO=1 +CVars=r.ShaderPipelineCache.StartupMode=1 +CVars=r.ShaderPipelineCache.GameFileMaskEnabled=0 +Cvars=r.ShaderPipelineCache.LazyLoadShadersWhenPSOCacheIsPresent=1 +CVars=r.ShaderPipelineCache.BatchSize=10 +CVars=r.ShaderPipelineCache.BatchTime=0.0 +CVars=r.Vulkan.PipelineCacheFromShaderPipelineCache=1

These settings will enable the shader pipeline cache and enable your project to use PSO caches if they are available.
Logging PSO Caches On Your Device
Now that your project's packaging and rendering settings are configured for PSO caches, you will need to install a copy of the application to your device, and enable some additional logging tools. This section will show you how to modify your command line to log PSO data.
-
Package a new APK for your project, then open the folder containing your build output. Use the
Install*.batfile for your project to install the APK to your device.![image alt text]()
Shipping builds will not read UE4CommandLine.txt.
-
Open your UE4 engine installation directory, navigate to Engine/Build/Android/UE4Game directory, and locate PushCommandLine.bat .
![image alt text]()
-
Create a copy of PushCommandLine.bat for your project, then open it with a text editor. Modify the target path as follows:
%ANDROID_HOME%\platform-tools\adb.exe push UE4CommandLine.txt /mnt/sdcard/UE4Game/[MyGame]/UE4CommandLine.txt
-
In the same directory as
PushCommandLine.bat, create a new file called UE4CommandLine.txt and open it in a text editor, then add the following text:../../../[MyGame]/[MyGame].uproject -logPSO -psocache
This command will run the project with PSO logging and caching enabled.
-
Run PushCommandLine.bat to push the
commandlinefile to your device. -
Run the application on your device, then run through all sections of the app and trigger as many things as possible that need to render, including UI and navigation elements. Do this twice to ensure that every shader in every different PSO combination is generated.


Running the Android
Install*.bat
file will delete
UE4CommandLine.txt
from your device, so you should always run the
Install*.bat
file before using
PushCommandLine.bat
.
This will log PSO data for your project and store them in a Saved/CollectedPSOs directory on your device. This will usually be in
/mnt/sdcard/UE4Game/[MyGame]/[MyGame]/Saved/CollectedPSOs
, but you can find their exact location by using ADB logcat while playing through your application.
Adding PSO Caches to Your Project
After you have logged your PSOs, follow these steps to retrieve the PSO cache from your device and integrate them into a new build:
-
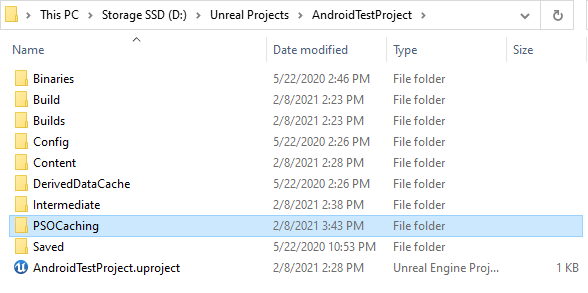
In your project directory, move all
.scl.csvfiles from [MyProject]/Saved/Shaders into a folder called PSOCaching in your project directory. If you do not have a PSOCaching folder set up, create one.![image alt text]()
-
Copy the
*.rec.upipelinecachefiles from your target device to your computer using theadb pullcommand. These will usually be located under /mnt/sdcard/UE4Game/[MyGame]/[MyGame]/Saved/CollectedPSOs . As an example, you would use the following command to pull from that directory:adb pull /mnt/sdcard/UE4Game/[MyGame]/[MyGame]/Saved/CollectedPSOs/*
The location of your
.rec.upipelinecache
file can vary depending on your device. If you do not know where to find it, use ADB logcat while you are running your application to see where it is saved.
-
In the PSOCaching folder, create a file called CreateStableCSV.bat .
-
Open CreateStablePcCSV.bat with a text editor, then fill it with the following text:
ue4editor-cmd.exe MyProject -run=ShaderPipelineCacheTools expand .rec.upipelinecache .scl.csv [MyGame]_GLSL_ES3_1_ANDROID.stablepc.csv
-
Save the changes to CreateStablePcCSV.bat , then run it. This will produce a file called
.stablepc.csvusing the information from the.upipelinecachefile. -
Copy
.stablepc.csvinto [MyGame]/Build/Android/PipelineCaches . -
Package your game as an APK one more time with the new files in place.
This will create a build with your PSO caches in place, and your project will use them to load shaders.
Re-Capturing PSO Caches in Future Builds
Whenever you change the materials in your application, you will need to collect your PSO caches again. Most of your initial setup for logging PSOs will remain intact, but you need to repeat these steps:
-
Copy the
.scl.csvfiles from [MyProject]/Saved/Shaders into your PSOCaching directory. -
Use
PushCommandLine.batto run the application with PSO logging, then run through the application to log all PSO combinations. -
Extract the
*.rec.upipelinecachefiles from your device. -
Run
CreateStablePcCSV.batto create a new copy of .stablepc.csv, then copy it into your Build/Android/PipelineCaches folder. -
Package the APK again.
Final Result
There are two ways you can verify that your PSO caches were successful.
First, after loading your new APK onto a device, check the folder /mnt/sdcard/Android/data/Android/data/[com.yourcompany.yourproject]/files/ProgramBinaryCache . There should be a file called GLSL_ES3_1_ANDROID_XXX , where XXX is replaced with a version number.
Second, when you monitor your project with ADB logcat, you should see messages reading
OnShaderPipelineCachePrecompilationComplete
, with a reference to the number of shaders that have been pre-compiled.
If both of these criteria are met, you have successfully generated and implemented PSO caches in your project, which will yield improved performance when loading new shaders.