Choose your operating system:
Windows
macOS
Linux
本文将演示如何在Maya的 老版XGen毛发创建系统 中设置Groom并导入虚幻引擎,以及如何参考[Alembic for Groom指南]来设置属性。
本文使用Maya 2018.6创建资产。
关于转换老版本XGen的说明
将导线转换为NURBS曲线
请参考下列步骤将Groom的导线转化为曲线,以便保存一组曲线并匹配你要转换的导线。
-
将Maya菜单集设为 建模(Modeling) ,以便查看可用的正确菜单选项。
![MenuSetSelection.png]()
-
从主菜单中,点击 生成(Generate) 下拉列表并选择 XGen编辑器(XGen Editor) 。
-
在 XGen 窗口中,使用 工具(Utilities) 选项卡选择 曲线的导线(Guides to Curves) 。
![XGen_Utilities.png]()
-
点击 创建曲线(Create Curves) 。
完成后,groom的输出将类似下图:

将Groom转换为XGen交互式Groom
如果你在使用老版本的XGen说明(XGen Description),需将groom转换为 XGen交互式Groom(XGen Interactive Groom) 。步骤如下:
-
选中XGen Description节点。
![XGenDescriptionNodes.png]()
-
在 建模(Modeling) 菜单中,使用主菜单点击 生成(Generate) 下拉列表,然后选择 转换为交互式Groom(Convert to Interactive Groom) 。
![XGenInteractiveGroom.png]()
将样条说明导出到NURBS曲线
请遵循以下步骤,将你选中的样条说明(spline description)导出成Alembic文件,该文件可以与插值生成的头发一起导入为NURBS曲线。
-
选中你的XGen Spline Description节点。在 建模(Modeling) 菜单集中使用主菜单点击 生成(Generate) 下拉列表。然后在列表中选择 缓存(Cache)> 导出缓存(Export Cache) 。
![SplineDescToNurbsCurve_ExportCache.png]()
-
在 导出缓存(Export Cache) 窗口中进行以下设置:
-
缓存时间帧(Cache Time Frame): 设置成 当前帧(Current Frame)
-
多个变换(Multiple Transforms): 禁用
-
写入最终宽度(Write Final Width): 启用
![SplineDescToNurbsCurve_ExportCacheWindow.png]()
-
-
为文件输入名称,文件类型选择 Alembic 。
![SplineDescToNurbsCurve_ExportCacheFile.png]()
-
点击 导出(Export) 。
-
在 文件(File) 菜单中选择 导入(Import) 。这会打开 导入(Import) 窗口,然后将Alembic('.abc')文件放入场景。
![SplineDescToNurbsCurve_ImportAlembic.png]()
导入完成后,XGen样条说明就应该已经被导出为Alembic文件,并且将内插毛发作为NURBS曲线导入。

创建属性
创建组ID属性
可在一个或多个组中导出内插毛发。虚幻引擎中可识别此类组,用于唯一材质指定。
创建组ID属性时使用以下脚本:
from maya import cmds

attr_name = 'groom_group_id'

# 注意:更改以下命名以反映节点场景。
groups = ['hair_brows_splineDescription1|SplineGrp0', 'hair_lashes_splineDescription1|SplineGrp0', 'hair_head_splineDescription1|SplineGrp0']

for groom_group_id, group_name in enumerate(groups):

    # 获取xgGroom下的曲线
    curves = cmds.listRelatives(group_name, ad=True, type='nurbsCurve')

    # 用组id标记组
    cmds.addAttr(group_name, longName=attr_name, attributeType='short', defaultValue=groom_group_id, keyable=True)

    # 添加属性范围
    # 强制Maya的alembic将数据导出为GeometryScope::kConstantScope
    cmds.addAttr(group_name, longName='{}_AbcGeomScope'.format(attr_name), dataType='string', keyable=True)
    cmds.setAttr('{}.{}_AbcGeomScope'.format(group_name, attr_name), 'con', type='string')
创建导线属性
当你为Groom创建导线属性时,只有标记为 导线(guide) 的曲线才会被用于虚幻引擎中的模拟。若未在Alembic文件中指定导线,在导入UE4的过程中,一定比例的内插毛发将被内部标记为导线。
导入无导线的groom时,使用 Groom导入选项 可设置标记为导线的内插毛发比例。默认仅10%的毛发用作导线。
创建导线属性时使用以下脚本:
from maya import cmds

attr_name = 'groom_guide'

# 获取xgGroom下的曲线
curves = cmds.listRelatives('xgGroom', ad=True, type='nurbsCurve')

# 新建组
guides_group = cmds.createNode('transform', name='guides')

# 将组标记为groom_guide
cmds.addAttr(guides_group, longName=attr_name, attributeType='short', defaultValue=1, keyable=True)

# 强制Maya的alembic将曲线导出为一个组。
cmds.addAttr(guides_group, longName='riCurves', attributeType='bool', defaultValue=1, keyable=True)

# 添加属性范围
# 强制Maya的alembic将数据导出为GeometryScope::kConstantScope
cmds.addAttr(guides_group, longName='{}_AbcGeomScope'.format(attr_name), dataType='string', keyable=True)
cmds.setAttr('{}.{}_AbcGeomScope'.format(guides_group, attr_name), 'con', type='string')

# 导线组下方的父曲线
for curve in curves:
    cmds.parent(curve, guides_group, shape=True, relative=True)
Groom_Width属性
对于Maya来说,宽度值有一个特殊的行为,不像其他DCC应用程序可以按照 Alembic for Grooms规格 来检索它们并使用它们来建立新郎。
Maya可以直接在曲线上导出宽度值,这样就不需要导出一个自定义的
groom_width
属性;导入器会自动将这些值转换为该属性。如果
groom_wdith
属性在导入虚幻引擎时与新郎一起存在,它不会被覆盖。如果
groom_wdith
没有被指定,或者不能从宽度值中转换,那么生成器将回到1厘米的值上。
从Maya导出到Alembic
-
在Maya中,选择要导出的导线和Group_ID曲线。
每个节点应拥有唯一名称。
-
在 建模(Modeling) 菜单集中,使用主菜单点击 缓存(Cache) 下拉列表,然后选择 Alembic缓存(Alembic Cache)> 将选中项导出到Alembic(Export Selection to Alembic) 。
![ExportToAlembic_ExportSelection.png]()
-
在 导出选中项(Export Selection) 窗口中的 通用选项(General Options) 类别下,将 缓存时间范围(Cache time range) 设为 当前帧(Current Frame) 。
![ExportToAlembic_ExportSelection_CurrentFrame.png]()
-
在 属性(Attributes) 类别下,输入要罗列出的 属性(Attribute) 命名,然后点击 添加(Add) 按钮。添加以下模式属性:
![ExportToAlembic_ExportSelection_AddAttributes.png]()
-
groom_group_id
-
groom_guide
-
-
在 文件名(File name) 文本框中为文件命名,并将 文件类型(Files of type) 设为 Alembic 。
![ExportToAlembic_ExportSelection_FileNameType.png]()
-
点击 导出选中项(Export Selection) 按钮。
将纹理应用于毛发UV
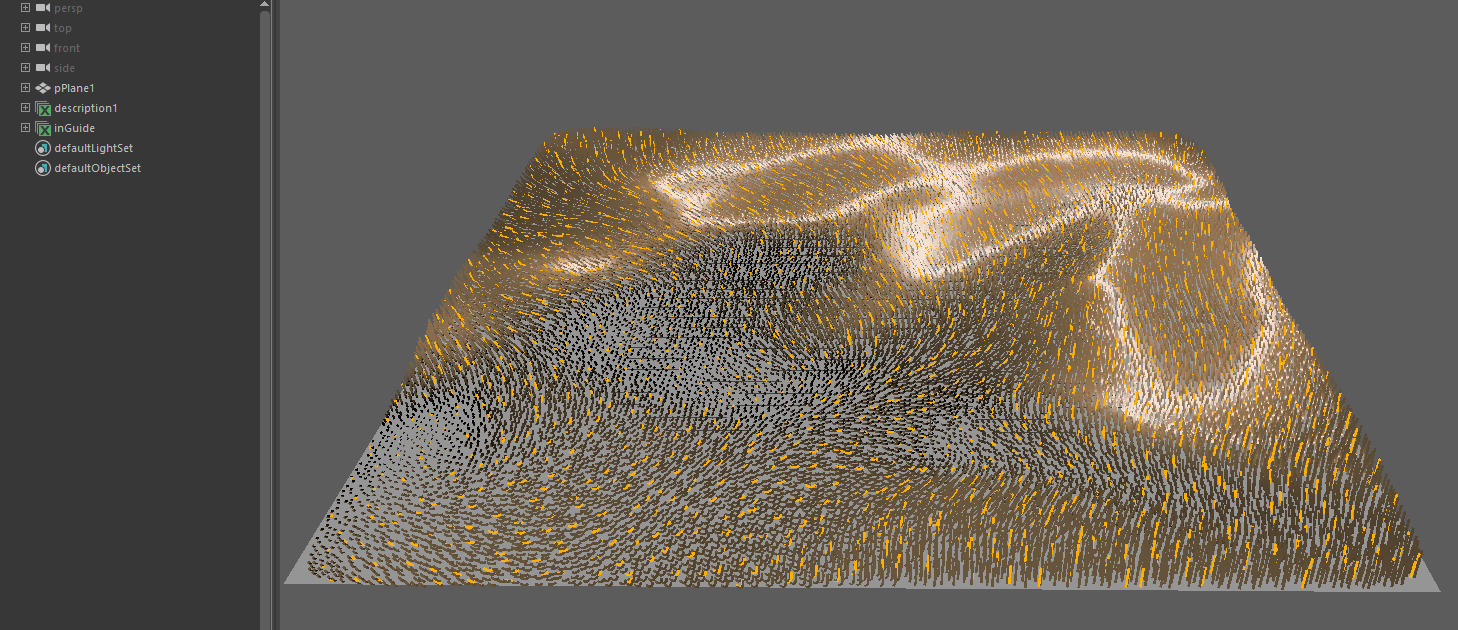
以下步骤和包含脚本可以帮助你设置自己的XGen毛发,该毛发可以导出到虚幻引擎,并且各个发束上呈现已应用的纹理。
-
在Maya的建模菜单中,选择 生成(Generate) > 创建交互式Groom样条(Create Interactive Groom Splines) 。
![HairUV_XGen.png]()
-
你可以根据自己的偏好为项目创建导线并涂刷毛发。准备就绪后,选择 生成(Generate)> 缓存(Cache)> 创建新缓存(Create New Cache) 将曲线导出为 Alembic缓存(Alembic Cache) 。
![HairUV_2_XGen.png]()
-
通过隐藏或删除XGen头发以将其移除。然后,在Maya场景中,使用源网格体重新导入之前导出的毛发曲线。
![HairUV_3_XGen.png]()
-
根据你的场景,顶部曲线下将有数千条样条曲线,本例中为 SplineGrp0 。编辑以下Python脚本,并将以下值替换为项目中的值:
-
export_directory
-
hair_file
-
curve_top_group
-
uv_mesh
你可以在 此处 下载脚本。
from maya import cmds from maya import OpenMaya import os def create_root_uv_attribute(curves_group, mesh_node, uv_set='map1'): ''' Create "groom_root_uv" attribute on group of curves. ''' # check curves group if not cmds.objExists(curves_group): raise RuntimeError('Group not found: "{}"'.format(curves_group)) # get curves in group curve_shapes = cmds.listRelatives(curves_group, shapes=True, noIntermediate=True) curve_shapes = cmds.ls(curve_shapes, type='nurbsCurve') if not curve_shapes: raise RuntimeError('Invalid curves group. No nurbs-curves found in group.') else: print "found curves" print curve_shapes # get curve roots points = list() for curve_shape in curve_shapes: point = cmds.pointPosition('{}.cv[0]'.format(curve_shape), world=True) points.append(point) # get uvs values = list() uvs = find_closest_uv_point(points, mesh_node, uv_set=uv_set) for u, v in uvs: values.append([u, v, 0]) #print (str(u) + " , " + str(v) ) # create attribute name = 'groom_root_uv' cmds.addAttr(curves_group, ln=name, dt='vectorArray') cmds.addAttr(curves_group, ln='{}_AbcGeomScope'.format(name), dt='string') cmds.addAttr(curves_group, ln='{}_AbcType'.format(name), dt='string') cmds.setAttr('{}.{}'.format(curves_group, name), len(values), *values, type='vectorArray') cmds.setAttr('{}.{}_AbcGeomScope'.format(curves_group, name), 'uni', type='string') cmds.setAttr('{}.{}_AbcType'.format(curves_group, name), 'vector2', type='string') return uvs def find_closest_uv_point(points, mesh_node, uv_set='map1'): ''' Find mesh UV-coordinates at given points. ''' # check mesh if not cmds.objExists(mesh_node): raise RuntimeError('Node not found: "{}"'.format(mesh_node)) # check uv_set uv_sets = cmds.polyUVSet(mesh_node, q=True, allUVSets=True) if uv_set not in uv_sets: raise RuntimeError('Invalid uv_set provided: "{}"'.format(uv_set)) # get mesh as dag-path selection_list = OpenMaya.MSelectionList() selection_list.add(mesh_node) mesh_dagpath = OpenMaya.MDagPath() selection_list.getDagPath(0, mesh_dagpath) mesh_dagpath.extendToShape() # get mesh function set fn_mesh = OpenMaya.MFnMesh(mesh_dagpath) uvs = list() for i in range(len(points)): script_util = OpenMaya.MScriptUtil() script_util.createFromDouble(0.0, 0.0) uv_point = script_util.asFloat2Ptr() point = OpenMaya.MPoint(*points[i]) fn_mesh.getUVAtPoint(point, uv_point, OpenMaya.MSpace.kWorld, uv_set) u = OpenMaya.MScriptUtil.getFloat2ArrayItem(uv_point, 0, 0) v = OpenMaya.MScriptUtil.getFloat2ArrayItem(uv_point, 0, 1) uvs.append((u, v)) return uvs def abc_export(filepath, node=None, start_frame=1, end_frame=1, data_format='otawa', uv_write=True): job_command = '-frameRange {} {} '.format(start_frame, end_frame) job_command += '-dataFormat {} '.format(data_format) job_command += '-attr groom_root_uv ' if uv_write: job_command += '-uvWrite ' job_command += '-root {} '.format(node) job_command += '-file {} '.format(filepath) cmds.AbcExport(verbose=True, j=job_command) def main(): export_directory = 'D:/Dev/Ref' hair_file = os.path.join(export_directory, 'hair_export.abc') curve_top_group= 'description1|SplineGrp0' uv_mesh='pPlane1' create_root_uv_attribute( curve_top_group , uv_mesh) abc_export(hair_file, curve_top_group) main() -
-
在Maya中,使用更改后的数值运行脚本。这 将 生成一个新的Alembic('.abc')文件,该文件可以导入到虚幻引擎中。
-
在虚幻引擎中,使用 毛发 着色模型创建新材质。在材质图表中,添加 毛发属性(Hair Attributes) 表达式,然后将 根UV(Root UV) 插入纹理样本的 UV 输入中。
![HairUV_4_XGen.png]()
The
groom_root_uvattribute specifies per hair the underlying mesh UV which it is attached to. This attribute is optional, and if not specified, a root UV is automatically generated in the engine using a spherical mapping. -
将导入的毛发Alembic文件从内容浏览器拖到关卡中,然后向其指定毛发材质。你应该以如下形式结束:
确保关卡中的毛发Alembic文件的宽度大于0。
![HairUV_5_XGen.png]()


