Choose your operating system:
Windows
macOS
Linux
-
Select your CineCamera Actor in the World Outliner and go to the Details panel.
![Select the CineCamera Actor]()
-
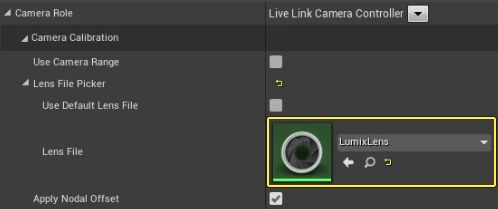
Select the LiveLink Component Controller component and scroll down to the Camera Role category. Verify that the correct Lens File is assigned to the Lens File slot. In this example the LumixLens file is used from the Quick Start Guide .
![Select the Live Link Component]()
![Check that the Lens File is assigned correctly]()
-
Click the Add Component button, then search for and select Lens Distortion to add the component.
![Add the Lens Distortion component]()
-
Scroll down to the Default section and click the dropdown next to Distortion Source . Select the LumixLens file and enable the Apply Distortion checkbox.
![Add the Lens Distortion Source]()
-
You should now see the lens distortion applied to the CineCamera Actor in the viewport.
![The lens distortion is applied to the CineCamera Actor]()
Section Results
In this guide you learned how to apply the lens distortion effect from the Camera Calibration plugin to the CineCamera Actor.


