
Choose your operating system:
Windows
macOS
Linux
When you create a new project, Unreal Engine 4 gives you a list of templates you can choose from. These templates contain some ready-to-use Assets, such as level geometry, a character you can control, and simple character animations. Many tutorials use one of these templates as a starting point.
In a third-person game, the player sees the game world from a Camera that's located at a fixed distance behind and slightly above their character. In Unreal Engine, you can control camera distance and position, and adjust it as needed.
Creating a Third Person Project
When you launch Unreal Engine, you will see a screen where you can choose to open an existing Unreal project or create something new. To create a third-person project:
-
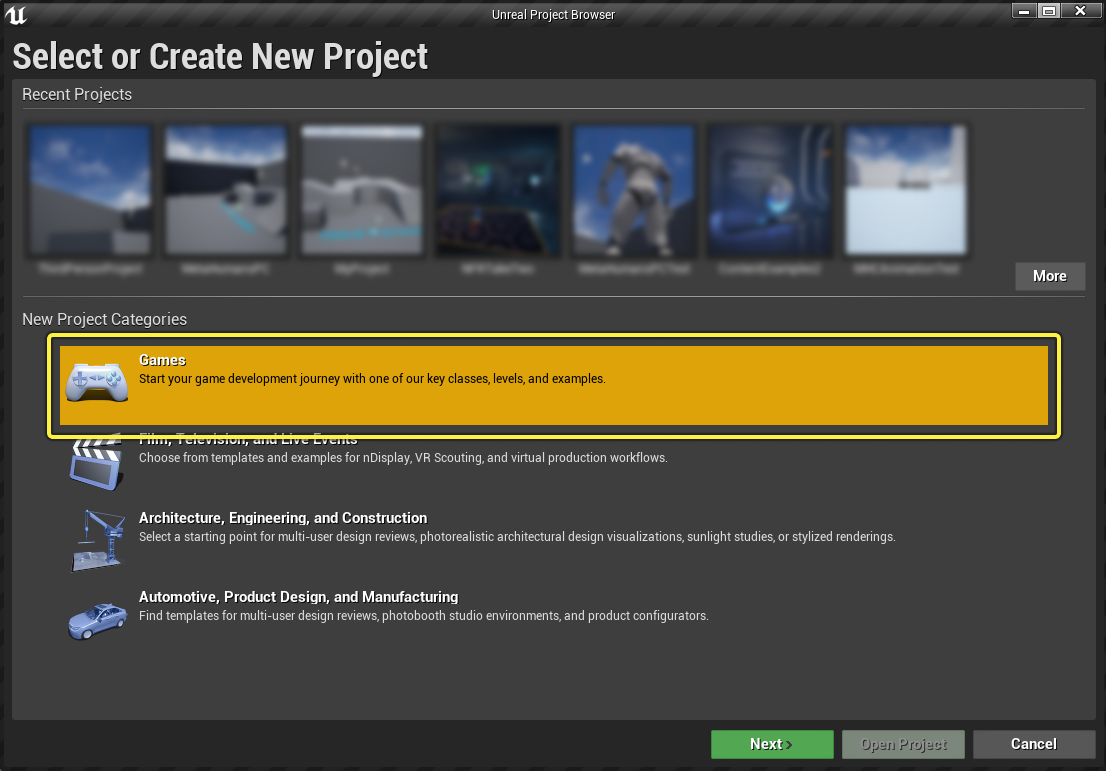
From New Project Categories , select the Games category, then click Next .
![Creating a Third Person Template Project]()
-
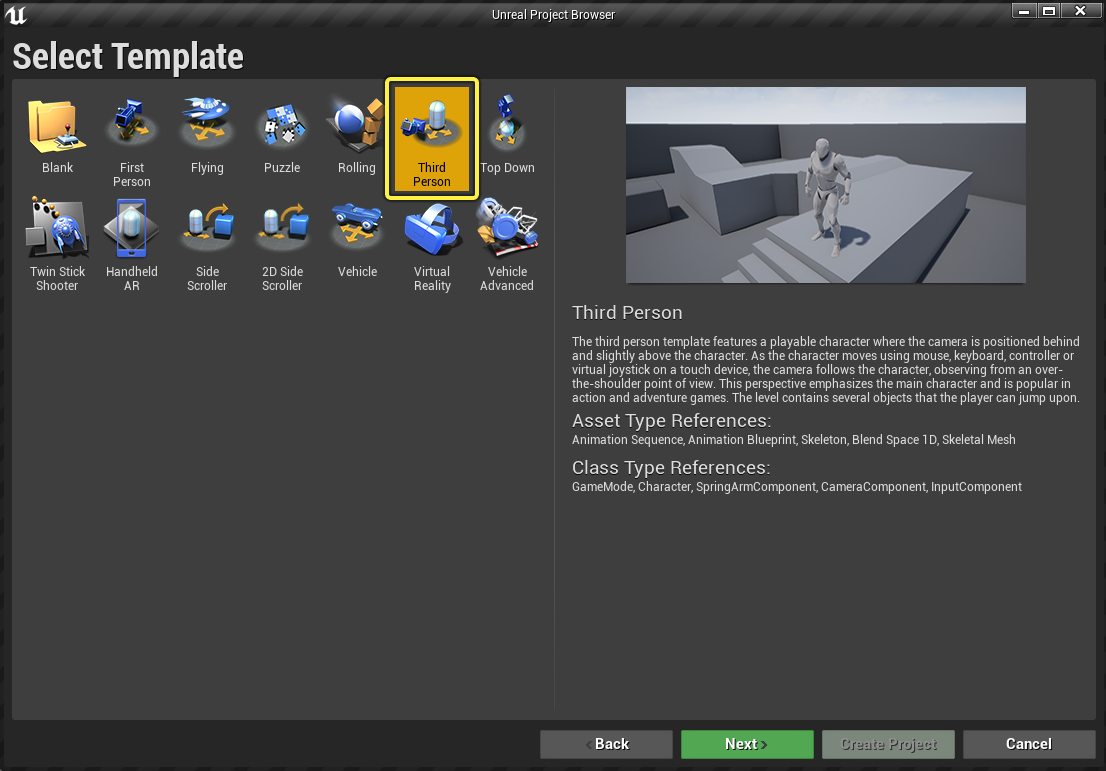
Select the Third Person template, then click Next .
![Creating a Third Person Template Project]()
-
Configure your Project Settings to choose whether you want to create a Blueprint or C++ game, which platforms you're targeting, whether to include starter content, and more. See the Project Settings documentation for more information.
If you want to have some ready-to-use objects to populate your Level with, choose the With Starter Content option. These are great to use while you get used to the controls and workflows in Unreal Engine.
End Result
After following these steps, you should have a basic Level with a third-person character you can control.
Why don't you try out your new Level? In the Main Toolbar, click Play , then try to move your character around using your keyboard and mouse.
Accessing the Interactive Tutorial
The Third Person template includes an interactive tutorial that walks you through the different components of the template and what they are used for. You can navigate to this tutorial from the
Content Browser
: go to the
Content/ThirdPersonBP
folder, and double-click the
ThirdPerson Overview
file.

After you open the tutorial file, click the Launch button to launch the interactive tutorial. As you navigate through the tutorial, the Content Browser will automatically switch between folders and highlight relevant files with a flashing green marker.
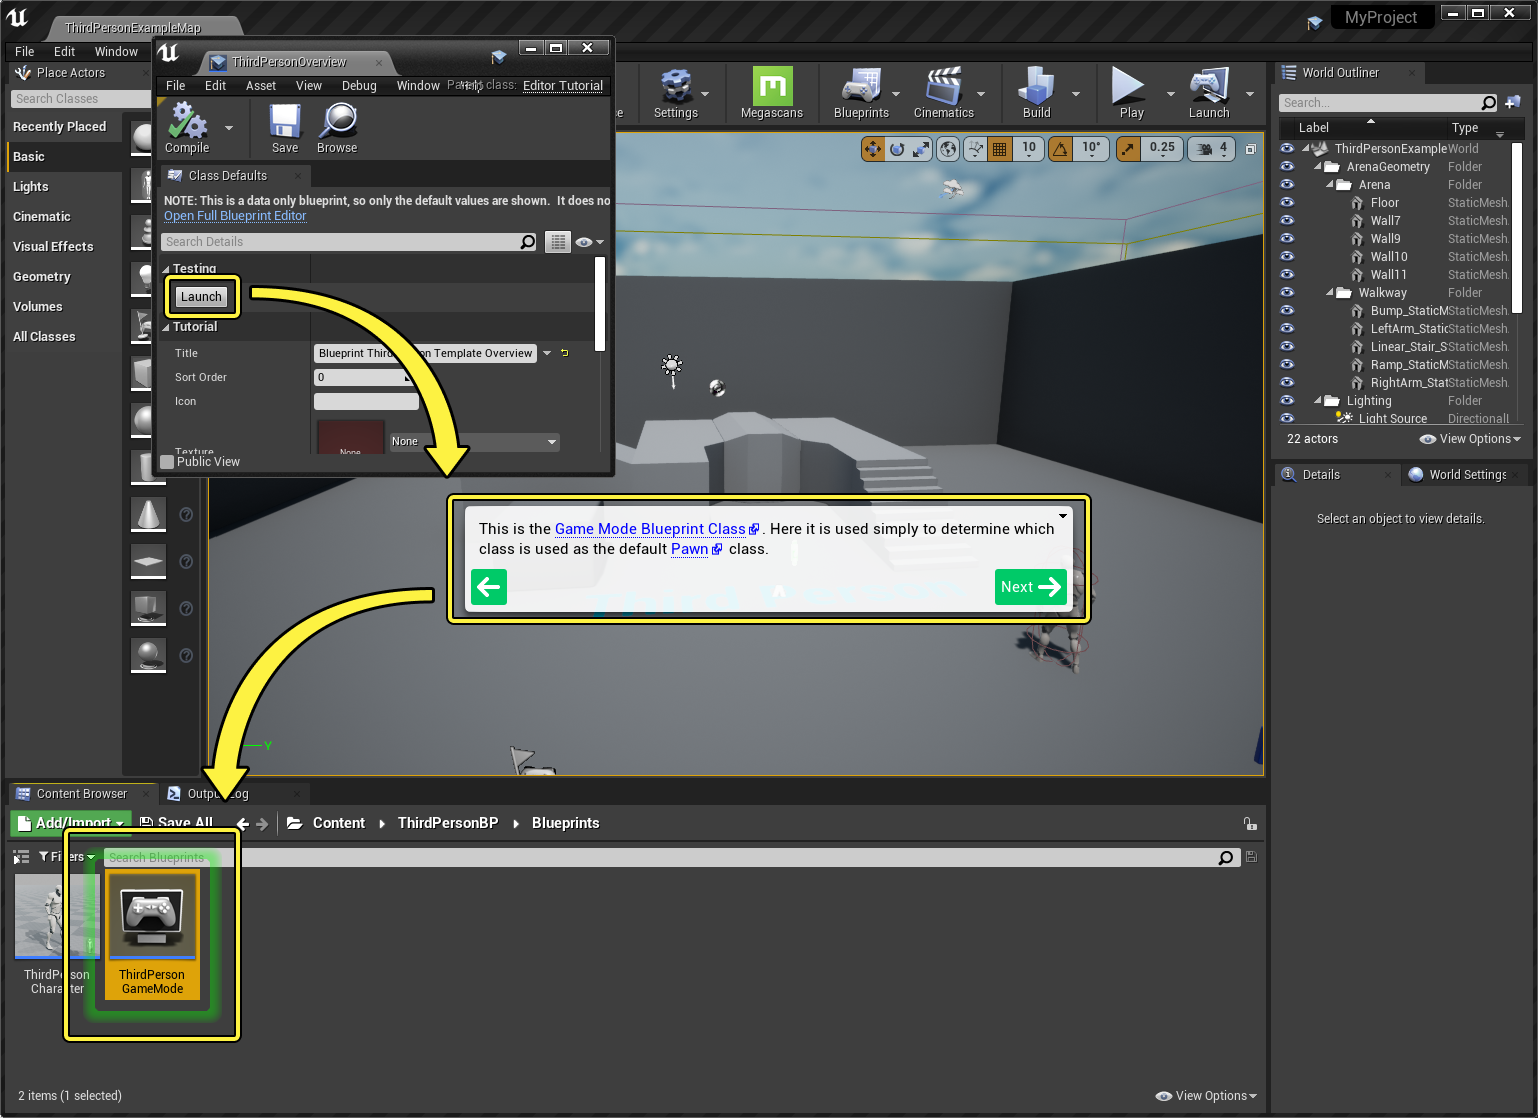
Click any of the blue links in the tutorial window to read more about that subject.
To close or restart the tutorial, open the context menu by clicking the down arrow in the upper-right corner of the tutorial window.

Improving your Project
Now that you have a playable Level, you can start to import content and tweak things to make your game more interesting.
Character
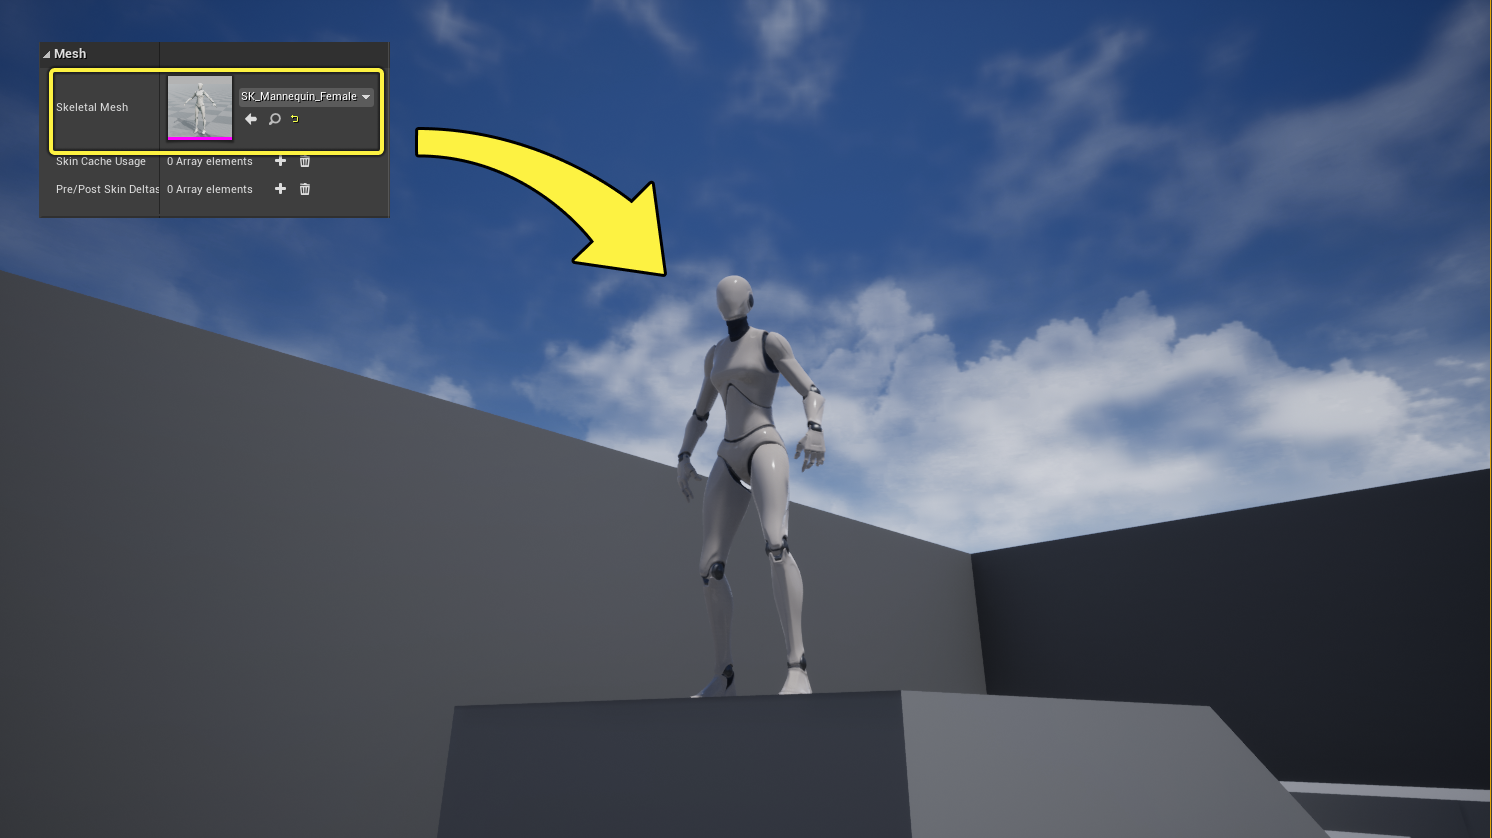
Let's start with your character model . By default, this is the Unreal Engine Mannequin. You can change it to the feminine Mannequin by following these steps:
-
Click the Mannequin to select it.
-
In the Details panel, look for the Mesh section. Use the Skeletal Mesh section to select the SK_Mannequin_Female skeletal mesh.
![Changing the playable character skeletal mesh]()
If you'd like to use a different character, you can download something from the Unreal Engine Marketplace , or use a MetaHuman character instead.
Your character can already run and jump, but you can also add other types of character movement , like walking or crouching. For a detailed tutorial, see Setting Up Character Movement .
Level
Your Level already has some simple geometry, like stairs and platforms. The easiest way to add more content inside is to drag-and-drop it from the Content Browser .
If you chose to include starter content when you created your project, you should already have some things you can drag-and-drop into your Level. If not, you can add it to your project now by following the steps on the Starter Content page.
For more in-depth instructions on how to populate your Level, see Level Designer Quick Start .
End Result
Your world is starting to take shape! You now have a playable character you can use to explore a much richer environment.
What's Next?
Now that you've gone through the basics of creating a third-person experience, here are some other things you can try:
-
Import and configure a different model for your player character. You can download premade characters from the Unreal Engine Marketplace , or create your own.
-
Add some fancy visual effects to your game, like motion blur or vignette, by using post-processing .
-
Create an in-game heads-up display (HUD) with Unreal Motion Graphics (UMG) to display information such as player health and ammo count.
-
Add AI characters using Behavior Trees . You can set them up to chase, flee, help, or harm the player.