Choose your operating system:
Windows
macOS
Linux


Previewing and applying your Materials is of critical importance to the Material creation process because it allows you see the results of the changes you make in the Material graph. This is something you should do quite often to make sure that you are getting the exact results you want. This guide explains how to preview your Material in the Material Editor viewport, and then shows how to apply a Material to your meshes in UE4.
Previewing in the Material Editor Viewport
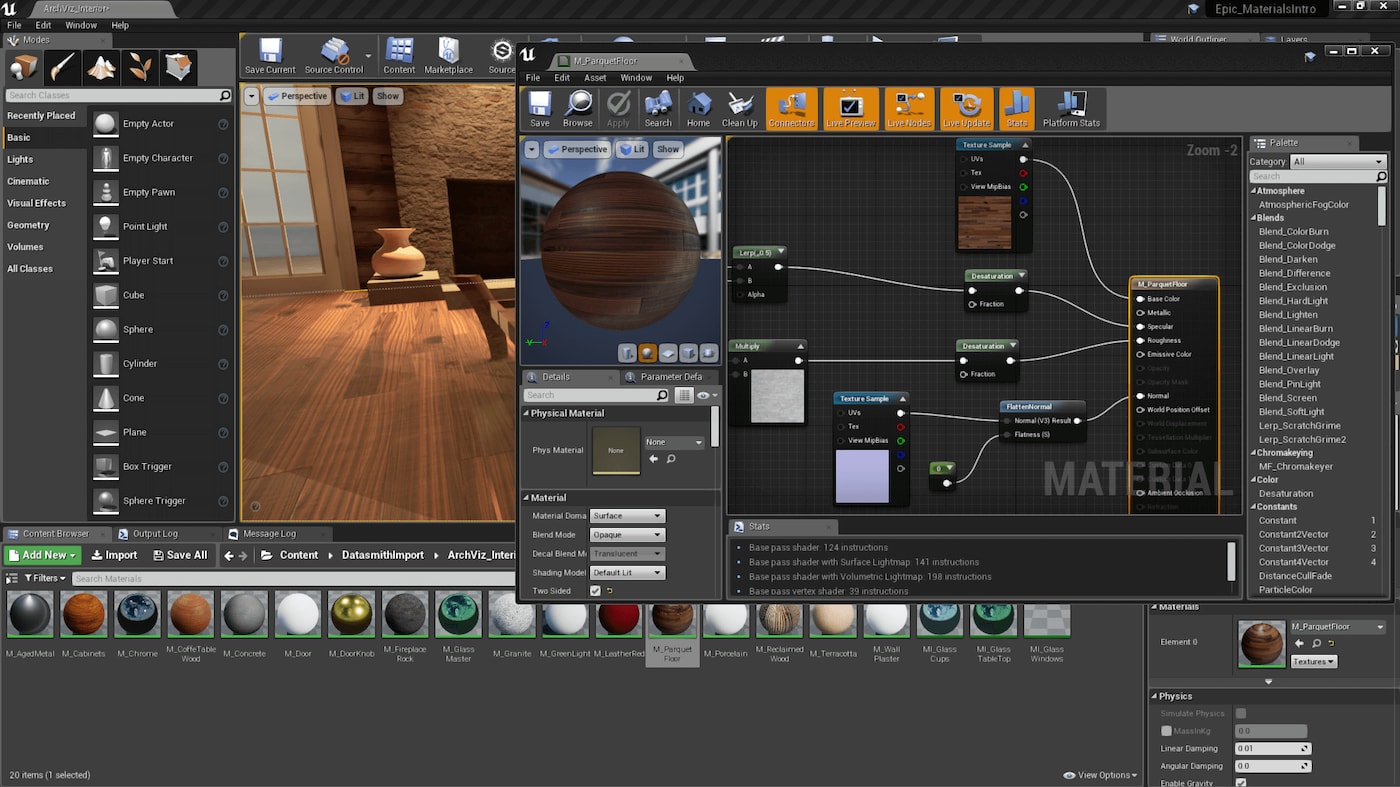
The easiest way to preview a Material is in the Material Editor viewport window. The viewport window has a number of different options to customize the look and feel of the preview environment. The image below shows a breakdown of the viewport and its various options.

|
Number |
Property |
Description |
|---|---|---|
|
1 |
Viewport Options |
This menu contains a toggle to turn the Realtime preview on and off. Also contains viewport statistics, layout options, and field of view (FOV) settings. Full documentation here . |
|
2 |
Viewport Types |
Switch between perspective and orthographic viewports. |
|
3 |
View Modes |
Choose from available View Modes and change exposure settings. Full documentation here . |
|
4 |
Viewport Show Flags |
Show or hide the background, grid, and viewport stats. |
|
5 |
Preview Mesh |
This is a preview mesh that you can use to examine how your Material will look on different objects. |
|
6 |
Preview Mesh Options |
Select from five different preview mesh options: cylinder, sphere, plane, cube, or a custom mesh. |
While inside of the Material Editor, hover your mouse cursor over any icon to display a tooltip description explaining what each of the properties does. Some of these tooltips contain links to relevant documentation.
While you are creating your Materials in the Material Editor, the viewport window will show your changes immediately if you have the Realtime option enabled. Realtime is enabled by default. You can toggle this option on and off from the Viewport Options menu.

Adjust the values in any Material Expression currently hooked up to the Main Material Node to preview changes in the viewport.
When making changes to your Material Network, it can take some time for the changes to be rendered correctly. The more complex a Material becomes, the longer it can take for the preview window to update. If you find that you need a quicker update, consider making your Material into a Material Instance .
Preview Scene Settings
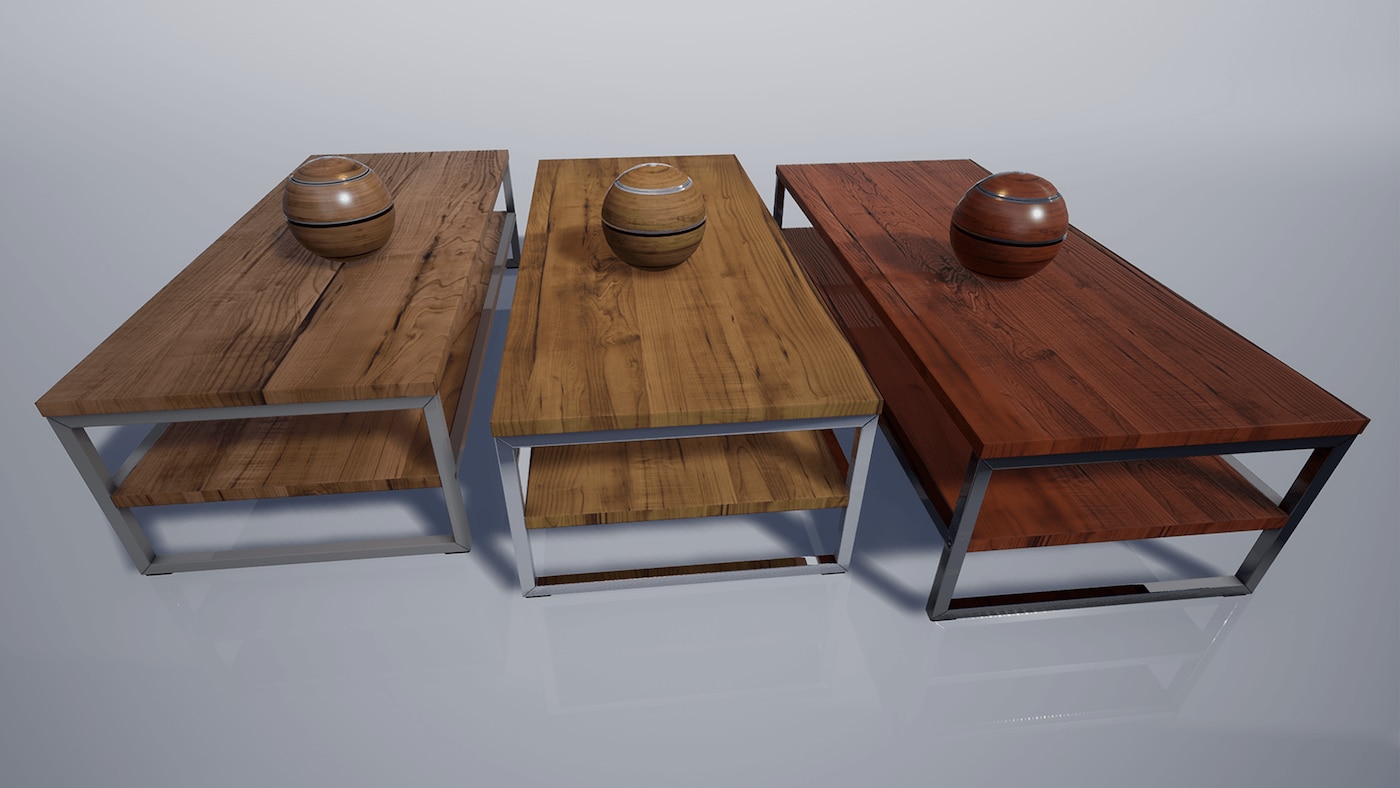
The Preview Scene Settings panel enables you to quickly preview your Materials in a variety of different environments and lighting conditions. This gives you a better understanding of how your Material will interact with light as the conditions change.
Go to Window > Preview Scene Settings in the menu bar enable the panel.

The Preview Scene Settings panel opens in the bottom left corner of the Material Editor.

Preview Scene Settings contains options to alter the color, direction, and intensity of the viewport lighting. You can also change the background, or add basic post-processing effects.
This lets you view a Material under very different lighting conditions without changing anything in the Level.


Previewing a Specific Node in the Material Graph
There are times when you may want to see the results of a single node in your Material graph. For example, if you are creating a Material that uses the Fresnel Material Expression , you might want to preview the node so you can accurately fine-tune the falloff of the Fresnel effect.
Right-click a Material Expression and choose Start Previewing Node from the menu to preview that node in the viewport.

The Fresnel node turns blue to indicate that it is currently being previewed. In the preview viewport you can clearly see the boundary of the Fresnel effect without any visual interference from other attributes like textures or reflections.

To stop previewing a node, right-click it and choose Stop Previewing Node.

Previewing Materials on a Custom Mesh
The Material Editor viewport provides four built-in preview mesh options: cylinder, sphere, plane, and cube. You can also preview your Material on a custom mesh.
-
Select any Static Mesh in the Content Browser.
![Select Static Mesh]()
-
Click the teapot icon in the bottom right corner of the Material Editor viewport to use the selected Static Mesh as the preview object.
![Custom Material Editor preview mesh]()


How to Apply Your Materials
Compile and Save
The Material Editor viewport preview updates continually as you make changes to the Material graph. However, before you can apply a Material to an object and view it within the UE4 Level, it needs to be compiled . To compile a Material, click the Apply or Save button on the left side of the Material Editor toolbar.

This will update the Material to include the changes you were just previewing. You can then apply it to a mesh and view it in the Level.
There are two main ways that you can apply Materials to objects in UE4.
Drag-and-Drop
Select a Material from the Content Browser and then drag it directly onto any object in the Level.
-
Left-click and drag a Material from the Content Browser onto an object. Release the left mouse button while hovering over an object to apply the Material.
![Apply a material by drag-and-drop]()
-
The new Material is applied to the object.
![New material applied to mesh]()


Apply a Material from the Details Panel
You can also apply a Material from the object's Details panel by clicking the Use selected asset from Content Browser button like in the following example.
-
Select a Material in the Content Browser.
![Select Material in Content Browser]()
-
Select an Actor in the viewport.
![Select Actor in viewport]()
-
Click the Use Selected Asset from Content Browser button in the Materials section of the object's Details panel.
![Use Selected Asset from Content Browser]()
-
The new Material is applied to the object.
![New Material on mesh]()


Previewing Material Parameters in the Level
The following feature requires you to use Scalar or Vector parameters, which can be updated dynamically without recompiling a Material. Read the documentation about Material Instances to learn about parameterization.
You can adjust Scalar and Vector parameters inside the Material Editor and see the results instantly in all 3D viewports.
This is especially useful for Material Functions that implement layers, as you can see the results of a tweak to the layer on all the Materials using that function instantly instead of having to wait for the Material to recompile.
To preview parameters in the Level, create a parameterized Material using Scalar or Vector Parameters and apply it to an object in your scene.
-
First make sure that the Material that you want to preview is applied to something in the level.
-
Inside of the Material, make sure that you are using Scalar or Vector Parameters as inputs for the properties you want to change. Previewing like this will not work with Constant Material Expression nodes. Only parameters can be previewed in the Level without recompiling the Material. Make sure your parameters have unique, descriptive names.
-
To see the changes happen in real time in the Level viewport, adjust the value of the Scalar or Vector parameters inside the Material. The adjustments that you make are displayed, in real time, in the Level viewport.
Conclusion
As you can see, there are a number of different ways to preview and apply your Materials in UE4 to ensure you are getting the desired results. Make sure you preview your materials often, and consider adjusting the Preview Scene settings to see your material in different lighting conditions. Remember that when you are finished editing a material, you must click Apply and Save in the Toolbar to recompile, otherwise you run the risk of losing your work.