UDN
Search public documentation:
UnrealSpecificFaceFXNodes
日本語訳
中国翻译
한국어
Interested in the Unreal Engine?
Visit the Unreal Technology site.
Looking for jobs and company info?
Check out the Epic games site.
Questions about support via UDN?
Contact the UDN Staff
中国翻译
한국어
Interested in the Unreal Engine?
Visit the Unreal Technology site.
Looking for jobs and company info?
Check out the Epic games site.
Questions about support via UDN?
Contact the UDN Staff
UE3 Home > FaceFX Facial Animation > Unreal Specific FaceFX Nodes
Unreal Specific FaceFX Nodes
Overview
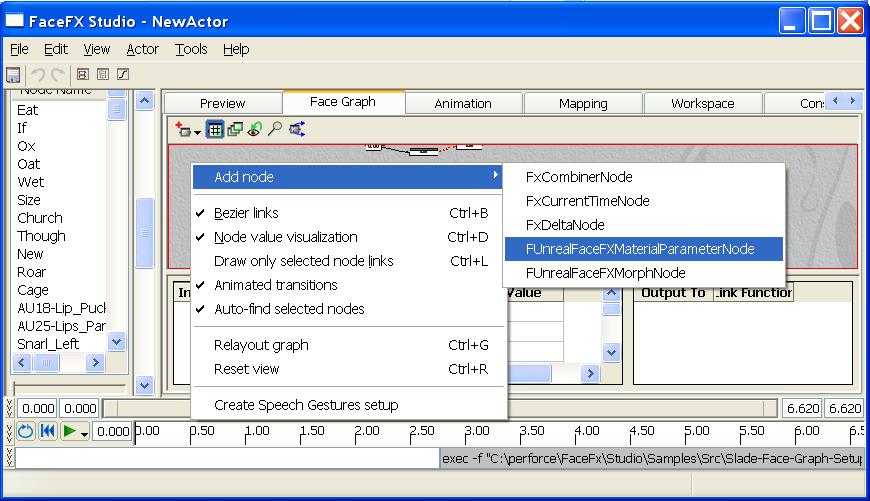
Creating the FUnrealFaceFXMaterialParameterNode
 You will notice that the node has all of the same funtionality as a combiner node, but it also has a few extra properties: Material_Slot_Id and Parameter_Name. You can modify these properties by selecting the node in the Face Graph and editing the Face Graph node properties.
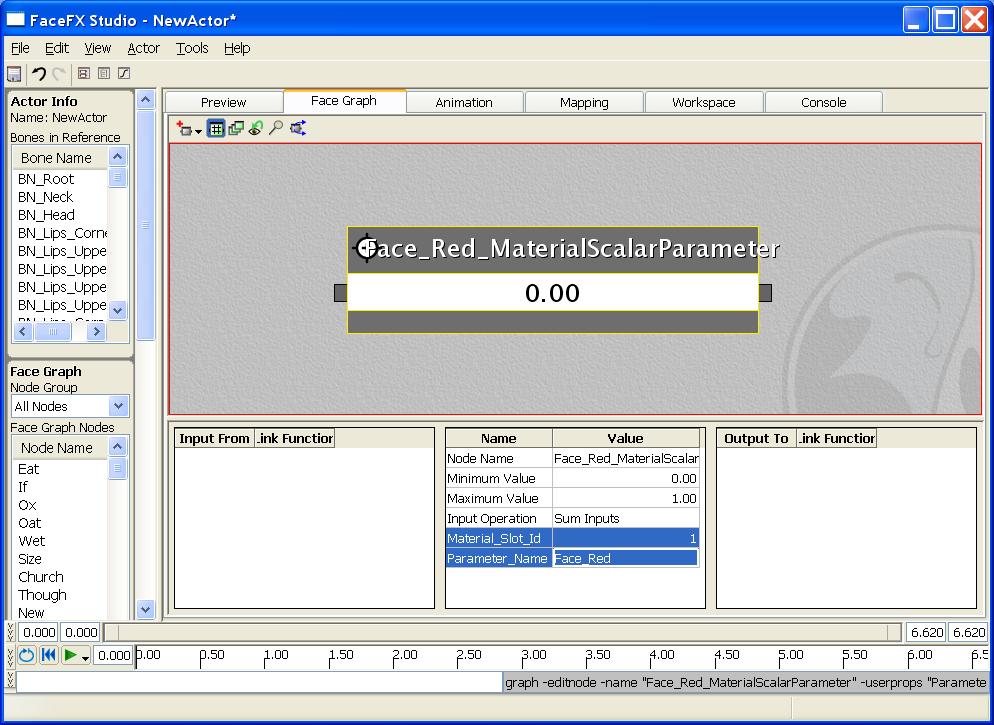
Modify the Material_Slot_Id
The Material_Slot_Id references the material slot we want to animate. In this case we are modifying Slade's main texture which resides in Material slot 1. To view your skeletal mesh's material slots, open the AnimSet Viewer by double clicking on the skeletal mesh and go to the Mesh tab on the right. We want our new Face Graph node to reference Material slot 1, so type "1" into the Material_Slot_Id property in the Face Graph with the newly created FUnrealFaceFXMaterialParameterNode selected. Hit enter.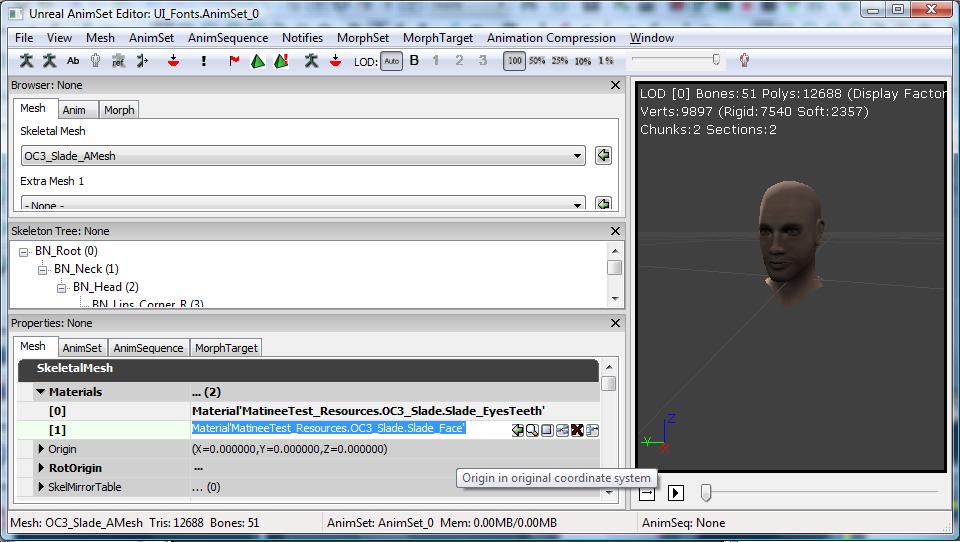
Modify the Parameter_Name
To make the face turn red, start by making a Scalar parameter called Face_Red that changes the Emissive channel of the texture. To drive this Scalar parameter from FaceFX, Type "Face_Red" into the Parameter_Name property in the Face Graph with the newly created FUnrealFaceFXMaterialParameterNode selected. Hit enter.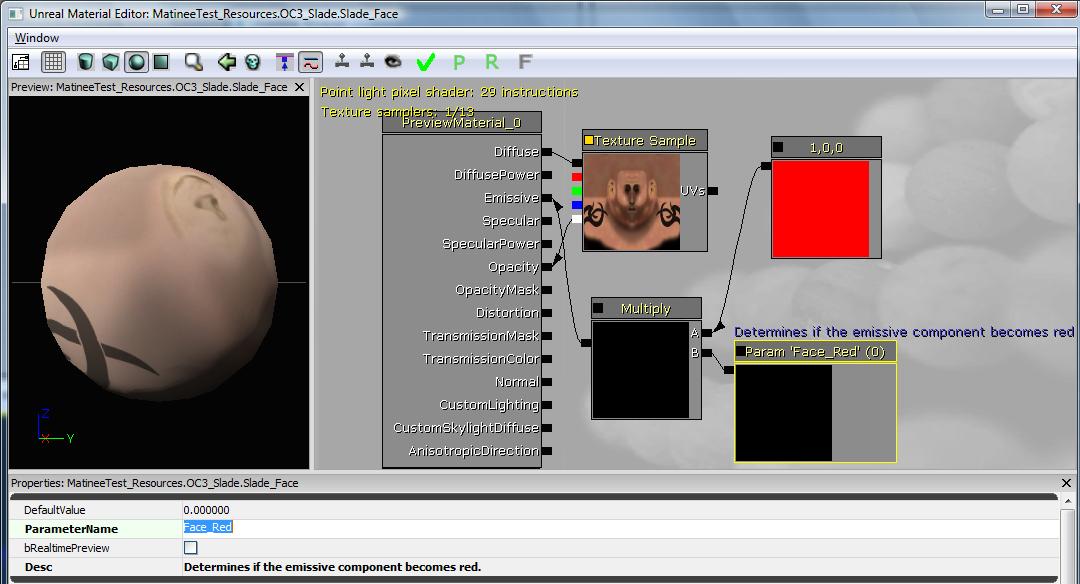
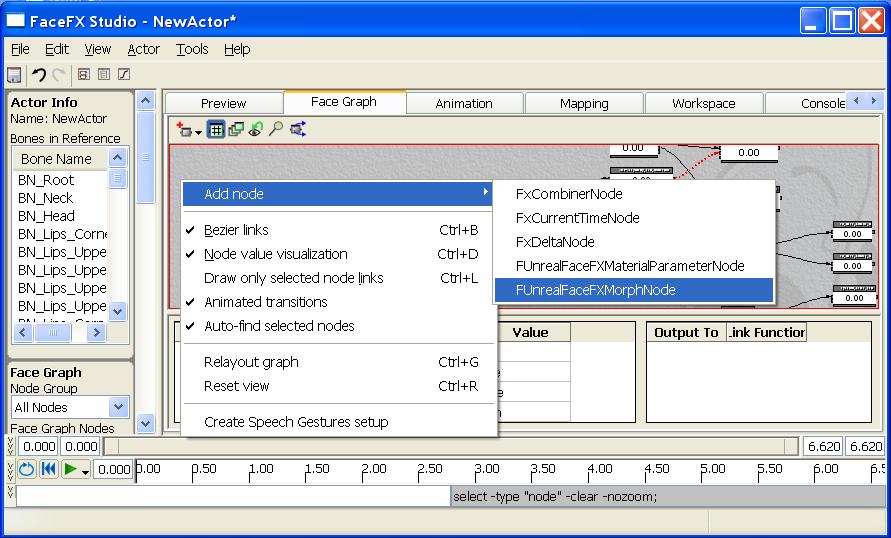
Creating the FUnrealFaceFXMorphNode
 To create the morph node, right-click in the Face Graph and select Add Node -> FUnrealFaceFXMorphNode. Call the node Slade_Egghead_MorphTarget. Morph target nodes only have one additional parameter: Target_Name.
Modify the Target_Name
For morph target nodes, you only need to specify the name of the morph target you want to drive. In this case, type Slade_Egghead into the Target_Name property in the Face Graph with the newly created FUnrealFaceFXMorphNode selected.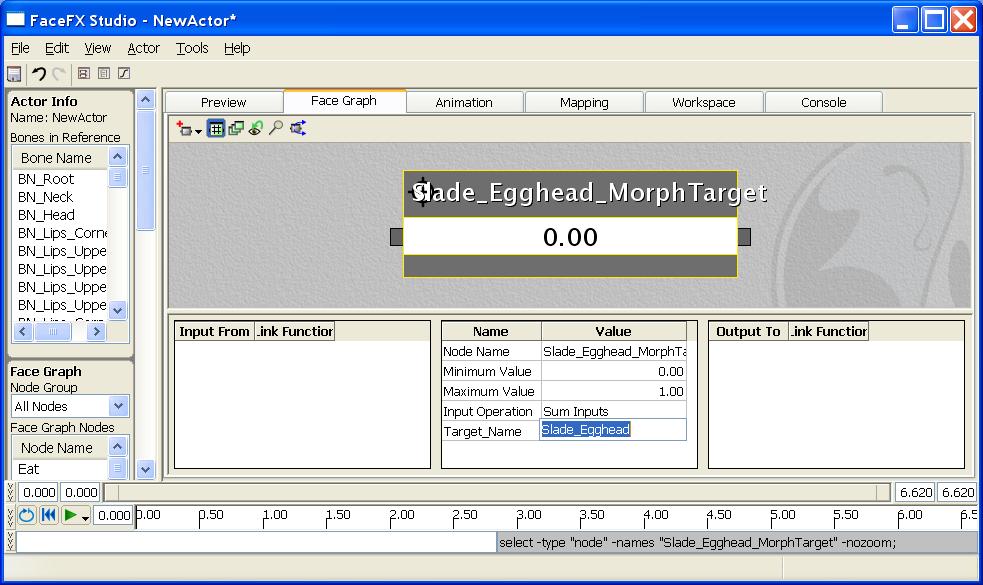
Animating the Unreal-specific Nodes
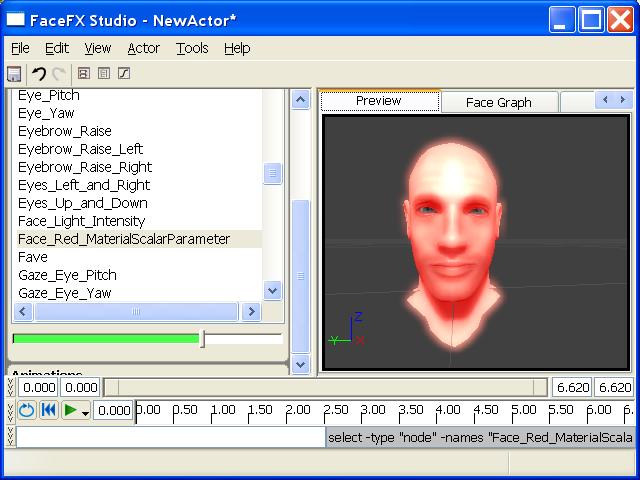
 Now go to the Preview tab in FaceFX and open the "Face Graph" section of the Actor Panel on the left. Make sure the "Node Group" selected at the top of the "Face Graph" section is All Nodes. You should be able to scroll down to the bottom of the list and see the newly created Unreal-specific nodes. Or you can sort the list of nodes and find them by name. You can use the quick preview slider below the list of nodes to drive the targets. First drive the face_Red_MaterialScalerParameter.
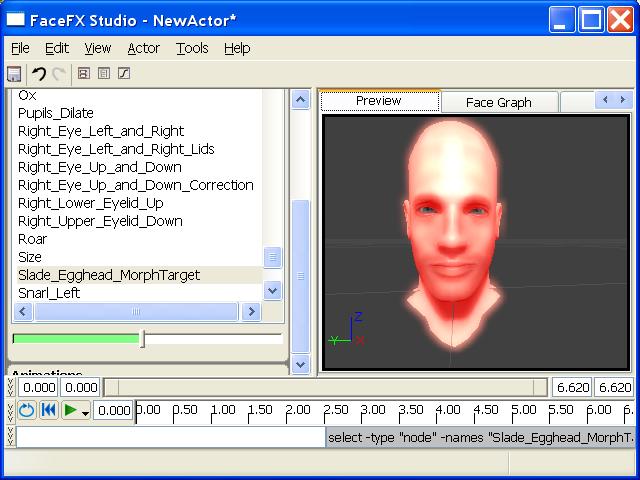
 Next select the Slade_Egghead_MorphTarget from the "Face Graph" section of the Actor Panel. Drive it's node value up. Now both nodes have values.
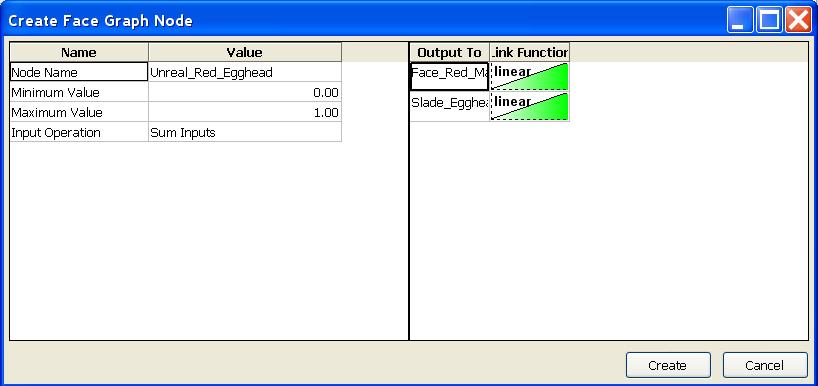
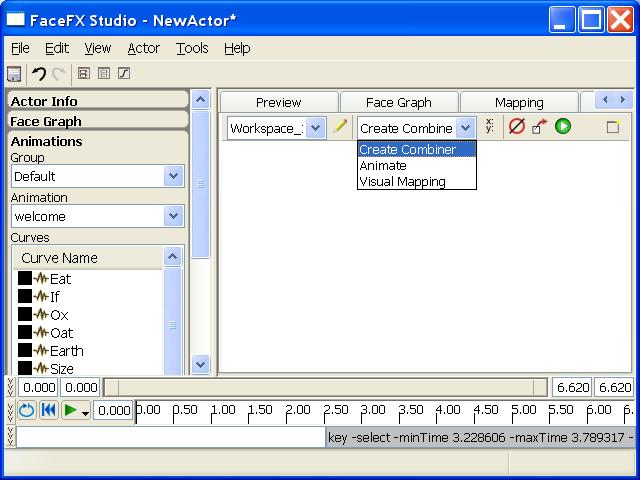
 Finally, go back to the Workspace tab, and click on the "Create Combiner Node From Sliders" button. This will bring up the "Create Face Graph Node" dialog. Change the name of the new node to "Unreal_Red_Egghead", then hit the Create button. This will create a new combiner node in the face graph that drives both Unreal nodes simultaneously. You can also modify the Face Graph directly from the Face Graph Tab, but using the quick preview slider allows for a more visual creation process.