UDN
Search public documentation:
DevelopmentKitGemsRacerStarterKit
日本語訳
中国翻译
한국어
Interested in the Unreal Engine?
Visit the Unreal Technology site.
Looking for jobs and company info?
Check out the Epic games site.
Questions about support via UDN?
Contact the UDN Staff
中国翻译
한국어
Interested in the Unreal Engine?
Visit the Unreal Technology site.
Looking for jobs and company info?
Check out the Epic games site.
Questions about support via UDN?
Contact the UDN Staff
UE3 Home > Unreal Development Kit Gems > Racer Starter Kit
UE3 Home > Getting Started: Programming > Racer Starter Kit
UE3 Home > Getting Started: Programming > Racer Starter Kit
Racer Starter Kit
Last tested against UDK July, 2011
- Racer Starter Kit
- Overview
- What's included?
- Code / Kismet structure
- How does the camera work?
- How does the player get a vehicle at the start of the map?
- How does the concatenate Kismet node work?
- How does the teleport vehicle Kismet node work?
- How does the game work overall?
- How does the game render textures on the screen?
- How does the game handle restarting?
- How does the game handle end game?
- How to use this starter kit?
- Downloads
Overview
This starter kit has example code which you can use as a starting point to develop a car racing game.
What's included?
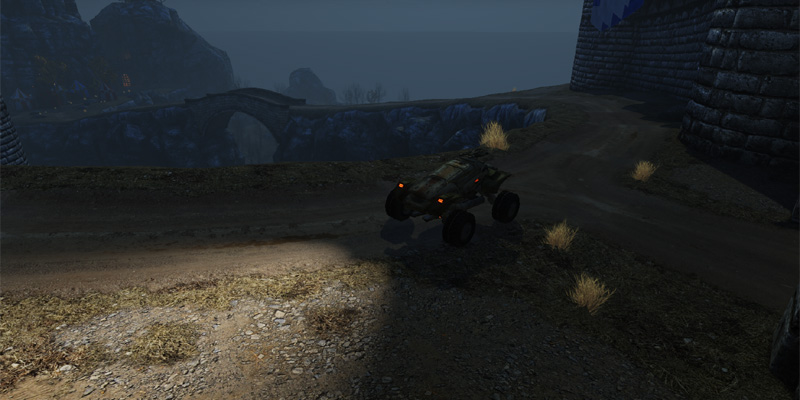
- Simple wheeled vehicle (SRG_Vehicle + SRG_VehicleCameraProperties) - This vehicle is a simplistic vehicle that can be archetyped with properties. They also override the camera using properties stored inside a VehicleCameraProperties archetype.
- Custom Kismet (SRG_SeqAct_ConcatenateStrings + SRG_SeqAct_VehicleTeleport) - There are two custom Kismet sequence action nodes, one allows Kismet to concatenate two strings together and the other teleports a vehicle to another actor's location.
- Game info using an archetyped vehicle (SRG_GameInfo) - The game info creates an archetyped vehicle for the player and gives the player an archetyped weapons. Archetypes are used here as it allows game designers to quickly adjust parameters without having to recompile.
- Sample map - A modified version of Epic Citadel is included with all the Kismet game logic required to simulate a racing game.
Code / Kismet structure
How does the camera work?
The default implementation of cameras in Unreal Engine 3 allow the player's current pawn or vehicle to override the camera location and rotation. This is done within CalcCamera, and you can see an implementation of that within SRG_Vehicle. SRG_Vehicle by default implements a third person camera. By using SRG_VehicleCameraProperties it can become any kind of third person camera such as top down or behind view. In this case, camera offset has been set to a behind view camera. By first calculating the potential camera location and then performing a trace between the vehicle's location and the potential camera location we can ensure that the camera does not embed itself within the world. This is because if the trace hit an actor that was considered to be part of the world (by checking the bWorldGeometry flag), it will adjust the potential camera location to the hit location (with a little bit of an offset applied by using the hit normal). If the trace did not hit anything, then the original potential camera location is used. The rotation of the camera is done by finding the direction between the vehicle location and the camera location. This is then converted into a rotator for the camera rotation. This creates a camera that always looks at the vehicle regardless of the camera location and pawn location. Finally the FOV is handled by linearly interpolating between a minimum and maximum value, stored in an archetype of SRG_VehicleCameraProperties, based on the relative speed of the vehicle. The relative speed is found by finding the magnitude of the vehicle's velocity vector and then dividing that by the maximum speed of the vehicle. This handles the pull out effect seen in many other car racing games, to give the sensation of speed while driving.How does the player get a vehicle at the start of the map?
By default, Unreal Engine 3 will spawn a pawn for you to control. You can change this behavior by overriding a function called RestartPlayer within your subclassed GameInfo class. When RestartPlayer is called, a suitable Player Start is first found. If one cannot be found, the player does not get "restarted". A simple pawn is given to the player at first, this is done as Unreal Engine 3 normally expects the player to be controlling a pawn before it drives a vehicle. After the pawn is possessed by the player, a vehicle is then spawned using the SpawnDefaultVehicleFor function. By ensuring that the pawn has no collision before spawning the vehicle, the vehicle will not fail to spawn due to collision encroaching issues. When the vehicle is spawned, the player's pawn then attempts to drive the newly spawned vehicle. The SpawnDefaultVehicleFor uses a similar method to GameInfo's SpawnDefaultPawnFor, with the addition that it uses an archetyped vehicle to do so. The reason why an archetype was used in this case, is to allow modifications to the vehicle without having to recompile the source code. This means that you can make changes to the vehicle within Unreal Editor and immediately start testing the changes.How does the concatenate Kismet node work?
When this Kismet node is activated it simply reads ValueA and ValueB, and depending on ConcatenateWithSpace whether to concatenate with a space or not. The result is then outputted to StringResult. These variables are automatically set by Unreal Engine 3 and setting VariableLinks appropriately. This is done by setting PropertyName to the variable name, where you want a Kismet variable to automatically populate a variable. It can also go the other way around by using the bWriteable flag, where a Kismet variable is automatically updated based on the Unrealscript value.How does the teleport vehicle Kismet node work?
When this Kismet node is activated it first attempts to cast Vehicle and Destination into a SVehicle and an Actor respectively. This is because while these fields are automatically populated by Kismet, they are populated as Objects. If the casts succeeds, the vehicle is then checked to ensure that it has a mesh and has set its physics to PHYS_RigidBody. This is because SetRBPosition, SetRBRotation, SetRBLinearVelocity and SetRBAngularVelocity are required to set the position, rotation, linear velocity and angular velocity of the vehicle. All of this is required because using SetLocation and SetRotation won't work for PhysX simulated actors.How does the game work overall?
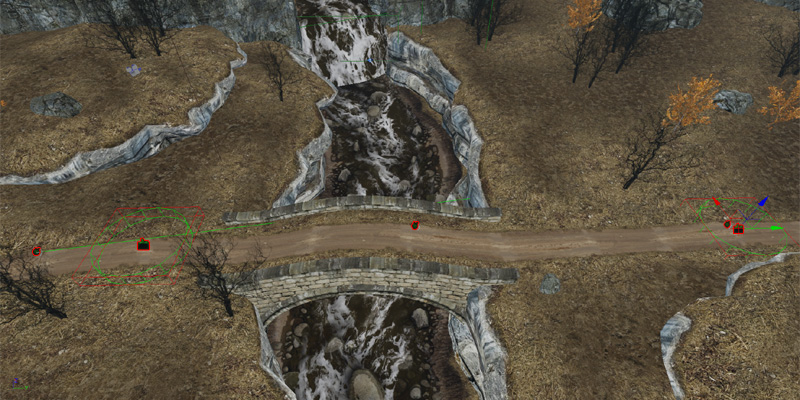
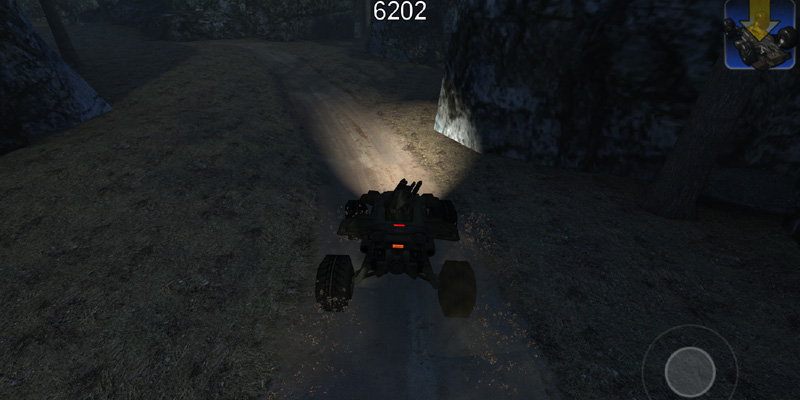
The game works by using Kismet to control the majority of the actual game logic. When the game first starts, it will start playing back a Matinee where a camera performs a fly by. During this time, the entire screen will respond to a touch to start the game. The player's vehicle has already been spawned, but is usually hidden from view. When the player touches the screen to start playing the game, the player's vehicle is teleported to the first initial check point.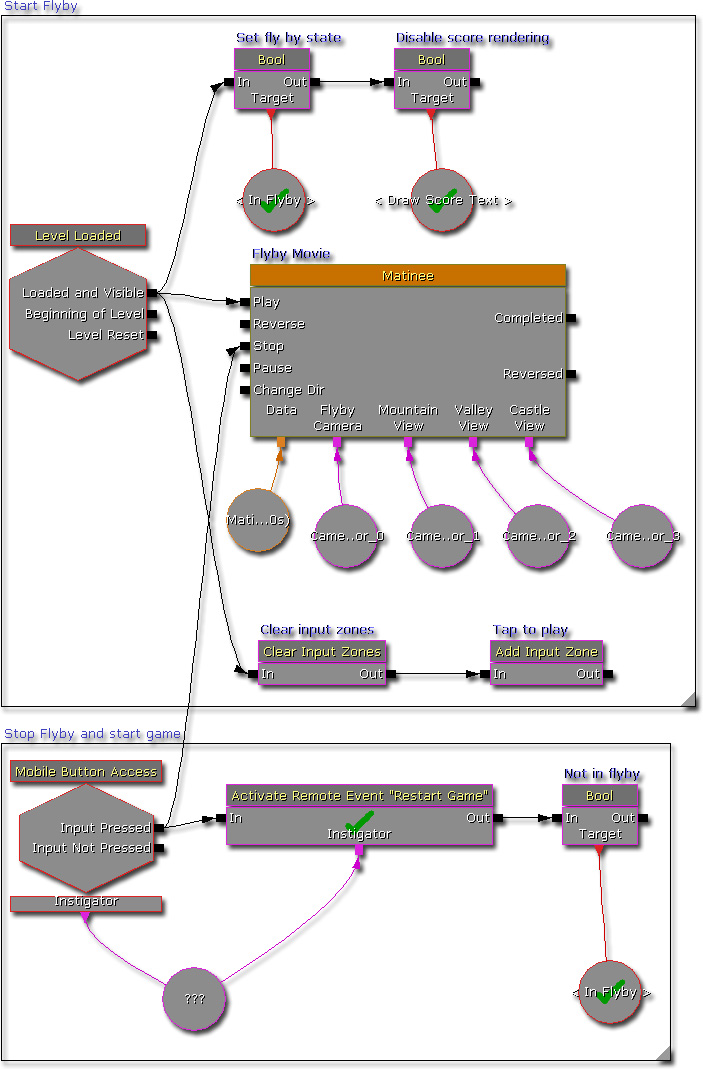 Sprinkled over the map are lots of triggers. There are two types of triggers. One type of trigger, triggers the audio and visual information to help guide the player. The other type of the trigger handles check points and scoring. The triggers are outlined in red, one looks like a apple and the other looks like a switch.
 When the player touches an audio visual triggers the road signs and the co-pilot would say "Turn Left", "Turn Right" and so forth.
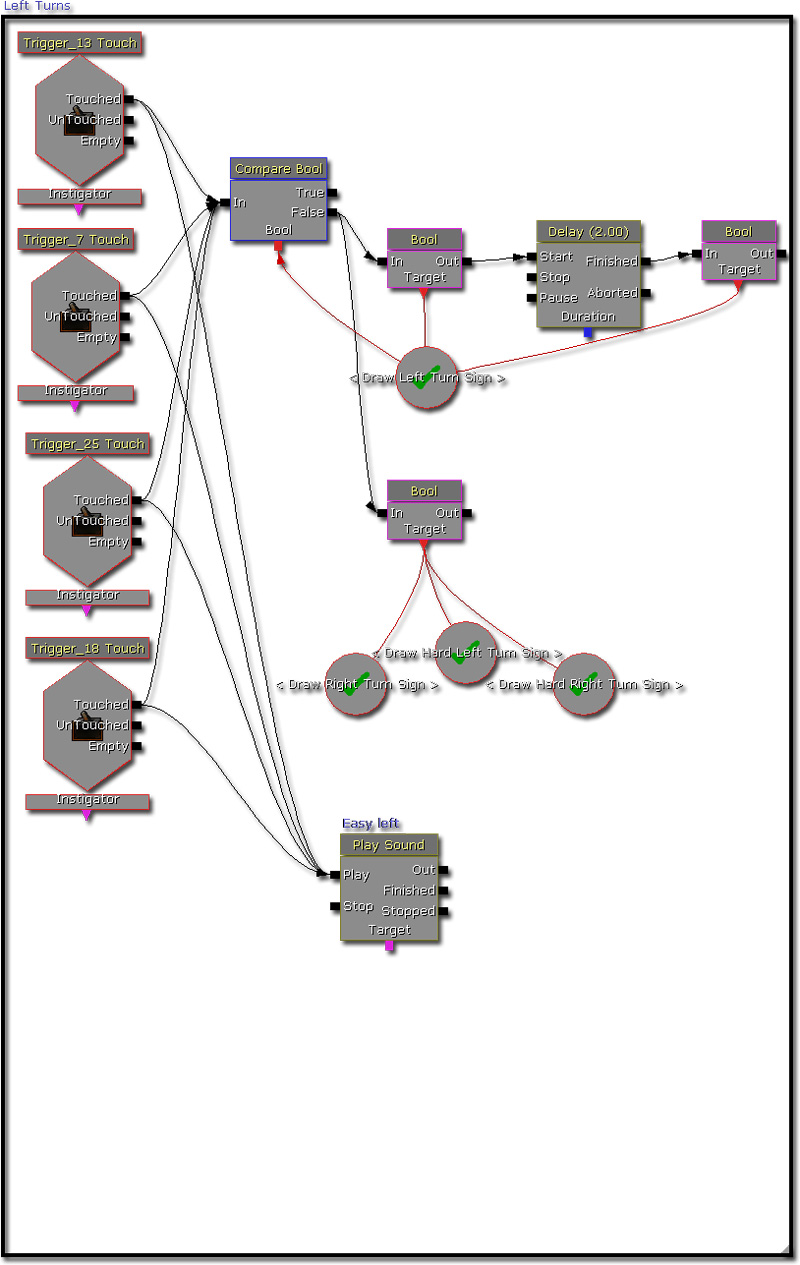 When the player touches a check point trigger, the first thing that happens is the check point gets set. From there a remote event gets executed. This gets done to keep Kismet tidy.
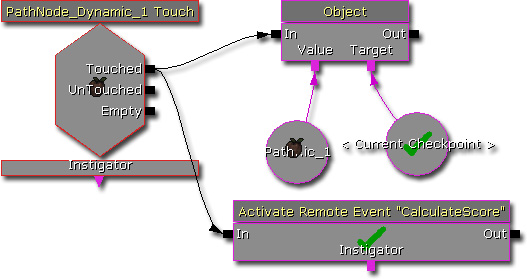 This remote event calculates the score given to the player. The calculation gets the current time from WorldInfo, subtracting from the previous check point time, dividing by a constant to give a check point score and then adding that to the current score. During this time, the previous check point time is set to the current time.
 With that, the basic construct of a simple racing game is constructed using Kismet.
How does the game render textures on the screen?
This is done by Kismet using its HUD rendering functionality. By using global boolean Kismet variables, these are simply enabled or disabled when the signs had to be rendering or not. You can see this in the audio visual Kismet sequence.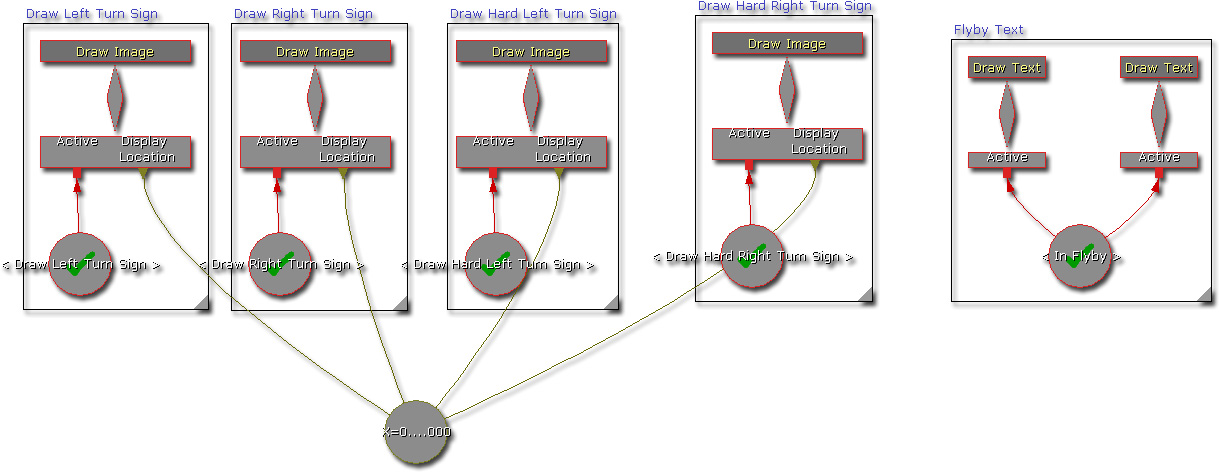
How does the game handle restarting?
Restarting the game does four things, as indicated by the four branches from the Remote Event.- The first branch, from the top, handles resetting the player's vehicle. First, Kismet plays back a a vehicle starting sound for player feedback. Next, the current check point is assigned to a player start in the level. Finally the vehicle is teleported to the current check point and the camera target is set back to the player's vehicle.
- The second branch handles setting up the mobile input zones. When the game ends, it removes all of the vehicle controlling input zones.
- The third branch handles setting the previous check point time to when the player restarted the game.
- The fourth branch handles resetting the score and clearing the score text.

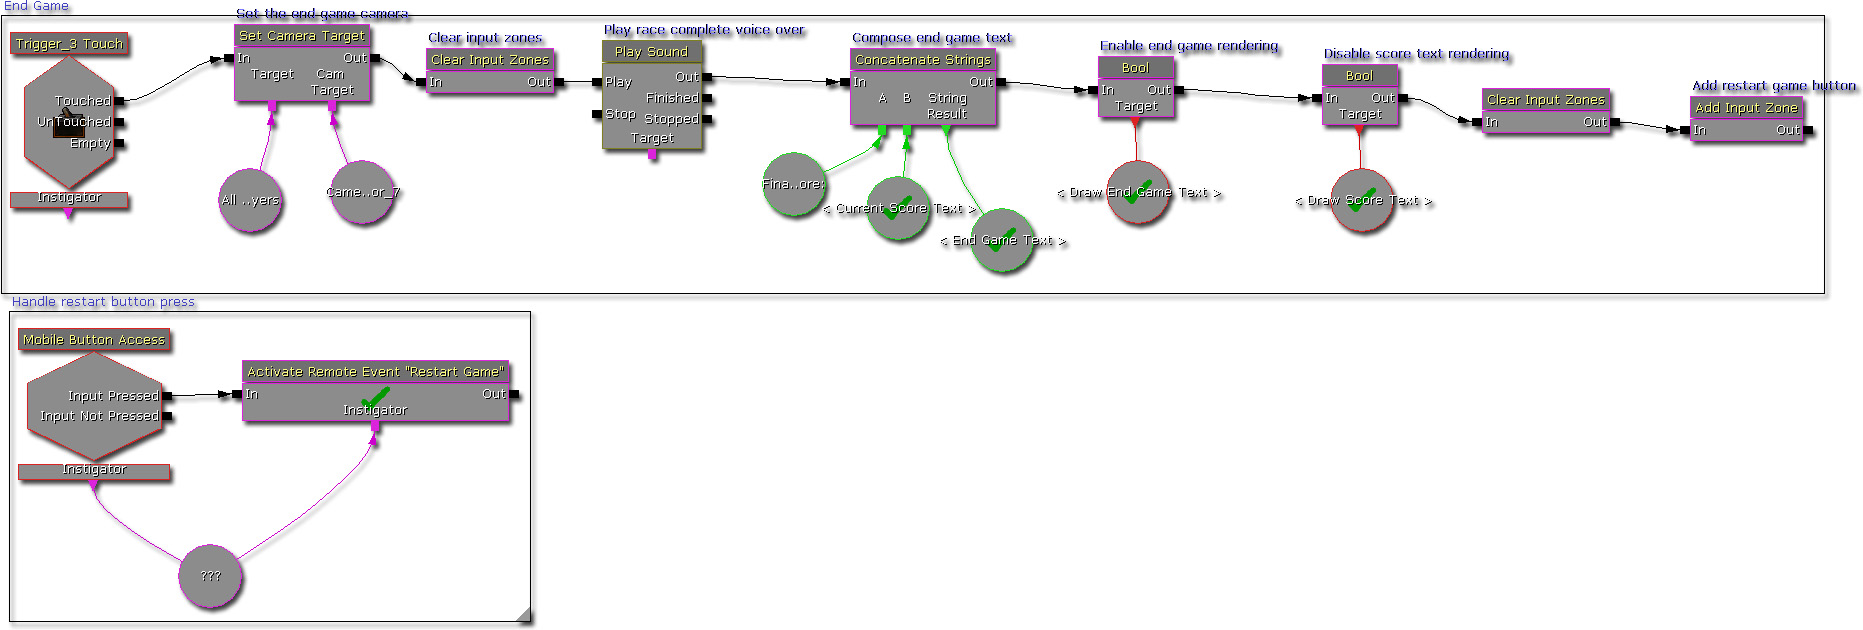
How does the game handle end game?
Ending the game occurs when the player's vehicle touches a trigger at the end of the race. Kismet does the follow instructions:- Sets the camera target to a camera actor in the level to have a more cinematic view of the race end, you could expand this to play back a Matinee if you wanted.
- Clears all the current input zones so that the player can't drive the vehicle any more.
- Plays back a race finished sound for player feedback.
- Composes the end game text which combines the score with a message to the player.
- Enables the end game text rendering sequence.
- Disables the in game score text rendering sequence.
- Adds a restart game button.
How to use this starter kit?
- Download UDK.
- Install UDK.
- Download the zip file.
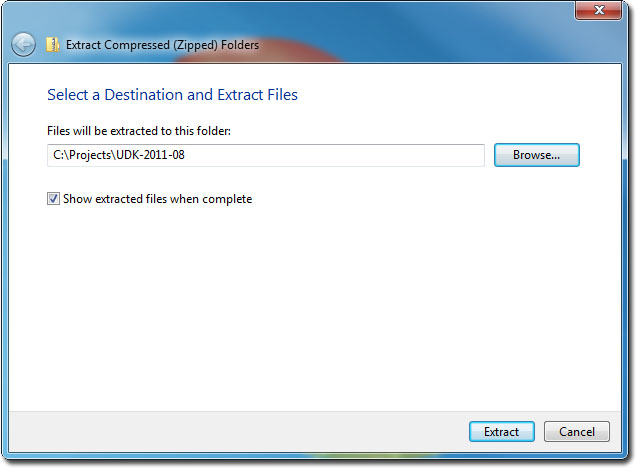
- Unzip the contents into your UDK base directory. (e.g C:\Projects\UDK-2011-08\) Windows may inform you that you may be overwriting existing files or folders. Click Ok on all of them.
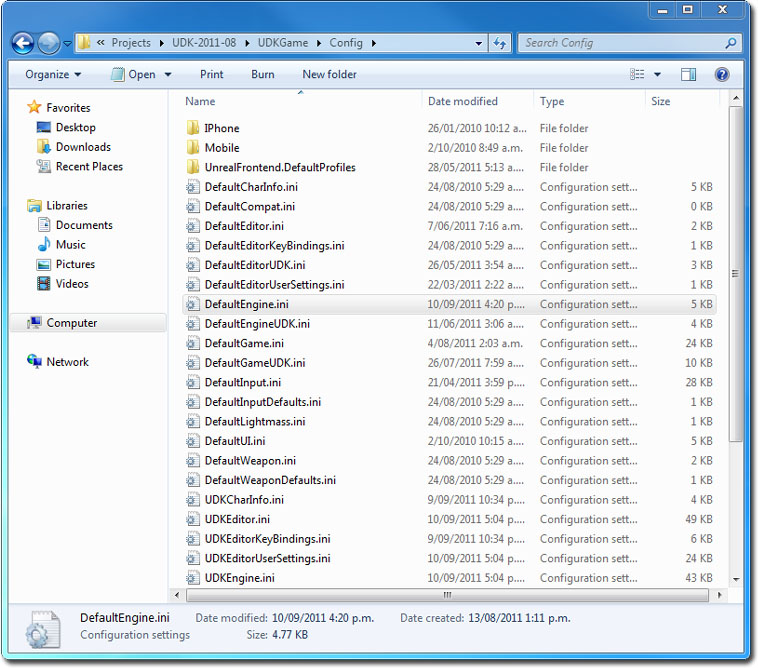
- Open up DefaultEngine.ini inside the UDKGame\Config directory with Notepad. (e.g C:\Projects\UDK-2011-08\UDKGame\Config\DefaultEngine.ini)
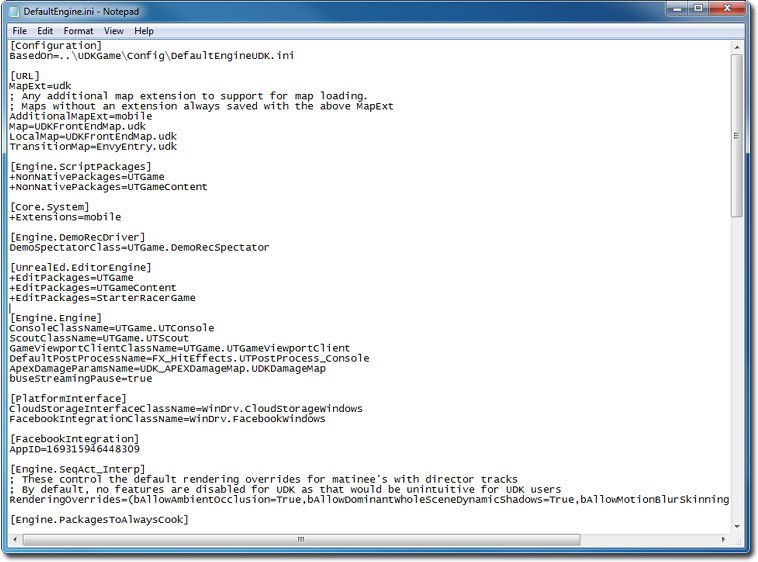
- Search for EditPackages.
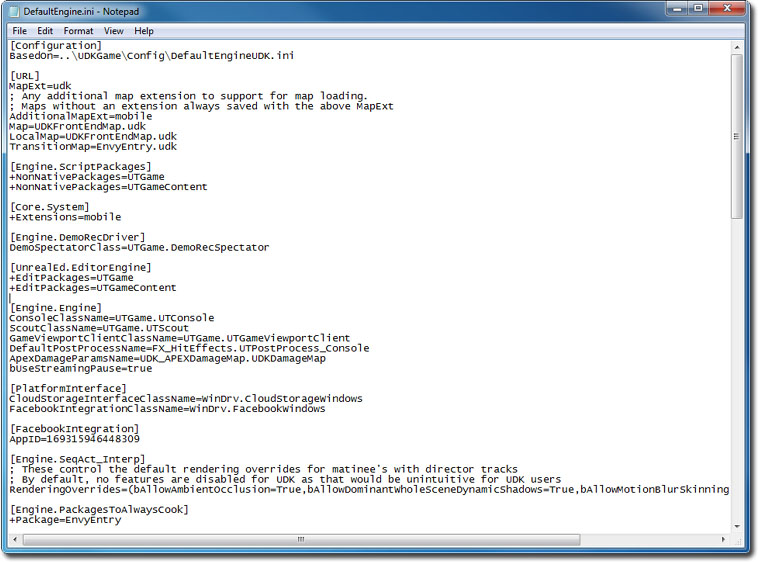
- Add +EditPackages=StarterRacerGame
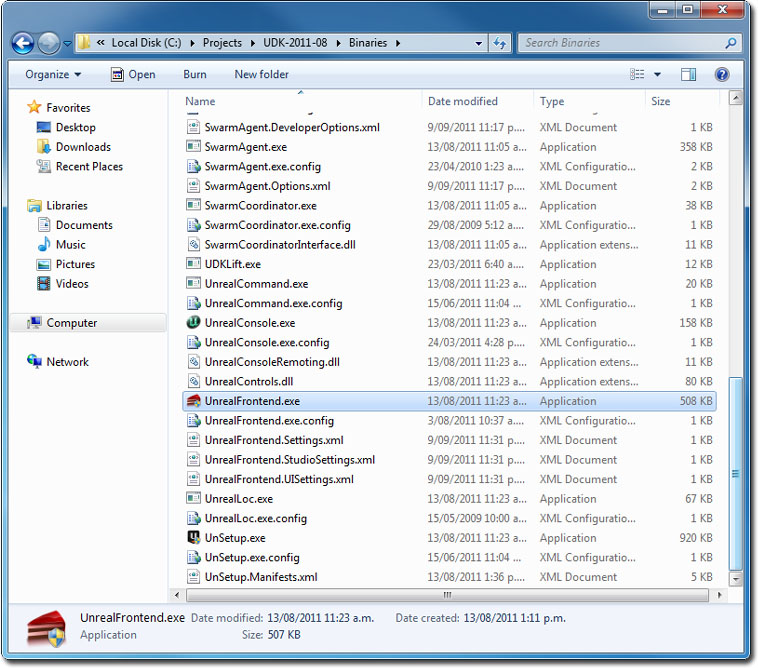
- Launch the Unreal Frontend Application inside the Binaries directory. (e.g C:\Projects\UDK-2011-08\Binaries\UnrealFrontend.exe)
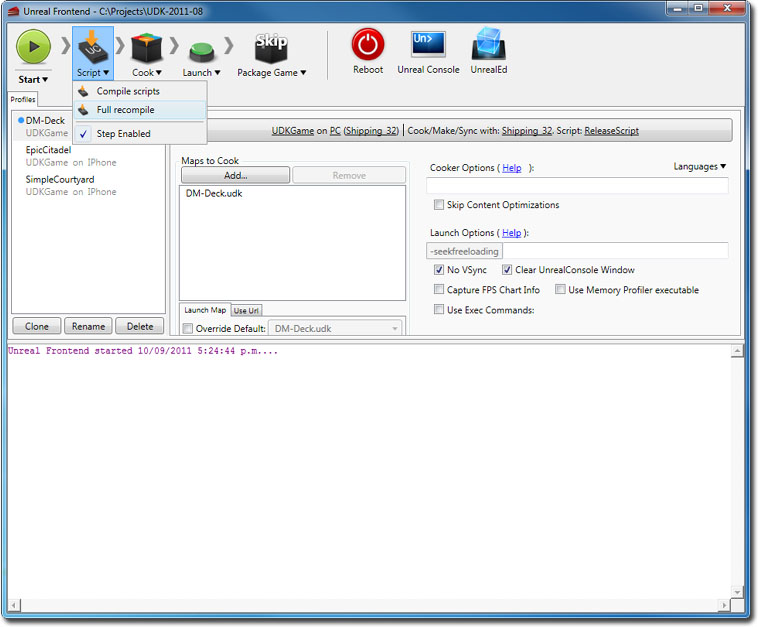
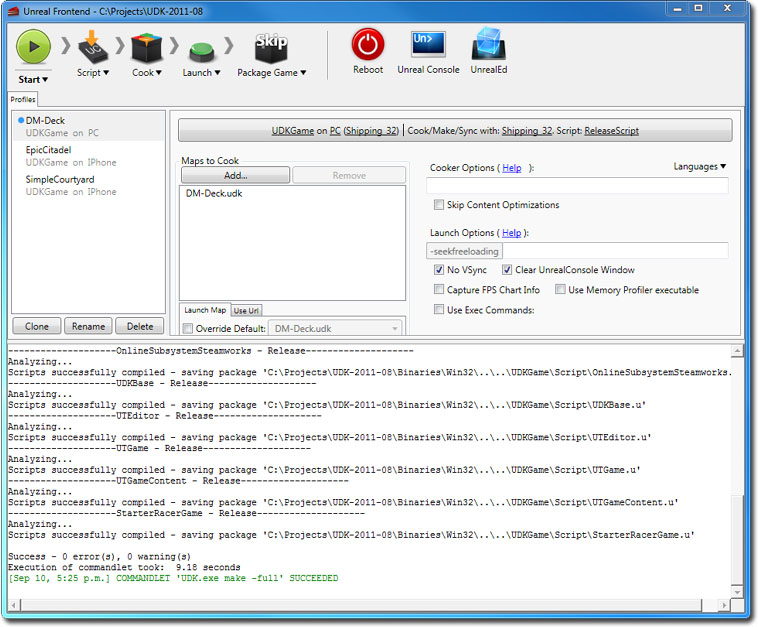
- Click on Script, then Full Recompile.
- You should see the StarterRacerGame package get compiled last.
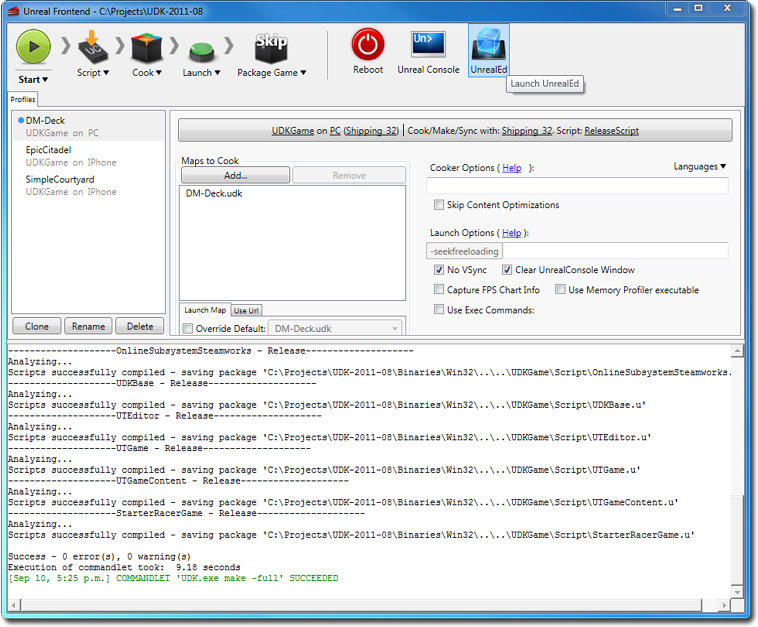
- Click on UnrealEd to open up Unreal Editor.
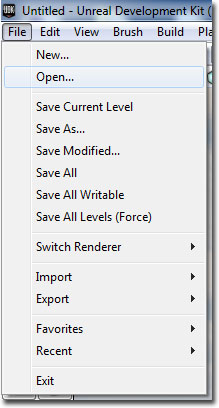
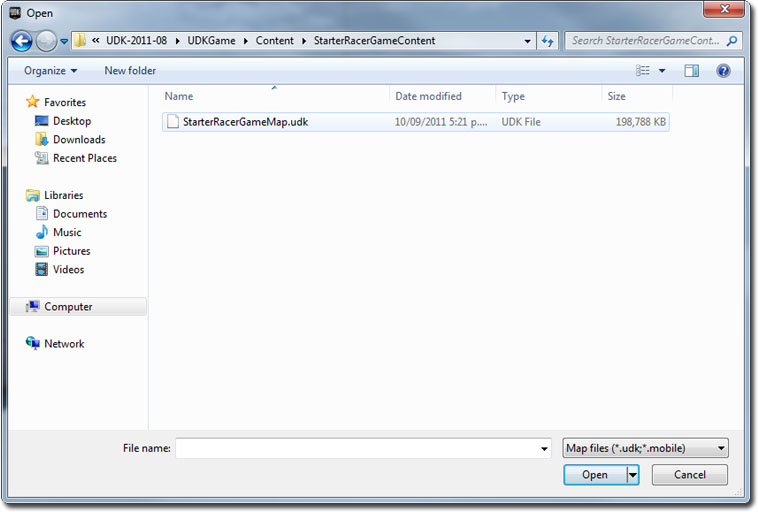
- Click on the Open button, and open up StarterRacerMap.udk.
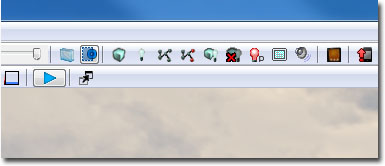
- Click on the Play In Editor button to play the racer starter kit.
Downloads
- Download the code and content for this starter kit.
