UDN
Search public documentation:
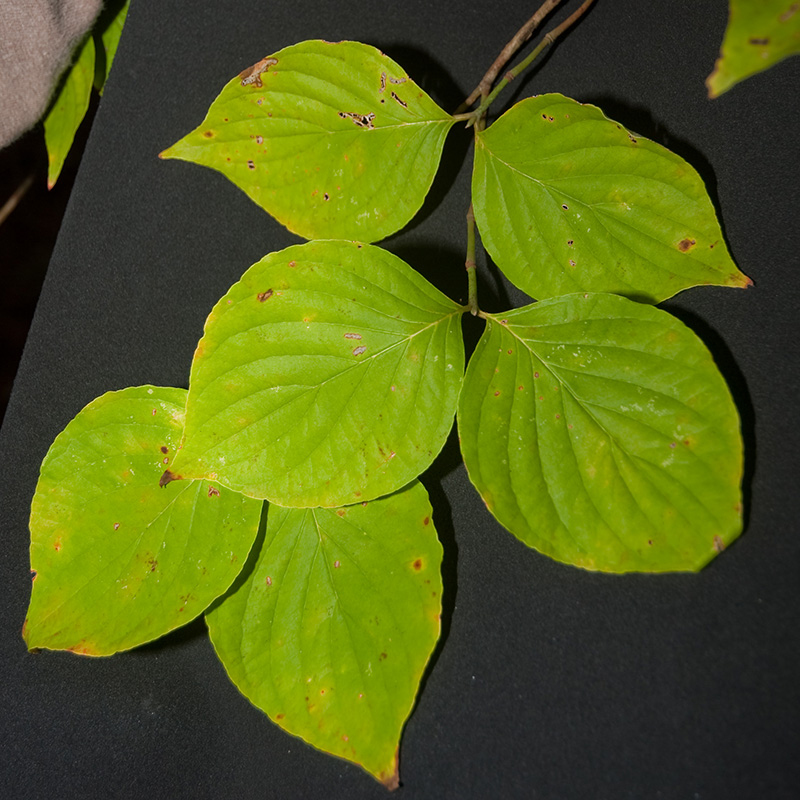
TakingBetterPhotosForTextures
日本語訳
中国翻译
한국어
Interested in the Unreal Engine?
Visit the Unreal Technology site.
Looking for jobs and company info?
Check out the Epic games site.
Questions about support via UDN?
Contact the UDN Staff
中国翻译
한국어
Interested in the Unreal Engine?
Visit the Unreal Technology site.
Looking for jobs and company info?
Check out the Epic games site.
Questions about support via UDN?
Contact the UDN Staff
UE3 Home > Materials & Textures > Taking Better Photos for Textures
UE3 Home > Texture Artist > Taking Better Photos for Textures
UE3 Home > Texture Artist > Taking Better Photos for Textures
Taking Better Photos for Textures
Overview
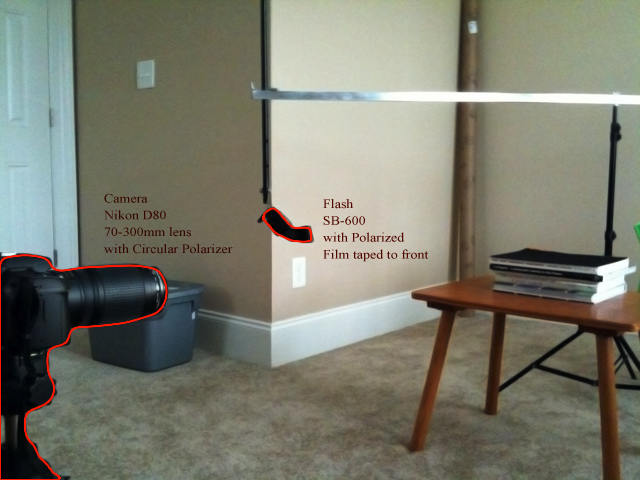
Setup
Results
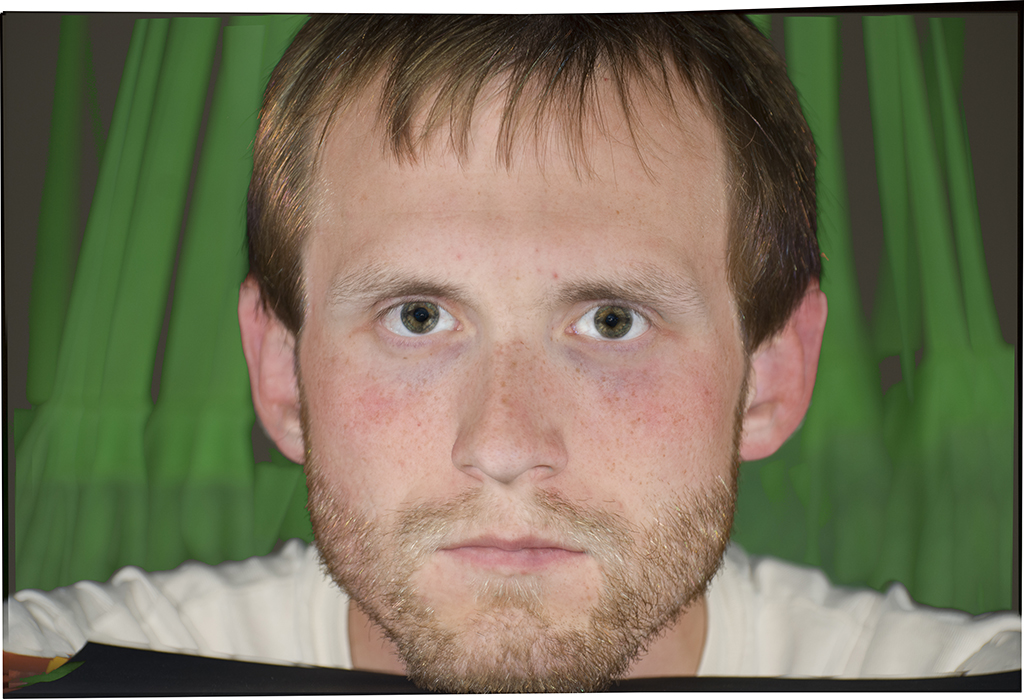
 These photos are aligned and blended in photoshop using the blend mode Lighten which returns max(x,y). The result is the brightest pixel from each image, eliminating shadows. Some touch up is required to the eye areas as they still get a faint specular highlight so erasing the highlight from each image is required. The result is an image of the face with very little directional lighting and no specular highlights.
 Below is a combination of similar photos but without polarization, here you can see why polarization is required.
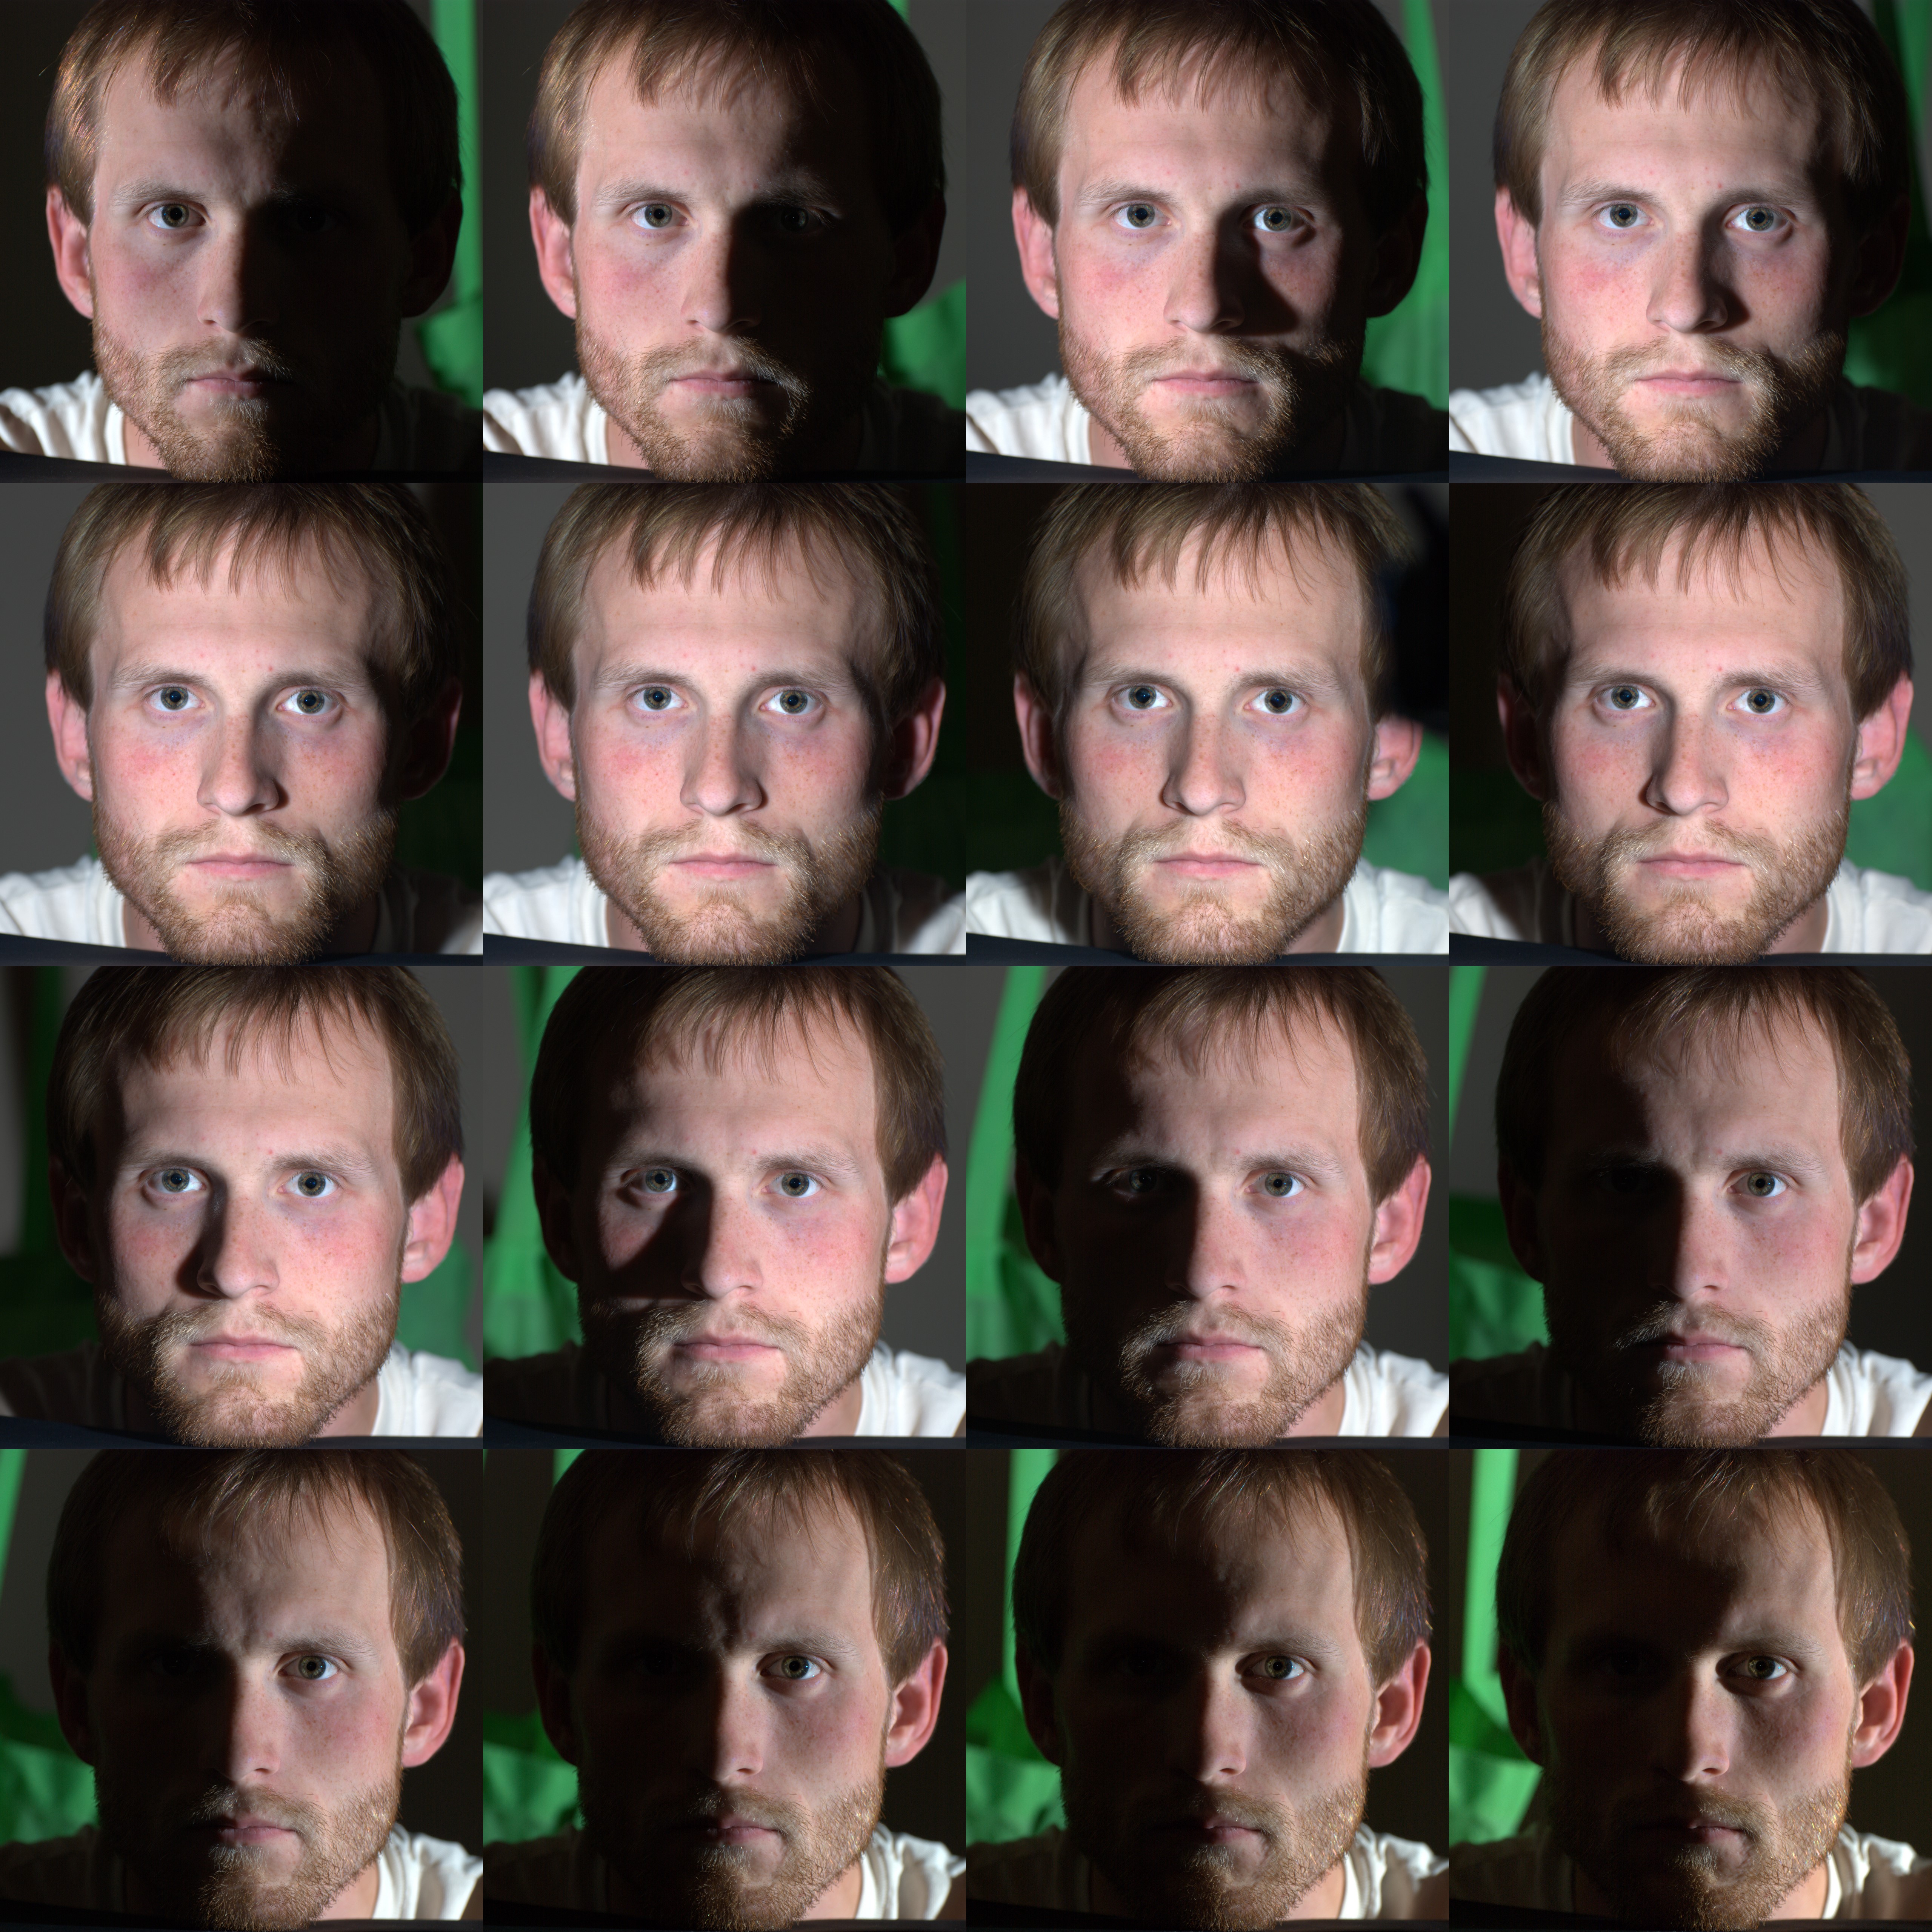
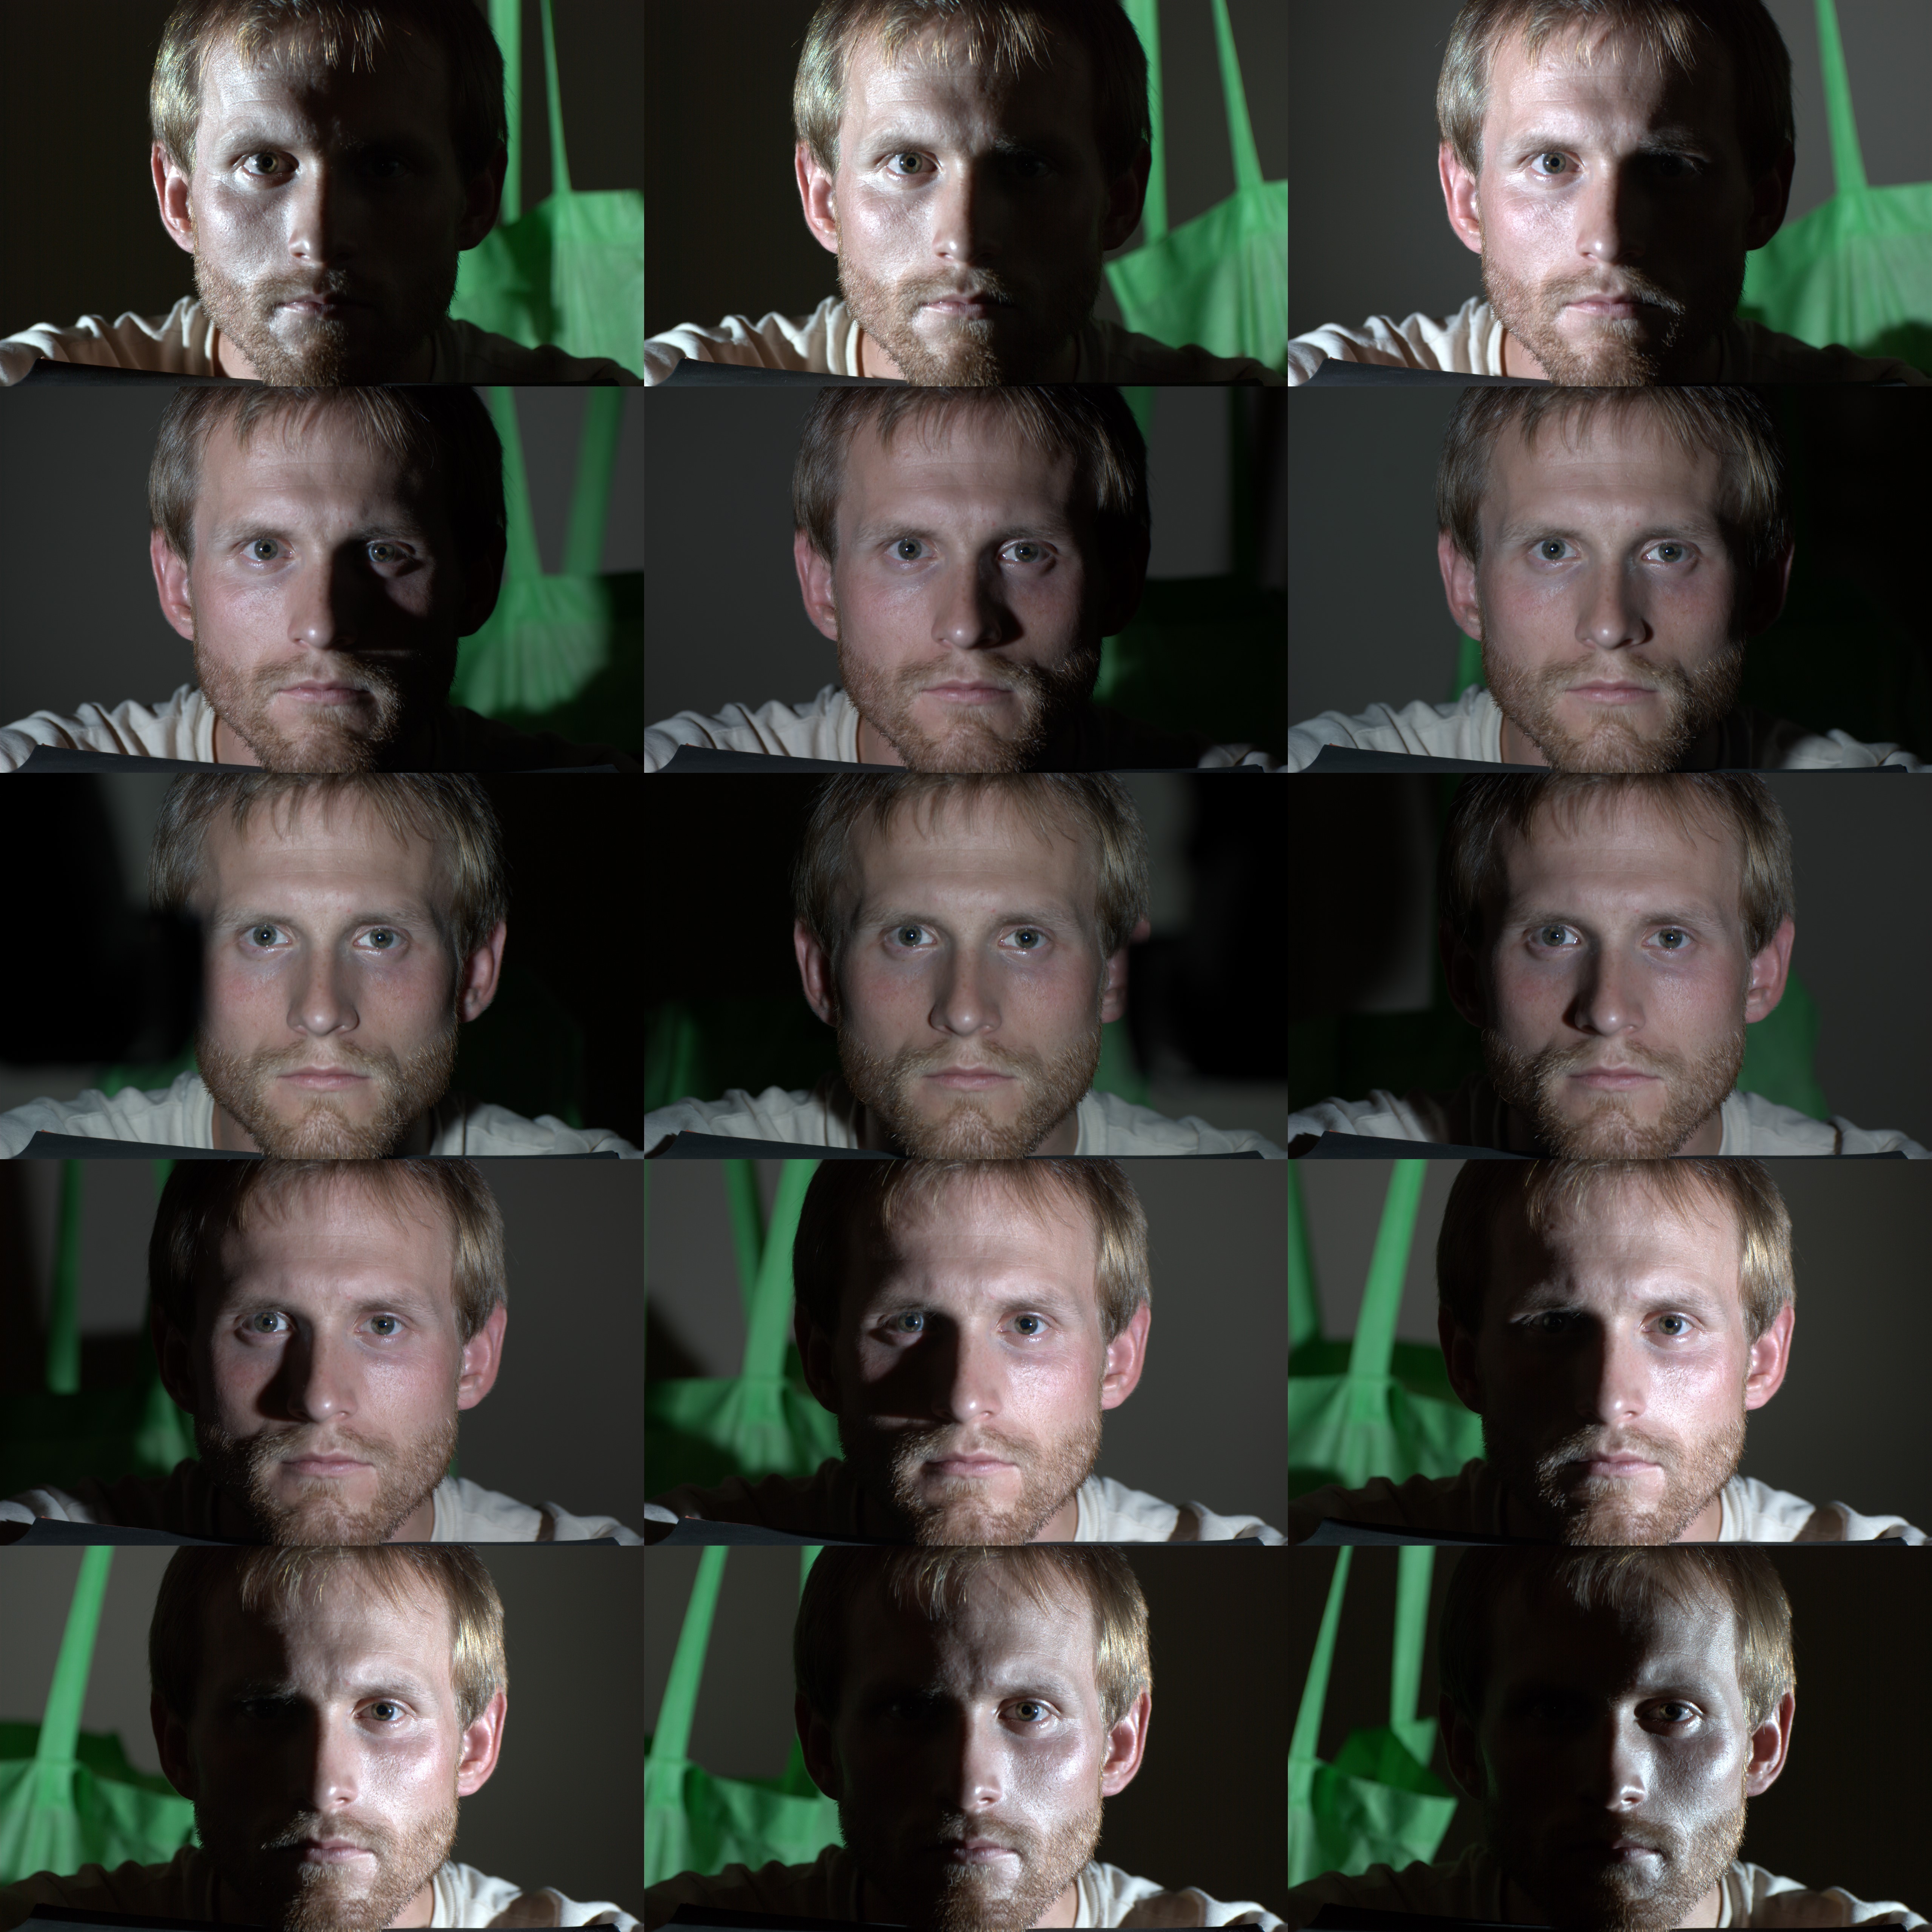
 Below are 15 images taken with the lens polarizer rotated 90 degrees which places it in parallel with the light. This shows lighting that is directly reflected from the surface. All images were taken using the same exposure and white balance yet when the light is at a glancing angle you see more specular response and the color is closer to the color of the light. This is expected but it's pretty interesting to see it in practice.
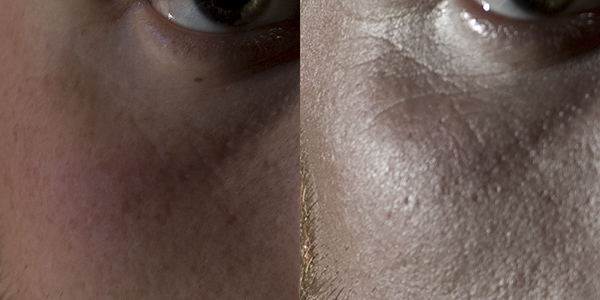
 Another interesting observation is the difference in the appearance of details between parallel polarization and cross polarization. The specular light reflected reveals much finer details than the diffuse and scattering component of the cross polarized image. The parallel polarization images aren't very useful for creating textures but they reveal a lot about making shaders for representing skin.
Other Uses