UDN
Search public documentation:
UsingInstanceParameters
日本語訳
中国翻译
한국어
Interested in the Unreal Engine?
Visit the Unreal Technology site.
Looking for jobs and company info?
Check out the Epic games site.
Questions about support via UDN?
Contact the UDN Staff
中国翻译
한국어
Interested in the Unreal Engine?
Visit the Unreal Technology site.
Looking for jobs and company info?
Check out the Epic games site.
Questions about support via UDN?
Contact the UDN Staff
UE3 Home > Particles & Effects > Particles Systems > Using Instance Parameters with Particle Systems
UE3 Home > FX Artists > Using Instance Parameters with Particle Systems
UE3 Home > FX Artists > Using Instance Parameters with Particle Systems
Using Instance Parameters with Particle Systems
Overview
Controlling Color Through Parameters
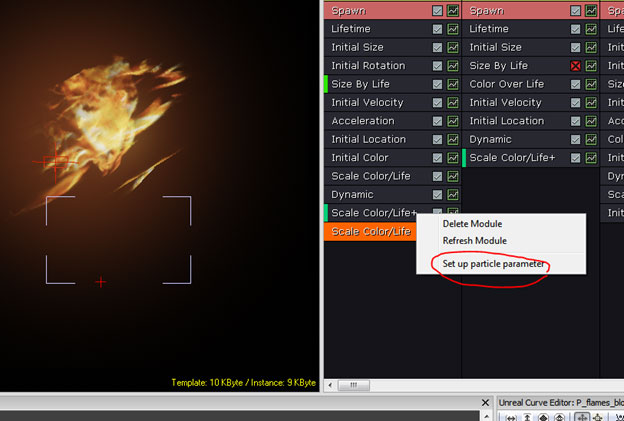
 First open your effect in Cascade, and make certain you have an initialColor or ColorOverLife module in your particle system.
Next add the Color > ScaleColor/Life module to your system. In the case of ScaleColor/Life the parameter gets utilized very often so setup is as easy as right-clicking and choosing Set up particle parameter. Note: this is not the case with all particleParameters.
First open your effect in Cascade, and make certain you have an initialColor or ColorOverLife module in your particle system.
Next add the Color > ScaleColor/Life module to your system. In the case of ScaleColor/Life the parameter gets utilized very often so setup is as easy as right-clicking and choosing Set up particle parameter. Note: this is not the case with all particleParameters.
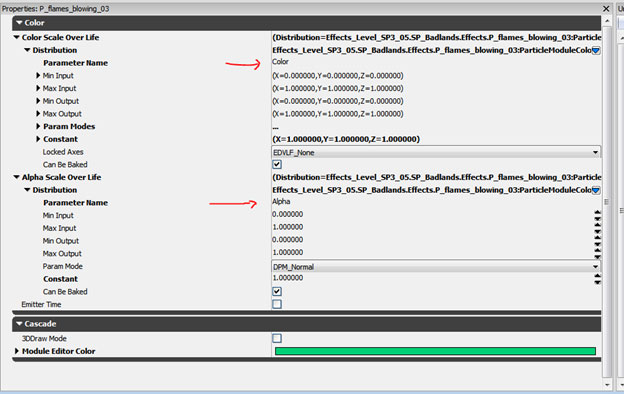
 If you select the module and view it's properties you can see vector and constant values have been defined for this module, The Parameters have been automatically named Color and Alpha, it is possible to modify this name and have multiple Parameter names in any particle system, placed on unique emitter stacks.
Setting up the Instance Parameter
The next step involves the individual EmitterActor placed in the scene. Select the EmitterActor and right-click, then choose Emitter > AutoPopulate from the drop down menu.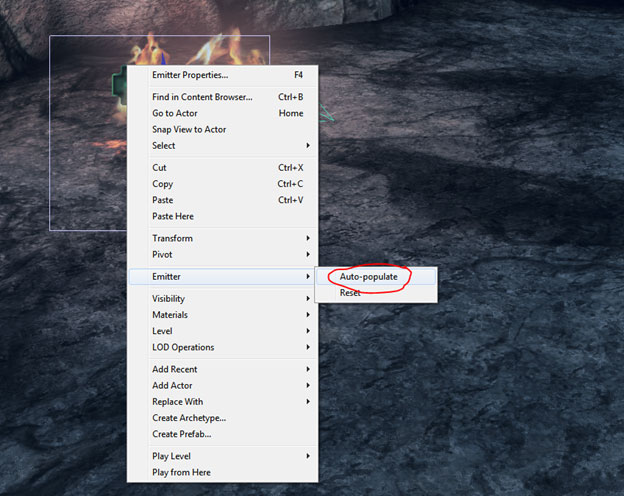 Your particle system may disappear at this point, depending upon your alpha/color settings and blend mode, this is normal behavior. Open up the EmitterActor's property window by pressing F4.
Located in the ParticleSystemComponent section is a newly generated set of data under the Instance Parameters section. Instance Parameters should now look Bold.
Your particle system may disappear at this point, depending upon your alpha/color settings and blend mode, this is normal behavior. Open up the EmitterActor's property window by pressing F4.
Located in the ParticleSystemComponent section is a newly generated set of data under the Instance Parameters section. Instance Parameters should now look Bold.
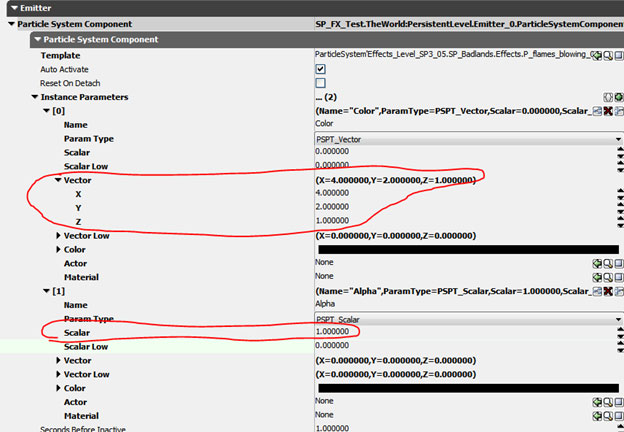
 You will see the two parameters which were specified in your effect, to the right, with their names listed. Open up the parameter and edit the settings, Vector for RGB and Scalar for Alpha as circled below.
 The original placed effect:
 The same effect manipulated with a particleParameter on the emitterActor to have more bloom and color saturation:
 It is possible to use the color parameter to create one particle effect, and manipulate the color as needed without having to copy/paste multiple effects into your packages for basic color variation across different levels.
ParticleParameters can make organizing and finding effects much simpler, reduce memory, level load times, and reduce the amount of files required to be stored on disk.
It is possible to use the color parameter to create one particle effect, and manipulate the color as needed without having to copy/paste multiple effects into your packages for basic color variation across different levels.
ParticleParameters can make organizing and finding effects much simpler, reduce memory, level load times, and reduce the amount of files required to be stored on disk.
Controlling Location Through Parameters (Reducing EmitterActor counts)
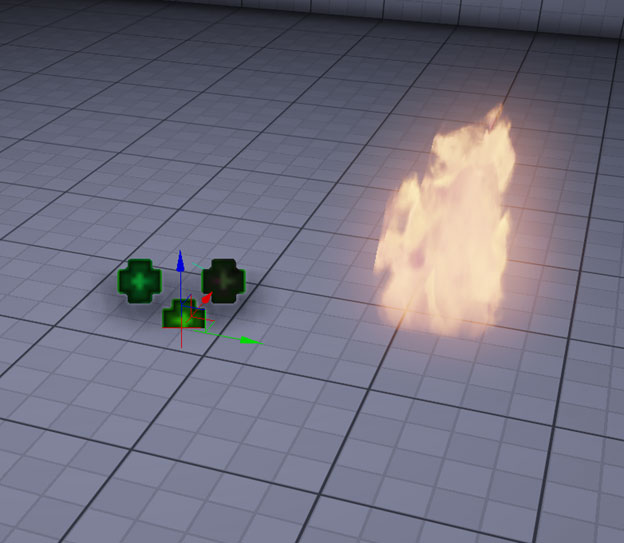
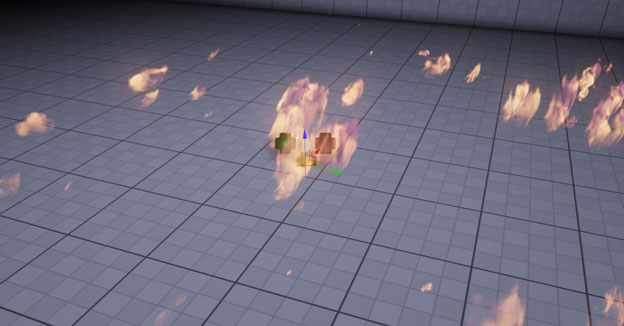 Note: the effect is intended for usage over a wide area, with two main sources of flame at the origin of the emitter and fwd in X, Y. Using a particle parameter we can modify the look of this effect, and only load one particle system into memory.
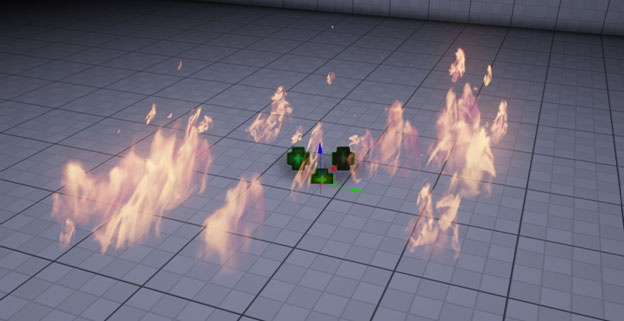
Below is the same effect modified with a particle parameter:
Note: the effect is intended for usage over a wide area, with two main sources of flame at the origin of the emitter and fwd in X, Y. Using a particle parameter we can modify the look of this effect, and only load one particle system into memory.
Below is the same effect modified with a particle parameter:
Setting Up the Particle Parameter
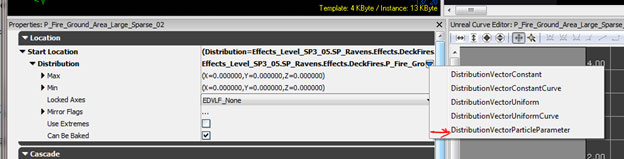
Using a single emitter we will move the position of our effect with a particle parameter. Right Click and add an Initial Position module to your Emitter in Cascade.
Select the Initial Location module and in the Distribution List choose DistributionVectorParticleParameter.
Right Click and add an Initial Position module to your Emitter in Cascade.
Select the Initial Location module and in the Distribution List choose DistributionVectorParticleParameter.
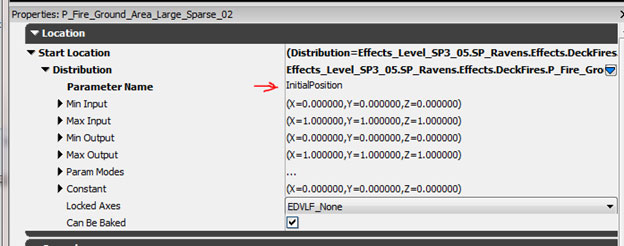
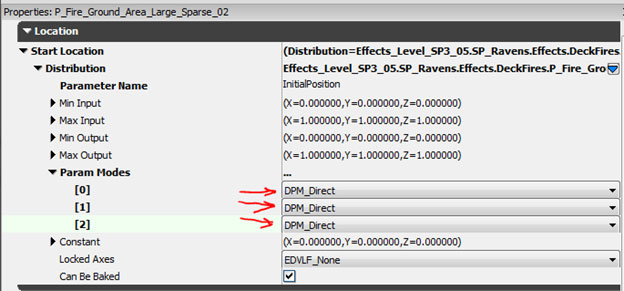
 Change the Parameter Name to
 InitialPosition or any parameter name you choose, just make it unique for this emitter, unless you wish to share position values across multiple emitters using a shared particle parameter.
 Open the Param Modes section and change the drop downs to DPM_Direct
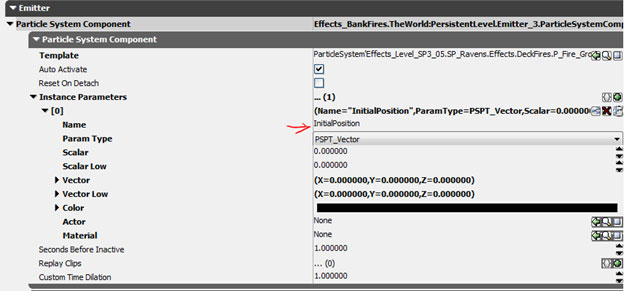
 Select your Emitter Actor placed in the world and setup the particle parameter by right clicking and choosing Emitter > AutoPopulate.
Press F4 to view the emitter properties in the Particle System Component section. Note the Instance parameter section is now bold and contains a [0] entry. The name in this entry should match the name in your module's of IntialPosition
Select your Emitter Actor placed in the world and setup the particle parameter by right clicking and choosing Emitter > AutoPopulate.
Press F4 to view the emitter properties in the Particle System Component section. Note the Instance parameter section is now bold and contains a [0] entry. The name in this entry should match the name in your module's of IntialPosition
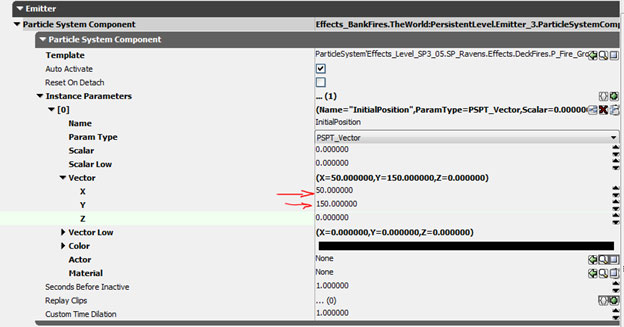
 Change the Vector values to match whatever the desired position.
 Before using a particle parameter to control position:
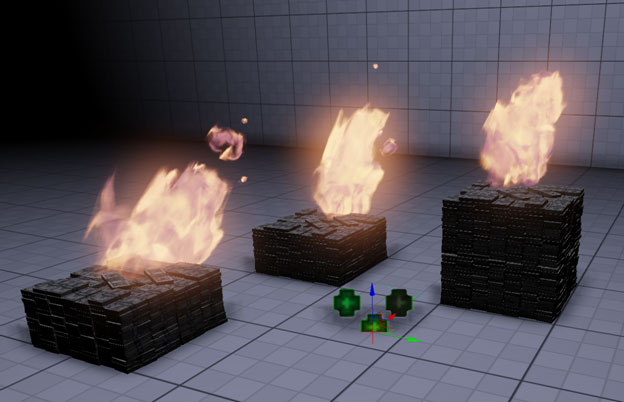
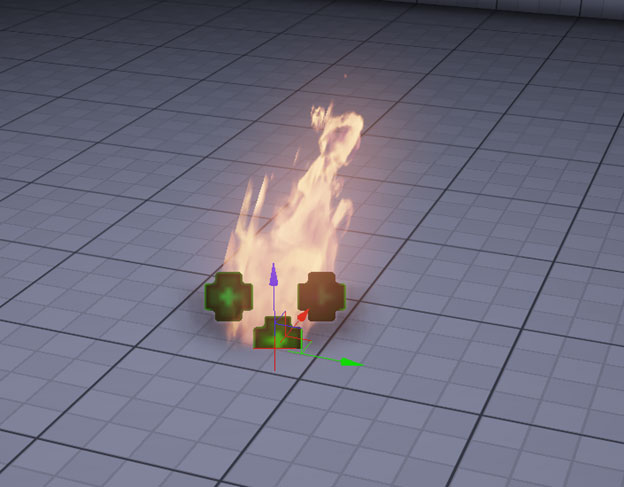 After using a particle parameter to control position:
 This demonstration is a simplified example of using particle parameters, there are many uses for this feature which may prove to be a savings for your project.
Using one EmitterActor to place 3 fires using a particle parameter with a unique name on 3 unique emitters in Cascade:
This demonstration is a simplified example of using particle parameters, there are many uses for this feature which may prove to be a savings for your project.
Using one EmitterActor to place 3 fires using a particle parameter with a unique name on 3 unique emitters in Cascade:
 It is essential when working with complex effects to name your particle parameters clearly, returning to an older effect with poorly name parameters can be a confusing process which may waste time deducing how the parameters work. It is possible to use multiple particle parameters to control behavior across several modules in a single emitter or multiple emitters. Try editing color, position, scale, lifetime etc. It can prove beneficial to experiment with different settings to achieve the desired result.
In this particular case a particle parameter can be used to move the position of effect elements around in a scene, reducing emitterActor counts which in turn can help performance and load times. It is also possible to control particle parameters through matinee and game code.
It is essential when working with complex effects to name your particle parameters clearly, returning to an older effect with poorly name parameters can be a confusing process which may waste time deducing how the parameters work. It is possible to use multiple particle parameters to control behavior across several modules in a single emitter or multiple emitters. Try editing color, position, scale, lifetime etc. It can prove beneficial to experiment with different settings to achieve the desired result.
In this particular case a particle parameter can be used to move the position of effect elements around in a scene, reducing emitterActor counts which in turn can help performance and load times. It is also possible to control particle parameters through matinee and game code.
