UDN
Search public documentation:
LightMapUnwrapping
日本語訳
中国翻译
한국어
Interested in the Unreal Engine?
Visit the Unreal Technology site.
Looking for jobs and company info?
Check out the Epic games site.
Questions about support via UDN?
Contact the UDN Staff
中国翻译
한국어
Interested in the Unreal Engine?
Visit the Unreal Technology site.
Looking for jobs and company info?
Check out the Epic games site.
Questions about support via UDN?
Contact the UDN Staff
UE3 Home > Static Meshes > Unwrapping UVs for Lightmaps
UE3 Home > Environment Artist > Unwrapping UVs for Lightmaps
UE3 Home > Environment Artist > Unwrapping UVs for Lightmaps
Unwrapping UVs for Lightmaps
On Creating Lightmaps
- BOX UNWRAP
- PLANAR UNWRAP
- CYLINDRICAL UNWRAP
Examples
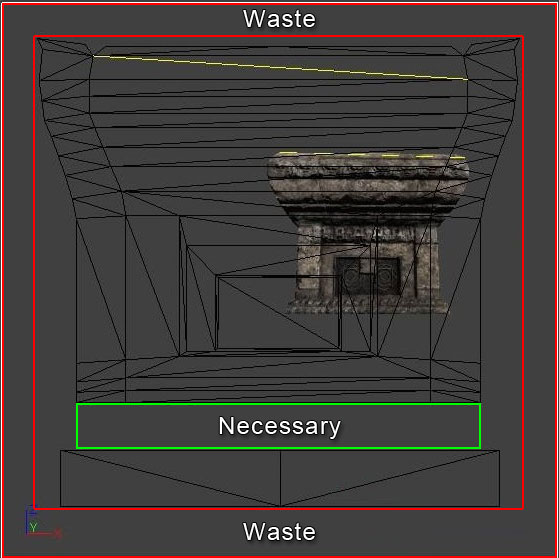
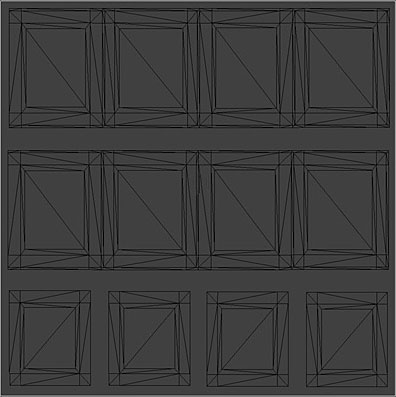
 This was a contiguous mesh so it was easy to box unwrap and just fold it out horizontally to use as much of the lightmap resolution as possible. The bottom faces highlighted in the middle image were split off from the whole because they will almost always render black and if they were connected to the rest of the UV's they would bleed dark across it where it ought not to be.
The reverse is true of the detached top faces shown in the bottom image, they will always be bright. The top image shows the texture UV's.
This was a contiguous mesh so it was easy to box unwrap and just fold it out horizontally to use as much of the lightmap resolution as possible. The bottom faces highlighted in the middle image were split off from the whole because they will almost always render black and if they were connected to the rest of the UV's they would bleed dark across it where it ought not to be.
The reverse is true of the detached top faces shown in the bottom image, they will always be bright. The top image shows the texture UV's.
 This method of connecting as much as we safely can allows us to have a near perfect lightmap in-game at the resolution of 32 by 32 units. There are no seams at all so there's no subtle dark lines where there ought not to be.
 Sometimes you need to just force pieces together with brute force. It is worth is to have a clean surface without interruptions to the lightmap. Stretching by a 1 to 1 ratio doesn't really matter with lightmaps as much as coverage does so an area that is too thin but a 1 to 1 ration will not light correctly because of bleed, but a 1 to 7 ration with twice the coverage looks great. Here you can also see I split the interior of the negative cuts because they will always be dark and we need to avoid the bleed from those across the exterior.
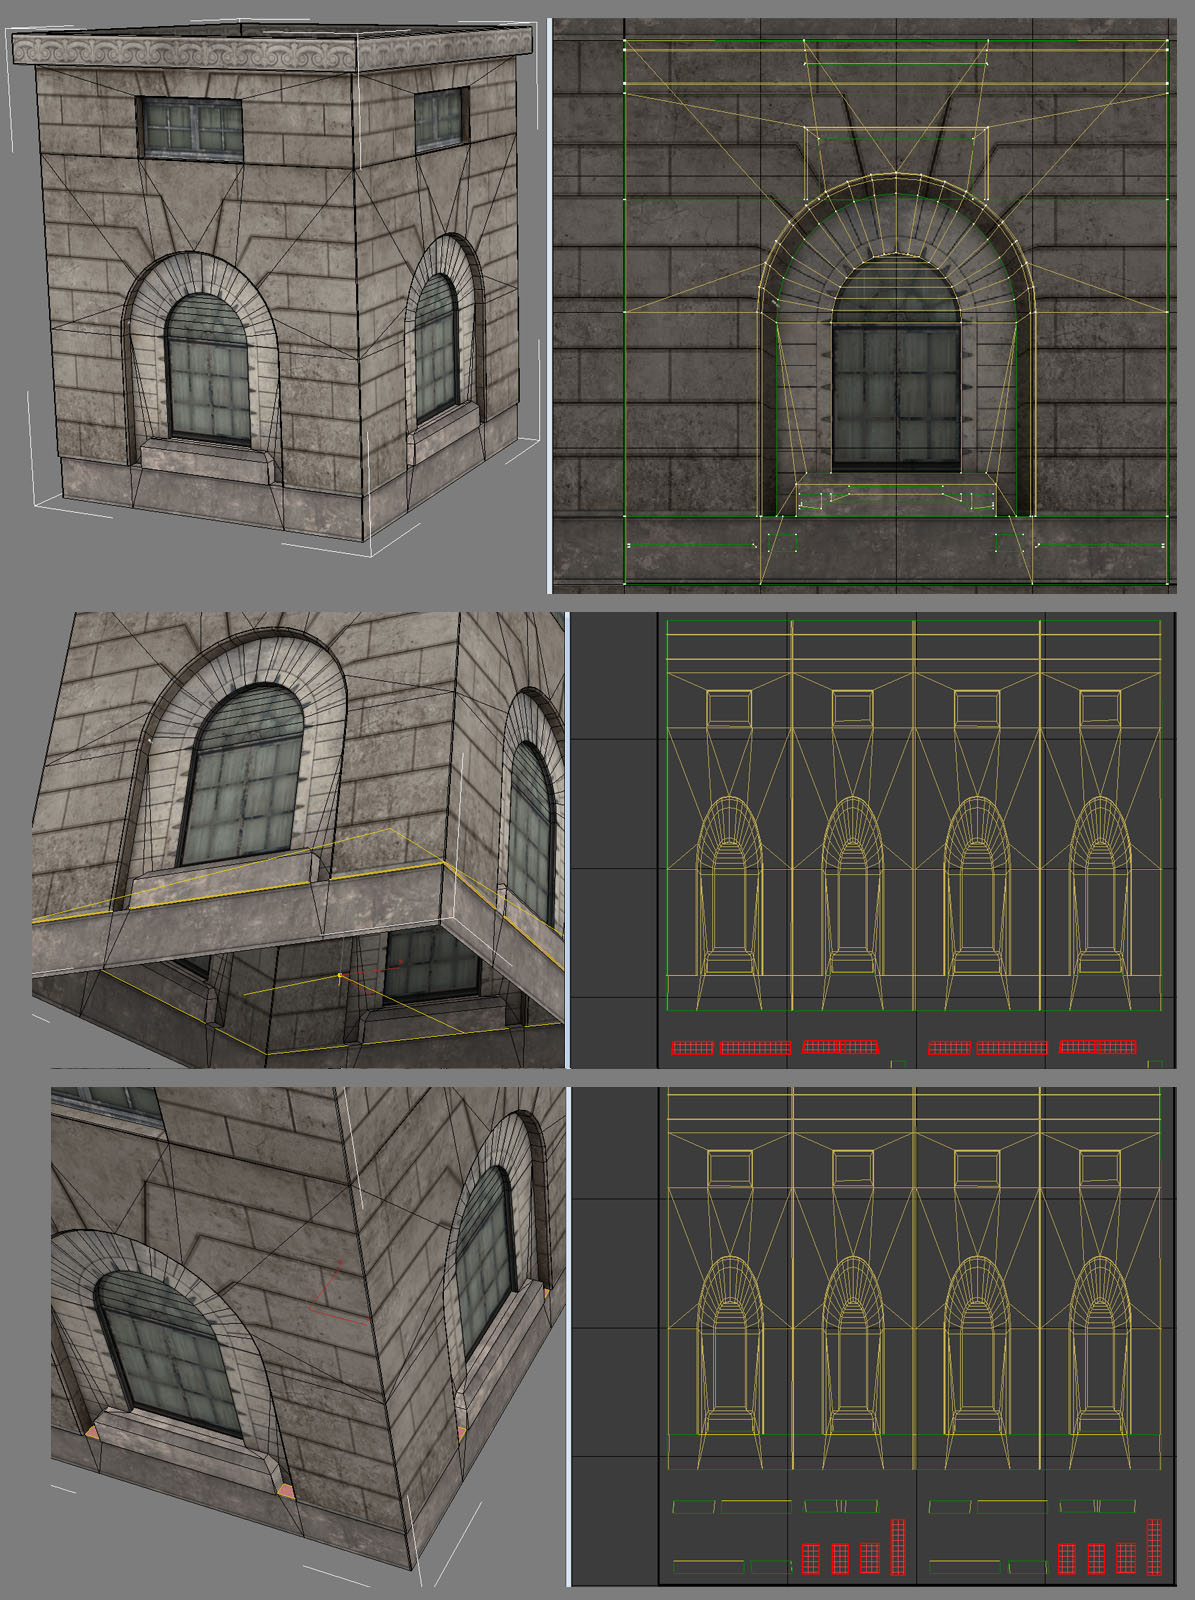
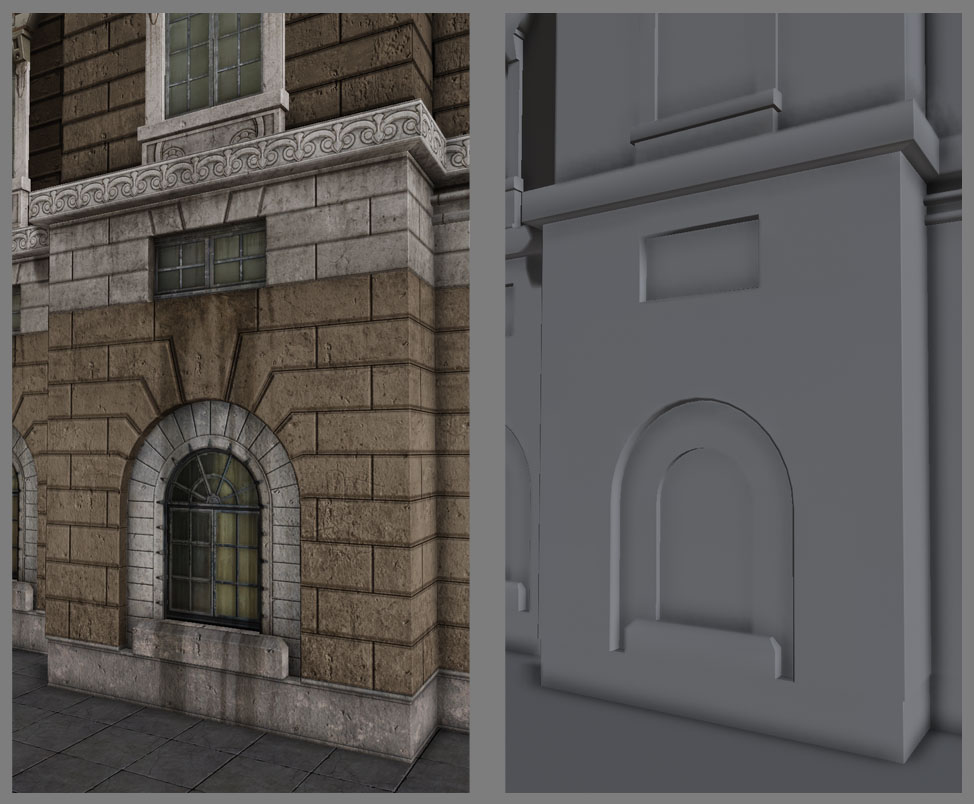
 With large facade pieces like this Planar unwraps work well. This mesh is contiguous so that aids our work here, but the same principal works with meshs that have a few vertical or horizontal elements. As long as you place things on the lightmap UV's in the most representative layout that matches the lowpoly, it will work the same albeit with the need for a bit of padding in case some side sections render black when stacked together with other pieces.
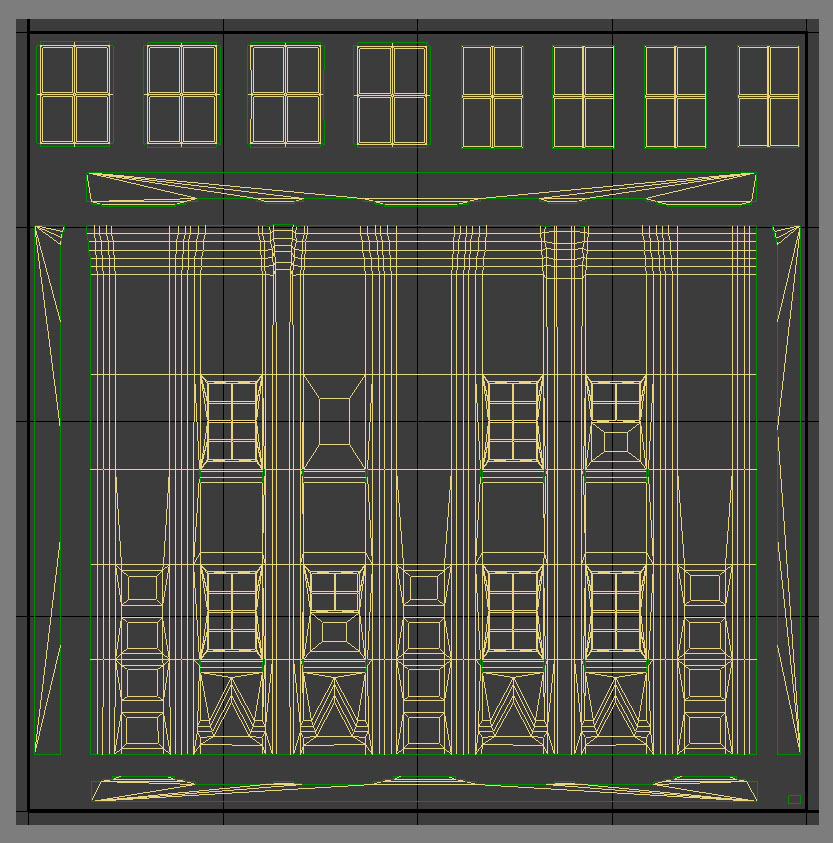 You can see here that that the contiguous mesh layout allowed me to more easily lay the UV's out in a way that mirrors the low-poly mesh. I still move the sides, top & bottom caps away from the main section to allow for those bleed issues and I ensure the padding around those, the main and the windows at the top have the same amount of padding.
Sometimes your design won't adhere to any of these simple rules of thumb, if a design has a lot of negative space with a few separate elements we need to fragment the lightmaps and add much more padding.
You can see here that that the contiguous mesh layout allowed me to more easily lay the UV's out in a way that mirrors the low-poly mesh. I still move the sides, top & bottom caps away from the main section to allow for those bleed issues and I ensure the padding around those, the main and the windows at the top have the same amount of padding.
Sometimes your design won't adhere to any of these simple rules of thumb, if a design has a lot of negative space with a few separate elements we need to fragment the lightmaps and add much more padding.
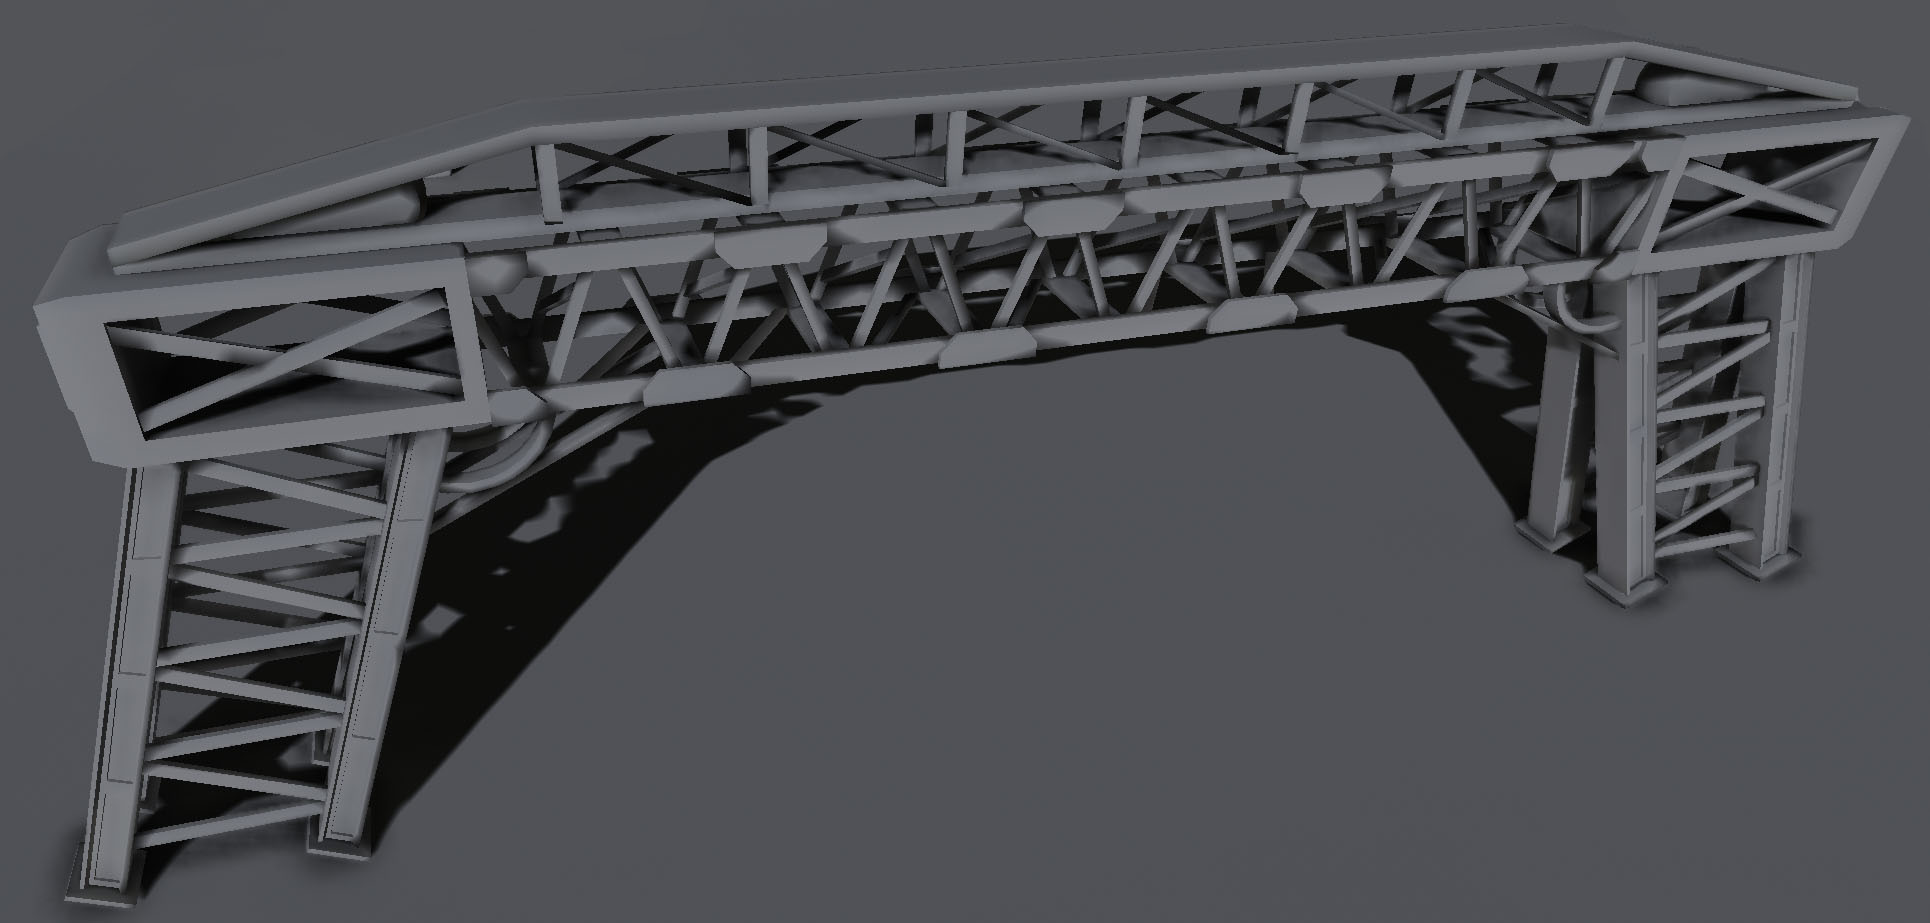
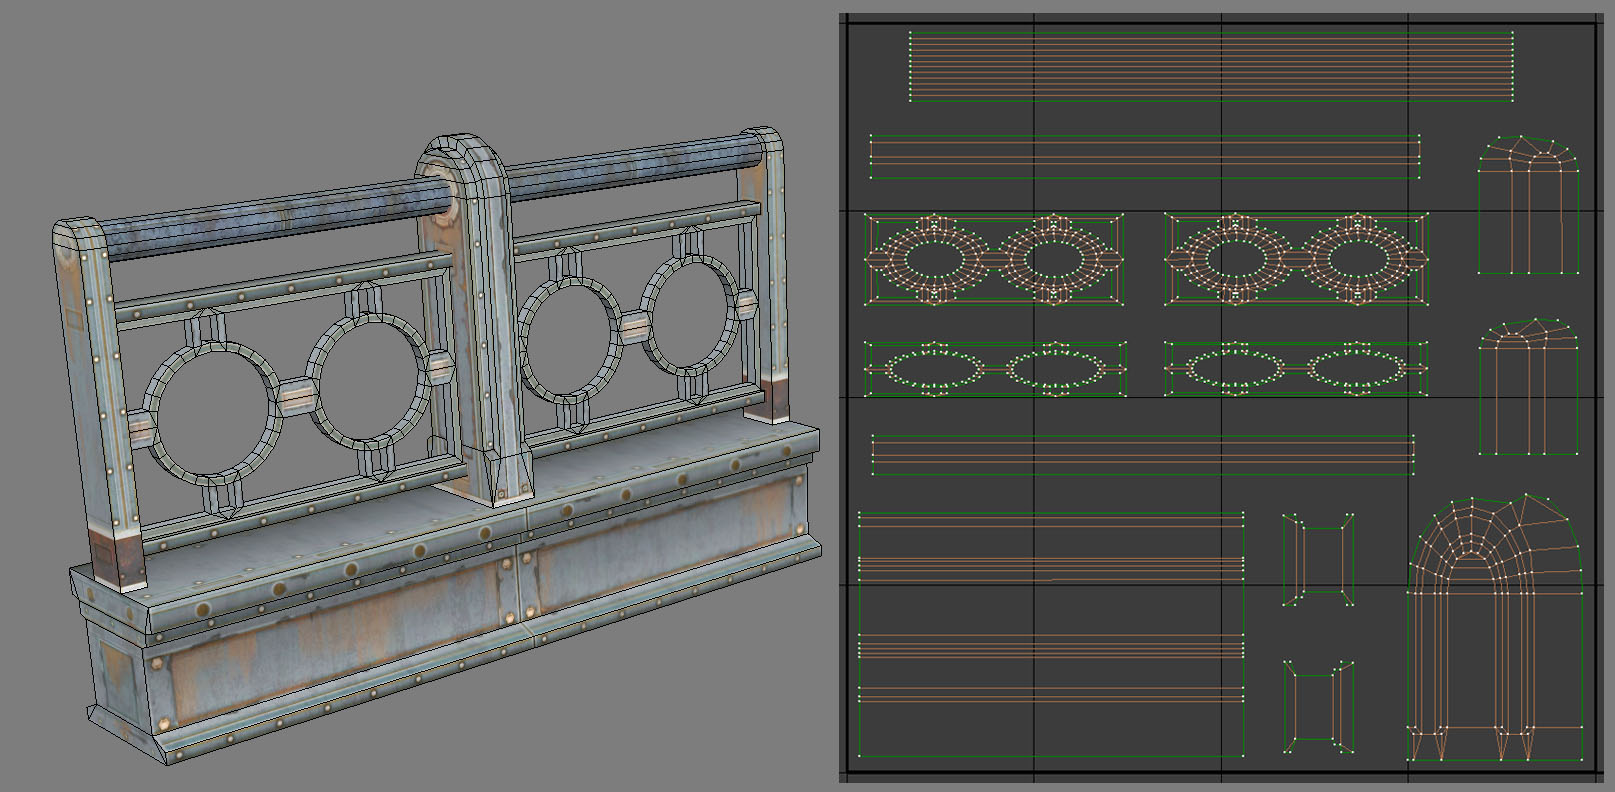 You can see some pretty aggressive distortion on the intersecting vertical pieces that hold the rails together, we just forced together the 2 sides with the middle & center sections in each of those 3 pieces.
With the circular rail interiors I split out one side on its own whilst the other i attached the inner and outer faces. This was done so there would be smooth lightmap shading across 3/4 of those areas and only one break in the lightmap on the other side, which you can't see due to the straight metal beam on top of it.
You can see some pretty aggressive distortion on the intersecting vertical pieces that hold the rails together, we just forced together the 2 sides with the middle & center sections in each of those 3 pieces.
With the circular rail interiors I split out one side on its own whilst the other i attached the inner and outer faces. This was done so there would be smooth lightmap shading across 3/4 of those areas and only one break in the lightmap on the other side, which you can't see due to the straight metal beam on top of it.
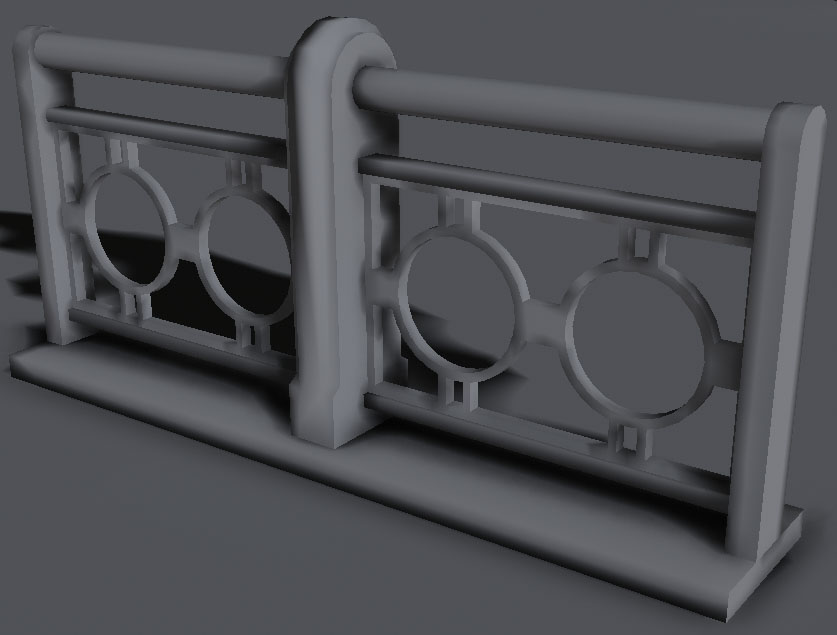 Some designs just work against what works based, designs like the one below.
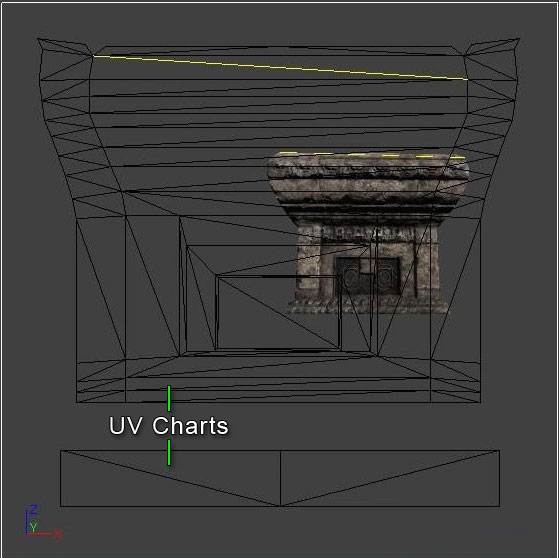
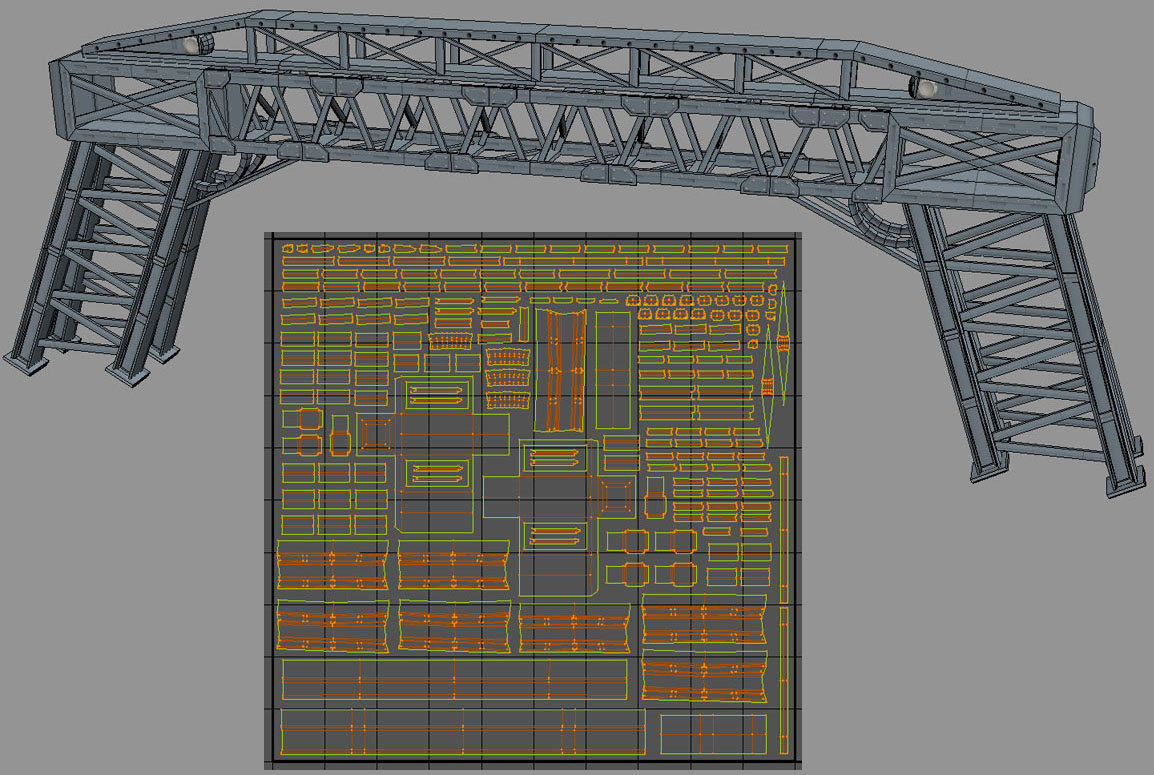 When there are so many separate elements we have no choice but to crank up the texture resolution or we would waste so much space on the lightmap due to padding enough between each section that it would look terrible in-game. So I planned on this being a 128by128 lightmap knowing also that it would still not look perfect, there would be some bleed but hopefully not so much as to ruin the object.
 Sometimes it's easy to just project near flat and relax the UV's because there are clear and distinct contiguous sections that can easily be connected together like in the case of the model below.
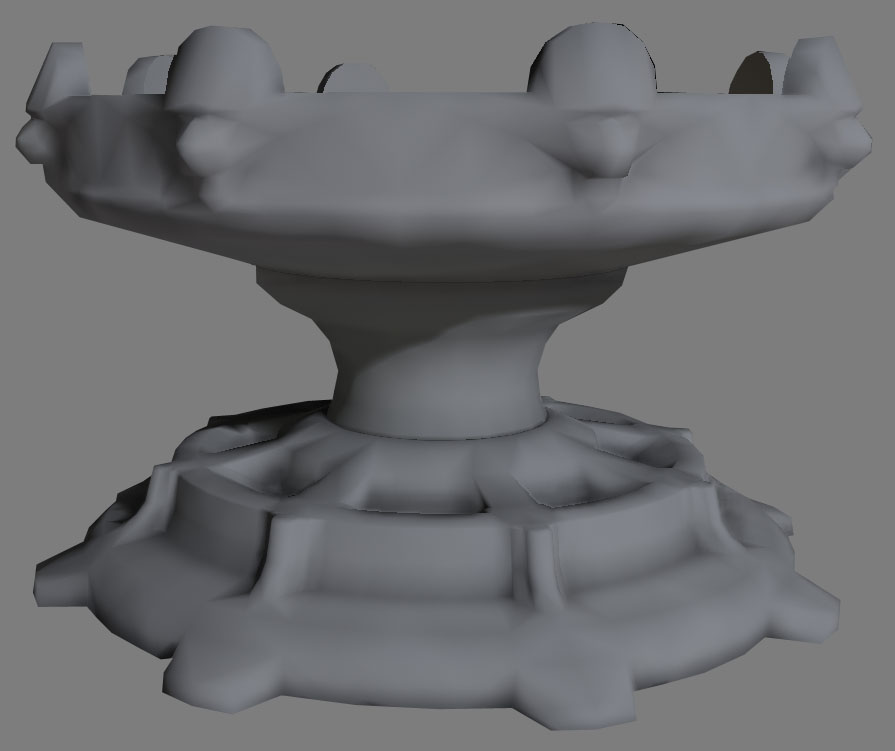
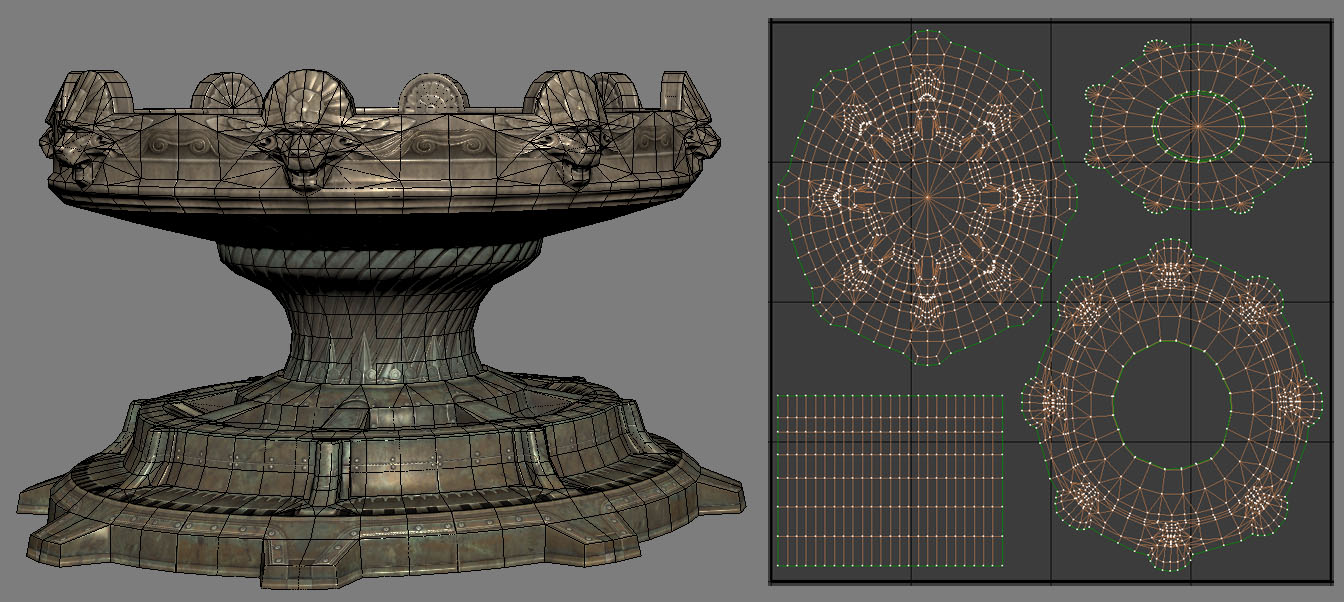 This design is essentially just a capped Cylinder a Planar base so I use those 2 basic methods to unwrap the UV's. The ground section cog is easy to just Planar unwrap down on the Z axis, then apply a relax modifier and adjust things a little to make sure nothing is getting too little coverage thanks to thin 1 to 1 ratio problems on the bevels.
The mid section was a clear case as much as a base, a cylindrical unwrap that I forced to be straight by hand to get the most coverage and use of the space. As always we are more concerned with coverage than 1 to 1 representations of each little facet of the low-poly mesh. I did an upward Z axis Planar unwrap for the underside of the top lion head sporting section and followed up with relax.
Splitting the model like this had the advantage of putting the seams at genuine seam sections in the low-poly design so it looks natural that there is a little break in the lighting there. Splitting your lightmap uv's at sections where there are sharp deep recesses or crevices is a good rule of thumb for choosing where to separate sections in a way that aids the look of the model in-game rather and downgrades it.
This design is essentially just a capped Cylinder a Planar base so I use those 2 basic methods to unwrap the UV's. The ground section cog is easy to just Planar unwrap down on the Z axis, then apply a relax modifier and adjust things a little to make sure nothing is getting too little coverage thanks to thin 1 to 1 ratio problems on the bevels.
The mid section was a clear case as much as a base, a cylindrical unwrap that I forced to be straight by hand to get the most coverage and use of the space. As always we are more concerned with coverage than 1 to 1 representations of each little facet of the low-poly mesh. I did an upward Z axis Planar unwrap for the underside of the top lion head sporting section and followed up with relax.
Splitting the model like this had the advantage of putting the seams at genuine seam sections in the low-poly design so it looks natural that there is a little break in the lighting there. Splitting your lightmap uv's at sections where there are sharp deep recesses or crevices is a good rule of thumb for choosing where to separate sections in a way that aids the look of the model in-game rather and downgrades it.
Lightmap Coordinates Index
LightmapCoordinateIndex that allows a specific set of UVs to be used for lightmap generation. By setting this property to point to a set of UVs that are unique and properly set up for lightmaps, static meshes can enjoy the best of both worlds: better texture resolution for diffuse textures and accurate lighting from lightmaps.
Contiguous UVs and Padding
 Padding between UV charts is necessary to prevent bleeding artifacts. Padding around the edges of the lightmap UV layout, however, is not necessary as Lightmass automatically pads around the edges by enough to prevent bleeding artifcats. Note when you are setting up padding between UV charts that 4 texels are usually required to avoid all bleeding, as DXT compression operates on 4x4 texel blocks.
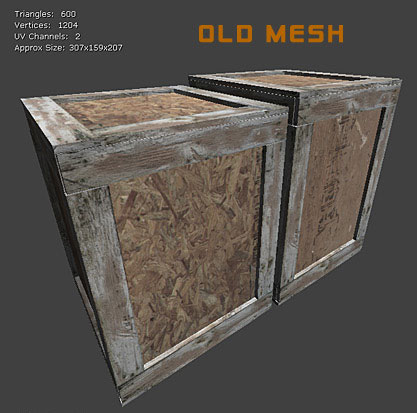
 This means that for a lightmap resolution of 32, the padding between the UV charts should be 12.5% of the entire UV space. However, keep in mind that placing more padding btween UV charts will result in more lightmap memory being wasted at higher lightmap resolutions.The more contiguous you can make the lightmap UVs for a mesh, the better off you will be. This will reduce the amount of padding necessary and allow for increased resolution. Prior to Lightmass being implemented or when relying mostly on vertex lighting, meshes may have been created by modeling elements seperately and merging them together.
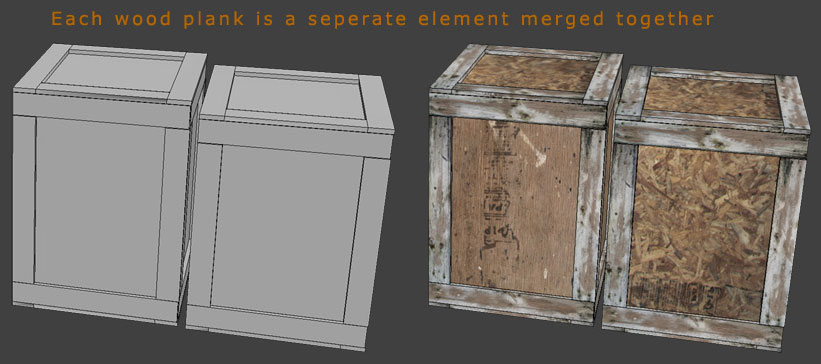 This is less than ideal when relying on lightmaps and using Lightmass, though. It doesn't allow for good, contiguous lightmaps UVs.
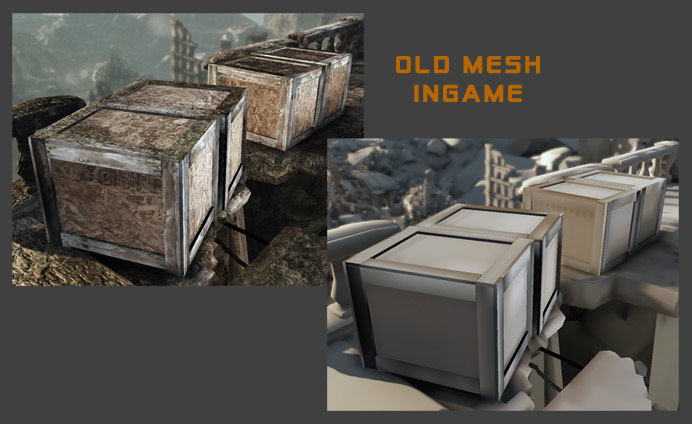
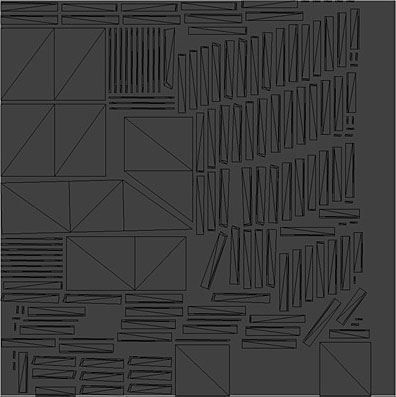 Instead you end up with fragmented lightmaps with polygons that are inside the model and rendered as black which bleeds across to other parts of the mesh. Another potential pitfall is relying on automatic unwrapping as it, too, can lead to these same issues.
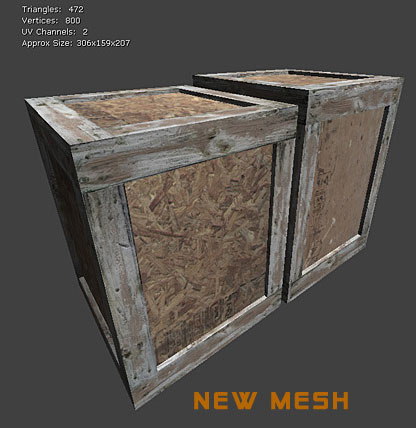
 The best method of creating meshes and laying out their UVs for lightmaps is to model the entire mesh as one contiguous element and lay out the UVs manually.
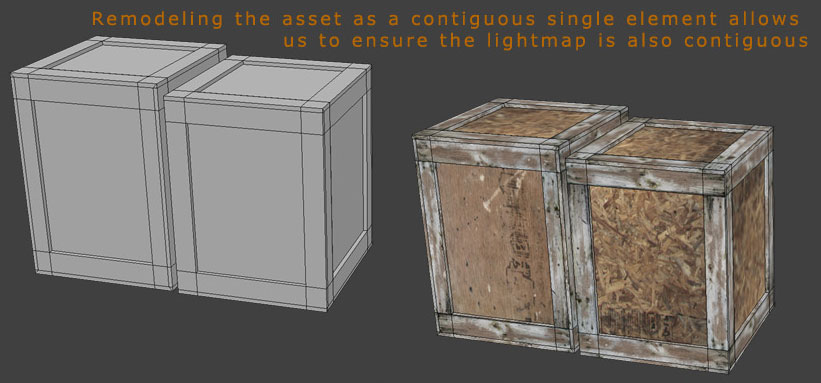 This leads to contiguous lightmap UVs which eradicate seams and promote efficient lightmaps.
 The end result is a mesh that is lit properly without any bleeding artifacts.
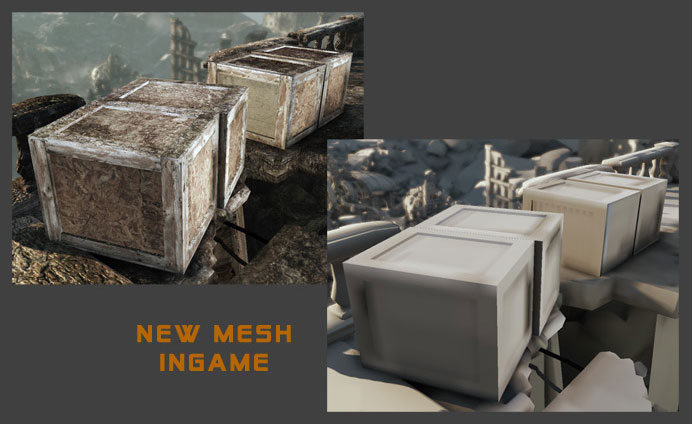 An added benefit of this method is that it also generally reduces the number of tris needed for the model.