UDN
Search public documentation:
Scaleform
日本語訳
中国翻译
한국어
Interested in the Unreal Engine?
Visit the Unreal Technology site.
Looking for jobs and company info?
Check out the Epic games site.
Questions about support via UDN?
Contact the UDN Staff
中国翻译
한국어
Interested in the Unreal Engine?
Visit the Unreal Technology site.
Looking for jobs and company info?
Check out the Epic games site.
Questions about support via UDN?
Contact the UDN Staff
UE3 Home > User Interfaces & HUDs > Scaleform GFx
Scaleform GFx
-
 Information for those starting out creating user interfaces and HUDs using Scaleform GFx in Unreal Engine 3. Setting Up Flash for Scaleform - Basic Scene Quick Start - Workflow Tips - Terminology
- Setting Up Scaleform GFx - Setting up Scaleform for UE3 in Adobe Flash Professional
- Scaleform Quick Start - Creating a basic Scaleform UI for Unreal Engine 3.
- Scaleform Workflow - Workflow tips for creating Scaleform UIs for UE3.
- Scaleform Terminology - Commonly used terms and concepts for Scaleform and Flash.
- Scaleform Technical Guide - Guide to working with and controlling Scaleform through code in Unreal Engine 3.
- Scaleform ActionScript Best Practices - Guide line on writing ActionScript with Scaleform.
- Scaleform Content Guide - Guide to creating and setting up Scaleform UIs for use in Unreal Engine 3.
- Scaleform GFx Import Pipeline - Guide to importing Flash scenes and content for Scaleform UIs into UE3.
- Scaleform GFx Content Best Practices - Tips and tricks on how to optimize content with Scaleform and UE3.
- Building the UDK Scaleform UIs - Instructions for building and importing the UDK UI and HUD.
- How to add a control volume with a status bar - A tutorial which discusses how you would add a volume with a status bar representing control that a player has.
- How to use render targets - A tutorial discussing how to use render targets in Scaleform.
- How to handle split screen - A brief overview of how you would handle split screen.
- How to route an external interface call to kismet - A brief description of how you would connect an external interface call to Kismet.
- How to access variables from an external SWF - An example of how you would access variables within Unrealscript from an external SWF.
- How to access Unrealscript variables within Actionscript - An example of how you would access Unrealscript variables from ActionScript.
- How to pass an array of objects to ActionScript - An example of how you would pass an array of objects from Unrealscript to ActionScript.
- How to get return values from ActionScript calls - An example of how you would get return values from ActionScript calls.
- How to display something on the HUD when a trigger is touched - An example of how you would display something on the HUD when a trigger is touched.
- How to capture keyboard input in Kismet - An example of how you would capture keyboard input in Kismet without having to use Unrealscript.
- How to capture XBox360 input in Scaleform - An example of how you would capture XBox 360 input in Scaleform.
- Making sense of GFx UDK Front End - A step by step, high level explanation of how GFxUDKFrontEnd works.
- SetViewScaleMode, SetAlignment and SetViewport Guide - A high level explanation of what these are and how you would use them.
- bCaptureInput, AddCaptureKey and AddFocusIgnoreKey Guide - A high level explanation of what these are and how you would use them.
- How to create a mouse cursor - An example of how you would create a mouse cursor on the HUD.
- Creating a Mouse Interface - How to create a mouse interface using Scaleform.
- How to get and set a check box value - An example of how you would get and set a check box value.
- How to populate a list from an ini file - An example of how you would populate a list from an ini file.
- How to create a multi column list - An example of how you would create a multi column list.
- Storing and retrieving options in a tabbed View - An example of how you would you would store and retrieve options in a tabbed view.
- How to create a simple chat box - An example of how to create a simple chat box that is controllable by the mouse and keyboard.
- How to create tween animations in ActionScript or UnrealScript - An example of how to create a tween animations in either ActionScript or Unrealscript.
- How to display icons in a scrolling list - An example of how to create a scrolling list where entries have an icon.
- Scaleform UDK Documentation - Official Scaleform 4.0 UDK documentation.
- Importing a SWF - This video discusses a few important rules when creating and importing Flash content into UDK.
- Render Textures & Materials - This video discusses creating the render texture and material necessary to display interactive Flash content on a BSP surface in a UDK level.
- Adding a SWF to a BSP Object - In this video we cover the steps needed to add a Flash file onto a BSP surface, including the necessary Kismet workflow.
- Capturing Input - In this video we explain how to use a GFx capture key kismet node to route keyboard and game controller inputs to a Flash file. This then interprets that input and enables you to rotate a movie clip in 3D.
- Using Invoke ActionScript & FSCommands - In this video we cover the use of Invoke ActionsCript in Kismet, which allows you to call an ActionScript function in the Flash file from UDK. We'll also cover sending a command back to UDK from the Flash file via FS Commands.
- Creating Custom Menus - In this sixth UDK video tutorial, we'll show you the basics of how to create a custom menu system using Scaleform GFx and UnrealScript.
- Using Scaleform 3Di Flash AS2 Extensions to Create 3D UI - This video will explain how to translate and rotate movie clips in 3D space using our new 3Di ActionScript 2 extensions in Scaleform GFx 3.2 and higher.
- Working with Fonts - In this seventh UDK video tutorial, we'll show you everything you need to know to properly use fonts in Flash and the September 2010 build of UDK.
- Mastering a Scaleform HUD
- HUD Overview - This is part one of a four part series which will take you file by file, asset by asset through the September 2010 UDK Scaleform HUD.
- UTGFxHudWrapper.uc - This is the second video explaining how the September 2010 UDK Scaleform HUD was put together. In this video I go over the basic construction of the UTGFxHudWrapper.uc class, and spend some time detailing how the pause menu is opened and closed as part of the HUD.
- GFxMinimapHud.uc - Part 1 - This is the third video explaining how the September 2010 UDK Scaleform HUD was put together. In this video I go over the first half of the GFxMinimapHud class, as well as the udk_hud Flash file.
- GFxMinimapHud.uc - Part 2 - This is the fourth video explaining how the September 2010 UDK Scaleform HUD was put together. In this video I go over the second half of the GFxMinimapHud class.
- Getting Started with CLIK
- Initial Setup - In this tutorial, we'll show you how to use the new component lightweight interface kit, or CLIK to rapidly prototype a basic front end menu system, which will include a main menu and an options screen, all composed of core CLIK components such as buttons, sliders, options steppers, and radio buttons.
- Main Menu Setup - In step two, we'll add some basic functionality to the main menu.
- Creating the Options Screen - In step 3, we'll make the button on the main menu take the user to the options screen, and we'll also add a difficulty settings option stepper as our first option.
- Checkboxes, Radio Buttons, & Sliders - In step 4, we'll add several new components, including video settings check boxes, radio buttons, and a volume slider.
- Adding Functionality - In step 5, we'll add the ok and cancel buttons, as well as some functionality to the difficulty settings option stepper and the radio buttons.
- Retaining Changes - In step 6, we'll set up the options screen so that it retains any changes the user makes, once the OK button is pressed.
- Adding a Background - In this tutorial we'll show you how to skin the components which make up the menu we created in tutorials 1-6. We'll break the process into eight steps. In step we'll add a background graphic to the menu.
- Importing a Background - In this step, we'll import a graphic created in Adobe Photoshop to serve as a window for our options screen. We'll also align components to fit the window, and duplicate a component so we have two differently skinned versions of it.
- Skinning the Main Menu Button - In this step, we'll skin the main menu button.
- Skinning the OK and Cancel Buttons - In step ten, we'll skin the ok and cancel buttons.
- Skinning the Sound Slider - Step eleven will cover skinning the sound slider.
- Skinning the Checkboxes - We'll skin the video settings checkboxes in step twelve.
- Skinning Radio Buttons - We'll cover skinning the video settings radio buttons in this step.
- Skinning an Option Stepper - The final step in Getting Started with CLIK will cover skinning the difficulty option stepper.
- Scaleform User Interface Design - Matt Doyle live at Unreal University held at MIGS 2011.
Scaleform GFx Integration
- GFx runtime player with 3Di rendering (Flash 8 currently supported, Flash 10 coming soon)
- CLIK Flash UI Framework
- Scaleform IME for Asian language chat support
- AMP profiler for performance and memory
- Game UI samples - HUD, menu, 3d inventory, and loading screen
- Docs, videos, and demos
- Scaleform Video is NOT included with UE3 / UDK. For an additional cost UE3 licensees (with source access) that would like an integrated video solution within their Flash content can add Scaleform Video by contacting Scaleform Sales. Note: Scaleform Video is not available to UDK users as source access is required to be able to integrate Scaleform Video.
- Content authoring tools. You will need some method of authoring Adobe Flash compatible content. Scaleform provides official support for content produced by the Adobe Flash toolset, which is included as part of the Adobe Creative Suite. Alternative tools, such as Sothink SWF Quicker, are also available, but are not officially supported by Scaleform.
Support
- Access to the Scaleform dev site - latest Scaleform docs, samples and videos.
- Direct email and phone support with Scaleform senior engineers.
- Private forums managed and responded to by Scaleform senior engineers and other commercial game developers.
UDK Example UI Files
Basic Scene using CLIK buttons and labels
See \UnrealEngine3\UDKGame\Flash\example\udk_GFxCLIKBasicScene.fla. This is the file created through an earlier example in this document. In includes two CLIK buttons, and drives the text of a single label via clicking the buttons. It is an example of setting up the buttons to respond to a click or press and execute the function.
Controller Button Input Sample
See \UnrealEngine3\UDKGame\Flash\example\udk_GFxControllerButtonInput_Sample.fla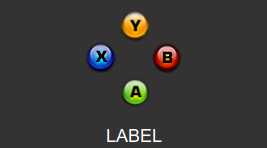 This file illustrates the use of the handleInput, and setting up controller button presses to drive functions and actions within your UI. In order for this to work properly, with the XBox 360 Controller button graphics not being actual selectable buttons (similar to buttons in a button bar within a UI), an invisible CLIK button needed to be added and given focus. To call a controller button press, the names are:
- GAMEPAD_A
- GAMEPAD_B
- GAMEPAD_X
- GAMEPAD_Y
- GAMEPAD_R1
- GAMEPAD_R2
- GAMEPAD_R3
- GAMEPAD_L1
- GAMEPAD_L2
- GAMEPAD_L3
- GAMEPAD_START
- GAMEPAD_BACK
Download Samples
| May QA Release | part 1 part 2 part 3 part 4 part 5 part 6 part 7 part 8 |
| June QA Release | part 1 part 2 part 3 part 4 part 5 part 6 part 7 part 8 |
| July QA Release | part 1 part 2 part 3 part 4 part 5 part 6 part 7 part 8 |
| August QA Release | part 1 part 2 part 3 part 4 part 5 part 6 part 7 part 8 part 9 part 10 part 11 |
| October QA Release | part 1 part 2 |
| November QA Release | part 1 part 2 part 3 part 4 part 5 part 6 |
| December QA Release | part 1 part 2 |
| January 2011 QA Release | part 1 part 2 |
| February 2011 QA Release | part 1 part 2 |
| March 2011 QA Release | part 1 part 2 |
| April 2011 QA Release | part 1 part 2 |
| May 2011 QA Release | part 1 part 2 |
| June 2011 QA Release | part 1 part 2 |
| July 2011 QA Release | part 1 part 2 |
| August 2011 QA Release | part 1 part 2 |
| September 2011 QA Release | part 1 part 2 |
| October 2011 QA Release | part 1 part 2 |
| November 2011 QA Release | part 1 part 2 |
| December 2011 QA Release | part 1 part 2 |
| January 2012 QA Release | part 1 part 2 part 3 part 4 |
